VLOG

Basement Tank Removal Guide: Expert Steps for 2025

Basement tank removal is becoming a top priority for homeowners as environmental regulations tighten in 2025. Removing old tanks is no longer just a suggestion, it is essential for safety, property value, and legal compliance.

This guide provides a step-by-step, expert-backed process for basement tank removal that is safe, compliant, and cost-effective. You will learn how to navigate new regulations, prepare your home, manage every stage of the removal, handle contamination, and complete final post-removal steps.

Discover the risks of aging tanks, avoid costly mistakes, and gain confidence with expert advice. Take action now to protect your home and stay ahead of 2025 requirements.

Understanding Basement Tanks and 2025 Regulations

What Are Basement Tanks and Why Are They Common?

Basement tanks are storage containers installed below ground level, typically within a home’s basement, and are used to hold oil, fuel, or water. These tanks became especially common in residential properties built before the 1980s, when oil heating systems were the standard in colder regions. In fact, 60% of homes in the Northeast with oil heating systems still rely on basement tanks.

Most basement tanks are made from either steel or fiberglass. Steel tanks usually last 15 to 20 years, while fiberglass models can extend up to 30 years if properly maintained. To make this clear, consider the following table:

Material

Typical Lifespan

Steel

15–20 years

Fiberglass

25–30 years

Over time, aging tanks present significant risks. Corrosion is a major concern, often leading to leaks that can contaminate soil and groundwater. Additionally, accumulated sludge and rust increase the chance of fire hazards. Homeowners should pay attention to these risks and understand how basement tank removal can prevent serious issues.

2025 Regulatory Changes Impacting Tank Removal

With new environmental regulations coming into effect in 2025, basement tank removal is no longer just a best practice, but a legal requirement in many states. The EPA and several state agencies have introduced stricter rules for residential tank removal, including mandatory inspections and defined removal timelines for non-compliant tanks.

Key regulatory changes include:

  • Increased penalties for failing to remove old tanks or for improper disposal.

  • Requirements to hire certified contractors with proper documentation.

  • Obligations to conduct soil testing after tank removal, as highlighted by New Jersey’s revised code, which mandates soil analysis for all removals after January 1, 2025.

For a more detailed overview of these legal requirements, homeowners can review the oil tank removal regulations to ensure their project is fully compliant.

By understanding these new guidelines, homeowners can avoid costly fines and ensure their basement tank removal process meets all current standards.

Why Timely Removal Matters

Timely basement tank removal is essential for protecting both the environment and your investment. Leaking tanks are a leading source of soil and groundwater contamination, impacting drinking water supplies and local ecosystems. According to recent statistics, incidents of contamination are on the rise as tanks age.

Health and safety risks are also considerable. Exposure to leaking fuel can cause respiratory issues and pose fire dangers. From a financial perspective, an old or non-compliant tank can lower property value and complicate real estate transactions. Many insurance providers now require proof of tank removal before issuing or renewing policies.

Taking prompt action with basement tank removal not only safeguards your property, but also helps you stay ahead of regulatory changes and insurance requirements.

Preparing for Basement Tank Removal

Preparing for basement tank removal starts with a thorough assessment and strategic planning. Each step ensures your project remains safe, compliant, and within budget. With new regulations arriving in 2025, careful preparation is more important than ever.

Initial Assessment and Planning

Before moving forward with basement tank removal, you need to determine if your tank requires removal. Begin with a visual inspection for signs of rust, leaks, or structural damage. Check the installation date—tanks older than 30 years are at greater risk of failure.

Consider hiring a licensed inspector or environmental consultant. Professionals can identify hidden issues and provide recommendations. According to industry reports, up to 30 percent of tanks inspected in 2023 showed leakage.

Gather all necessary documentation, including permits, property records, and maintenance logs. This paperwork streamlines the approval process and supports compliance.

If you are unsure about your tank’s condition, review warning signs your tank needs removal to make an informed decision.

Budgeting and Cost Expectations

Understanding the financial side of basement tank removal is essential. Costs usually fall into several categories: inspection, removal, remediation, and disposal. The total price depends on tank size, ease of access, and any contamination found.

Here’s a sample cost breakdown for 2025:

Service

Average Cost ($)

Inspection

250–500

Removal

800–1,500

Remediation (if needed)

500–2,000

Disposal

200–400

Standard basement tank removal typically ranges from $1,400 to $3,000. Always request detailed quotes and inquire about potential hidden fees. Compare offers from multiple contractors to ensure fair pricing.

Budget extra for unexpected remediation, especially if your tank has leaked. Clear, upfront cost estimates help you avoid surprises during the process.

Choosing the Right Contractor

Selecting a qualified contractor is critical for a safe and compliant basement tank removal. Look for professionals with proper licensing, insurance, and documented experience handling basement tanks.

Ask for fixed-price contracts to eliminate variable costs. Transparent agreements protect you from surprise charges. Reliable contractors provide references and clearly outline their removal process.

Watch for red flags such as vague pricing, missing credentials, or reluctance to answer your questions. Before hiring, ask these key questions:

  • Are you licensed and insured for basement tank removal?

  • Can you provide references from recent projects?

  • Is your pricing fixed and all-inclusive?

  • What is your process for handling contamination?

Choosing the right partner ensures your basement tank removal meets all safety and regulatory standards.

Step-by-Step Basement Tank Removal Process

Removing a basement tank is a complex project that demands careful planning, safety protocols, and regulatory compliance. The following expert-backed process breaks down the essential steps for safe, efficient, and compliant basement tank removal. Each phase is designed to minimize risk and meet 2025 environmental standards.

Step 1: Site Preparation and Safety Measures

Start by clearing the basement area of all unnecessary items and debris to ensure safe access. Proper ventilation is crucial, as fumes from residual oil or fuel can linger. Before any work begins, shut off all fuel lines and disconnect utilities related to the tank.

Use appropriate personal protective equipment (PPE), including gloves, goggles, and respirators. Fire prevention is critical, so keep extinguishers nearby and eliminate ignition sources. OSHA standards recommend continuous air monitoring and a buddy system when working in confined spaces.

A thorough safety checklist helps prevent accidents and protects everyone involved. By prioritizing preparation, homeowners lay the groundwork for a successful basement tank removal.

Step 2: Draining and Cleaning the Tank

The next step involves safely draining any remaining fuel or liquid from the tank. This process prevents spills and reduces environmental hazards. Collect all fluids in approved containers for disposal at licensed facilities.

After draining, clean out sludge and sediment from the tank’s interior. This material often contains hazardous substances and must be handled according to EPA hazardous waste guidelines. Use non-sparking tools and containment trays to avoid accidental releases.

Proper cleaning not only safeguards the environment but also ensures compliance with regulatory requirements. Effective preparation at this stage is vital for the overall basement tank removal process.

Step 3: Tank Disconnection and Extraction

With the tank cleaned, disconnect all pipes, vents, and fill lines. Carefully cut or dismantle the tank if it does not fit through the basement exit. Use lifting equipment designed for confined spaces to prevent injuries or property damage.

Professional handling is essential, as improper removal can cause structural issues or hazardous spills. For a detailed walkthrough of this phase, see the Oil tank removal process steps. Experienced contractors follow strict protocols to maintain safety and efficiency throughout basement tank removal.

Step 4: Inspection and Soil Testing

Once the tank is removed, inspect both the tank and surrounding area for signs of leaks or corrosion. Mandatory soil testing is required under 2025 regulations to detect contamination. Use certified labs to analyze soil samples within 72 hours, as some states mandate prompt reporting.

Interpret test results carefully. If contamination is found, plan for remediation according to local guidelines. Accurate documentation of inspections and testing is crucial for regulatory compliance and future real estate transactions.

This step ensures the basement tank removal process meets all legal and environmental standards.

Step 5: Disposal and Documentation

Transport the removed tank to an approved recycling or disposal facility. Ensure all hazardous materials are handled according to state and federal regulations. Complete and retain all required documentation, including certificates of removal and soil test reports.

Proper paperwork is vital for insurance claims and property sales. Provide homeowners with a clear record of compliance to avoid future liabilities. By finalizing these details, you close the loop on a thorough and responsible basement tank removal project.

Managing Contamination and Remediation

Basement tank removal is not just about physical extraction. Managing contamination is a crucial step to safeguard your home and property value. Addressing contamination promptly ensures compliance and protects your investment.

Identifying and Assessing Contamination

Detecting contamination early during basement tank removal is essential. Common signs include strong fuel odors, visible stains on concrete or soil, and unusual soil discoloration near the tank. Homeowners may also notice dying vegetation around the exterior foundation.

Professional soil and groundwater testing is vital to confirm the extent of contamination. In fact, 1 in 5 oil tanks removed in 2024 required remediation, underlining the importance of thorough inspection. For a detailed guide on what to expect during soil analysis, see Soil testing after tank removal.

These assessments form the foundation for a safe and compliant basement tank removal process.

Remediation Options and Procedures

Once contamination is confirmed, several remediation methods are available. The most common options include:

Method

Typical Use Case

Timeline

Soil Excavation

Heavy contamination

1–3 weeks

Bioremediation

Moderate contamination

2–6 months

Chemical Treatment

Targeted contamination

1–4 weeks

The choice depends on contamination level and local regulations. Fixed-price remediation contracts help prevent unexpected expenses during basement tank removal. Project timelines and costs vary, so request detailed proposals upfront.

Staying informed about regulatory expectations is key. For federal guidelines, review the EPA Oil Spill Prevention Regulations.

Working with Environmental Agencies

Collaboration with environmental agencies is mandatory during basement tank removal. Homeowners must notify local and state authorities when contamination is detected. Each state sets specific deadlines for reporting and remediation documentation.

Properly documenting every step, including notifications and cleanup efforts, is essential for regulatory approval. For example, New Jersey requires timely submission of remediation records to the Department of Environmental Protection.

Following agency protocols ensures your basement tank removal remains in compliance and avoids costly delays.

Protecting Your Property Value and Liability

Effective remediation directly impacts property value and liability. Incomplete or undocumented cleanup can delay home sales or result in insurance complications. Many insurers now require proof of proper basement tank removal and remediation before issuing or renewing policies.

A recent case highlighted how missing documentation postponed a home sale for months. Ensuring all records are complete helps transfer liability and reassures buyers.

Taking these steps during basement tank removal not only protects your investment but also secures peace of mind for the future.

Post-Removal Actions and Maintenance

After basement tank removal, your focus shifts to restoring your property, ensuring compliance, and protecting your investment for years to come. Addressing each post-removal step thoroughly reduces risk and supports a safe, valuable home environment.

Restoring the Basement Space

The first step after basement tank removal is repairing and improving the affected area. Removal may leave behind minor structural issues or cosmetic blemishes, so prompt restoration is essential.

  • Inspect floors and walls for cracks or moisture.

  • Repair concrete, patch holes, and reinforce supports as needed.

  • Clean and treat surfaces to prevent lingering odors.

Waterproofing is highly recommended after basement tank removal. Apply sealants, improve drainage, and consider a sump pump to reduce future water damage. Mold prevention is also key, so use dehumidifiers and monitor humidity levels.

Once repairs are finished, you have options for repurposing the space:

  • Create a finished basement for living or recreation.

  • Add storage solutions or a workshop.

  • Upgrade lighting and ventilation for comfort and safety.

Final Inspections and Compliance Checks

Completing final inspections is critical to ensure your basement tank removal meets all legal requirements. Local authorities may require scheduled inspections to verify proper removal and remediation.

Keep these documents organized:

  • Removal and disposal certificates

  • Soil and groundwater test results

  • Contractor licenses and permits

  • Remediation reports

Proper documentation is not just for peace of mind—it is essential for real estate transactions and insurance. Missing paperwork can result in fines or delays. For New Jersey homeowners, detailed procedures and required documentation are outlined in the New Jersey Residential Oil Tank Removal Bulletin.

Ongoing Monitoring and Environmental Safety

After basement tank removal, regular monitoring ensures long-term safety. Schedule periodic soil and groundwater tests, especially if your area had previous contamination.

Consider these monitoring options:

Monitoring Method

Frequency

Purpose

Soil Testing

Every 1-2 years

Detect residual contamination

Groundwater Testing

Every 2-3 years

Ensure water safety

Visual Inspections

Biannually

Spot new issues quickly

If you suspect lingering issues, install monitoring wells for deeper analysis. Homeowners seeking more guidance can consult the NYSDEC Guide on Underground Heating Oil Tanks for best practices in ongoing environmental safety.

Preparing for Future Regulations

Environmental standards around basement tank removal continue to evolve. Staying informed protects your property and ensures compliance with future policies.

Proactive steps include:

  • Joining local homeowner associations to receive updates

  • Subscribing to state environmental agency newsletters

  • Retaining all records of basement tank removal and remediation

Anticipate changes and act early to avoid costly surprises. By monitoring regulations and maintaining up-to-date documentation, you safeguard your property’s value and your family’s well-being.

Now that you understand the steps for safe and compliant basement tank removal in 2025, it’s important to have a trusted partner by your side. With changing regulations and the risks that come with old tanks, ensuring every detail is handled correctly protects both your property and peace of mind. If you want a fixed price, no surprises, and a team that truly understands New Jersey’s requirements, we’re here to help. Let’s make your tank removal process simple, transparent, and stress free—reach out today through Contact Us to get started.

Soil Remediation Guide: Essential Strategies for 2025

One third of the world’s soils are now degraded, according to the Food and Agriculture Organization. This stark reality underscores the urgent need for effective soil remediation to protect both the environment and public health.

This guide offers a comprehensive look at soil remediation strategies that will define sustainable land management in 2025. Whether you are a landowner, developer, or policy maker, understanding these solutions is essential for responsible stewardship.

We will explore the causes and impacts of soil contamination, the evolving regulatory landscape, and a step-by-step remediation process. You will also discover the latest technological advances, real-world case studies, and future trends shaping the field.

By the end of this article, you will have actionable insights and practical steps to address soil remediation challenges, ensuring compliance and sustainability for years to come.

Understanding Soil Contamination: Causes, Impacts, and Urgency

Soil contamination is a pressing challenge with wide-reaching consequences. Understanding how and why contamination occurs is the first step in effective soil remediation. By examining causes, impacts, and current statistics, stakeholders can appreciate the urgency and necessity of action.

Key Sources of Soil Contamination

Soil contamination stems from a range of activities and events. The most common sources include:

  • Industrial operations such as manufacturing, mining, and waste disposal

  • Use of agricultural chemicals, including pesticides and fertilizers

  • Urbanization, construction, and infrastructure expansion

  • Oil tank leaks and hydrocarbon spills

  • Both natural and human-caused contamination

For those new to this field, What is Soil Remediation and Why is it Important provides a clear overview of why addressing these sources is vital.

Environmental and Human Health Impacts

Contaminated soils can leach toxins into groundwater and surface water, affecting drinking supplies and ecosystems. Heavy metals and hydrocarbons often accumulate in plants and animals, entering the food chain. This bioaccumulation increases risks of cancer, respiratory, and neurological disorders in humans. Soil degradation also leads to reduced agricultural productivity, threatening food security and local economies.

Site Assessment and Liability

Before starting soil remediation, a thorough site assessment is mandatory. This includes soil sampling, risk analysis, and identifying contaminants. Legal responsibility for contamination often extends to current property owners, developers, and sometimes past land users. A clear chain of custody and accurate records are essential to avoid costly liability or delays during property transfers.

Permitting and Documentation

Most soil remediation initiatives require multiple permits at different government levels. Common documentation includes site assessment reports, remediation plans, and compliance logs. Accurate, up-to-date records are crucial during real estate transactions and regulatory inspections. Transparent documentation helps demonstrate due diligence and ensures smoother project approval.

Funding and Incentive Programs

Governments offer a range of financial incentives for soil remediation, including grants, tax credits, and support for brownfield redevelopment. Public-private partnerships can help share costs and accelerate land restoration. Accessing these funds requires careful application, thorough project planning, and compliance with program requirements. Early engagement with funding agencies improves project outcomes.

Site Investigation and Risk Assessment

The first step in soil remediation is a comprehensive site investigation. Environmental professionals collect soil samples, conduct laboratory analyses, and use remote sensing or GIS tools to map contamination patterns. Identifying pollutants such as heavy metals, hydrocarbons, or organics is critical.

Risk assessment protocols evaluate potential threats to human health and the ecosystem. For example, New Jersey mandates strict soil testing before property transfers, emphasizing the value of early detection. Thorough investigation lays the groundwork for selecting the right soil remediation approach.

Selecting the Right Remediation Strategy

Choosing an effective soil remediation strategy depends on several factors. Decision-makers weigh contaminant type, site size, regulatory requirements, and sustainability goals. Both in situ (on-site) and ex situ (off-site) methods are considered.

A detailed cost-benefit analysis helps prioritize solutions that balance efficiency and minimal environmental impact. Engaging stakeholders, including local communities, ensures that the selected soil remediation technique addresses both technical and social needs.

As we’ve explored, soil remediation is more urgent than ever, with new challenges and regulations shaping how we manage our land in 2025. Whether you’re a homeowner concerned about an old oil tank, a developer navigating compliance, or simply want peace of mind about your property’s future, having a knowledgeable and transparent partner makes all the difference. At Simple Tank Services, we take pride in offering fixed pricing and expert guidance every step of the way, so you always know what to expect. If you’re ready to take the next step or have questions about your specific situation, Contact Us.

10 Clear Signs You May Have an Underground Oil Tank on Your Property

Underground oil tanks were once very common in older homes, especially for heating systems. While many have been removed over the years, thousands still remain buried without the homeowner’s knowledge. These tanks may leak over time, causing soil contamination, property damage, and expensive cleanup costs. This guide reveals the clear signs you may have an underground oil tank on your property, plus what to do next if you suspect one.

Why Knowing the Signs of an Underground Oil Tank Matters

Underground oil tanks can cause serious issues if left undetected:

– Environmental contamination

– Property value loss

– Failed home inspections

– Compromised soil quality

– High removal or remediation expenses

Being aware of the warning signs can help you avoid costly surprises—especially during a home sale or property renovation.

Old or Disconnected Oil Lines — Primary Sign of an Underground Oil Tank

If you find copper pipes or steel oil lines running along your basement wall or foundation and they look unused, they may be connected to a buried tank. These lines often lead outdoors where the tank was once used for heating oil storage.

A Metal Fill Pipe Outside Your Home

A fill pipe is one of the most obvious signs of a buried oil tank. These pipes usually stick out of the ground a few inches and were used by oil delivery trucks.

Common locations include:

– Side of the house

– Near bushes

– Close to driveways or walkways

– Along exterior walls

If the pipe looks capped or unused, it may be connected to an underground tank.

Vent Pipes Near the Foundation — Secondary Underground Oil Tank Indicator

Older oil tanks required venting to release pressure. A small vertical pipe with holes or a mushroom-shaped cap is a common clue. These pipes typically appear:

– Along the foundation

– Behind shrubs

– Near old fill pipes

If you find a vent pipe with no known purpose, it may indicate a hidden tank underground.

Patchy or Dead Grass Spots Above a Tank Location

Oil leaks can cause soil contamination that affects vegetation. If a certain area of your yard:

– Has dead grass

– Shows unusual discoloration

– Looks sunken or uneven

…it may be the sign of a leaking underground oil tank.

A Strong Oil or Fuel Odor in Certain Yard Areas

Petroleum smells in your yard or near the foundation are serious red flags. This typically happens when a tank begins leaking. If you notice recurring fuel odors, you should get an inspection immediately.

Mysterious Metal Lids, Concrete Pads or Access Covers

Some underground storage tanks were installed with access points for maintenance. If you find a metal or concrete cover that serves no obvious purpose, it might be the access point for an oil tank.

These can appear:

– Buried slightly below the soil

– Near garages

– At the back of a house

– Close to old heating systems

Your Home Was Built Before the 1980s — High-Risk Property Type

Homes built between the 1920s and 1980s often used oil heat. Even if current heating systems use gas or electric, many underground tanks were never removed—only disconnected.

If your home fits this age range, the likelihood of having a hidden tank increases significantly.

Old Heating Systems or Signs of Past Oil Heat Use

Look for any indicators inside your home that oil heating was used:

– Oil furnace remnants

– Old oil burner switches

– Disconnected oil lines

– Oil tank gauges

If a previous owner switched to natural gas or electric, they may have abandoned the tank underground.

Past Property Records Showing Oil Delivery History

Sometimes, old delivery receipts, inspection tags, or basement stickers can reveal past oil use. You may also find:

– Delivery company logos

– Old invoices

– Maintenance records

Any documentation that mentions oil delivery or service strongly suggests a buried tank.

Sunken Ground or Soil Depressions — Possible Tank Collapse

As old steel tanks corrode, they weaken and collapse, causing dips in the ground. A noticeable indentation or uneven ground in a certain spot may mean the tank has caved in beneath the soil.

This is both a safety hazard and an environmental risk, requiring immediate inspection.

What to Do If You Suspect an Underground Oil Tank

If you notice one or more of these warning signs, the first step is to schedule a professional inspection. A certified oil tank removal company can perform ground scans, detect buried metal, and determine whether the tank is active or abandoned. Their expertise ensures accurate findings without damaging your yard or causing additional risks.

1. Do NOT Dig or Disturb the Area

Tanks can leak easily if damaged.

2. Schedule a Professional Tank Search

Experts use:

– Ground scanning equipment

– Metal detectors

– Soil probes

– Thermal imaging

3. Request Soil Testing if a Leak is Suspected

Early detection prevents costly cleanup.

4. Follow Local Regulations for Removal

Most states require proper tank decommissioning or removal.

FAQs

1. How accurate are surface signs of underground oil tanks?

While many signs are reliable, only a professional inspection can confirm the tank’s presence.

2. Can an abandoned tank still leak?

Yes. Even unused tanks can leak due to corrosion.

3. Is removing an underground oil tank required by law?

Many states require removal or proper decommissioning to avoid contamination.

4. How long does tank removal take?

Most residential removals take a few hours once excavation begins.

5. What happens if contamination is found?

Soil remediation is required to remove affected soil and restore safety.

Summary

Identifying the signs of an underground oil tank on your property is crucial for protecting your home, land, and investment. From fill pipes and vent lines to dead grass patches and fuel odors, these warning indicators should never be ignored. If you suspect a buried tank, rely on certified inspectors and licensed removal experts for accurate detection and safe removal. For dependable assessments, testing, and tank removal solutions, Simple Tank Services provides expert support backed by industry experience and environmental safety standards.

Oil Tank Removal Guide: Essential Steps for 2025

Rising regulations and heightened environmental awareness make oil tank removal a top concern for homeowners in 2025. With stricter laws and increasing risks to property value, understanding every step is more important than ever.

This guide walks you through the oil tank removal process, ensuring you stay safe, compliant, and protect your investment. You will learn how to assess your tank, navigate legal requirements, hire the right professionals, and manage remediation and post-removal steps.

Whether you are concerned about contamination, legal liabilities, or simply want peace of mind, follow our essential steps for a cost-effective and responsible solution.

Assessing the Need for Oil Tank Removal

For many property owners, understanding when oil tank removal becomes necessary is a critical first step toward protecting both their investment and the environment. In 2025, increased scrutiny from regulators and insurers means that proper assessment of your heating oil storage is more important than ever. Failing to act on warning signs can lead to costly consequences, so it is essential to recognize when your tank may be putting your property at risk.

Assessing the Need for Oil Tank Removal

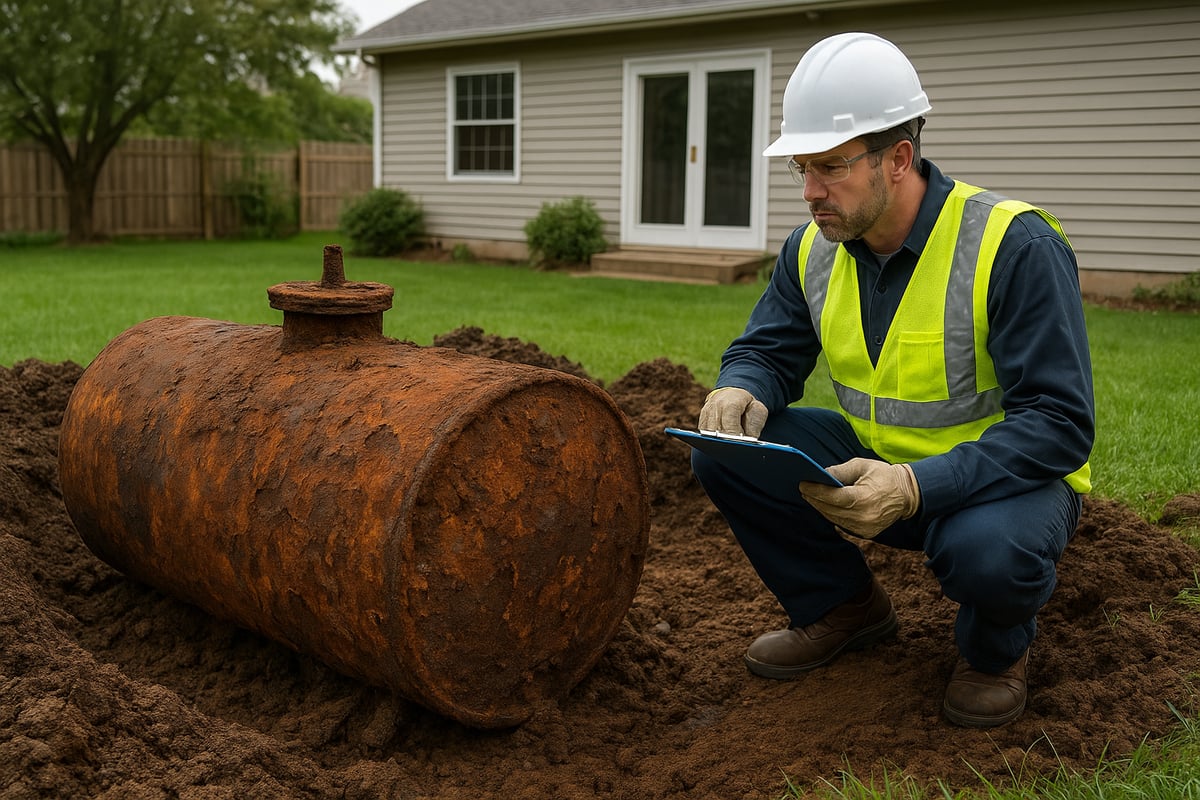
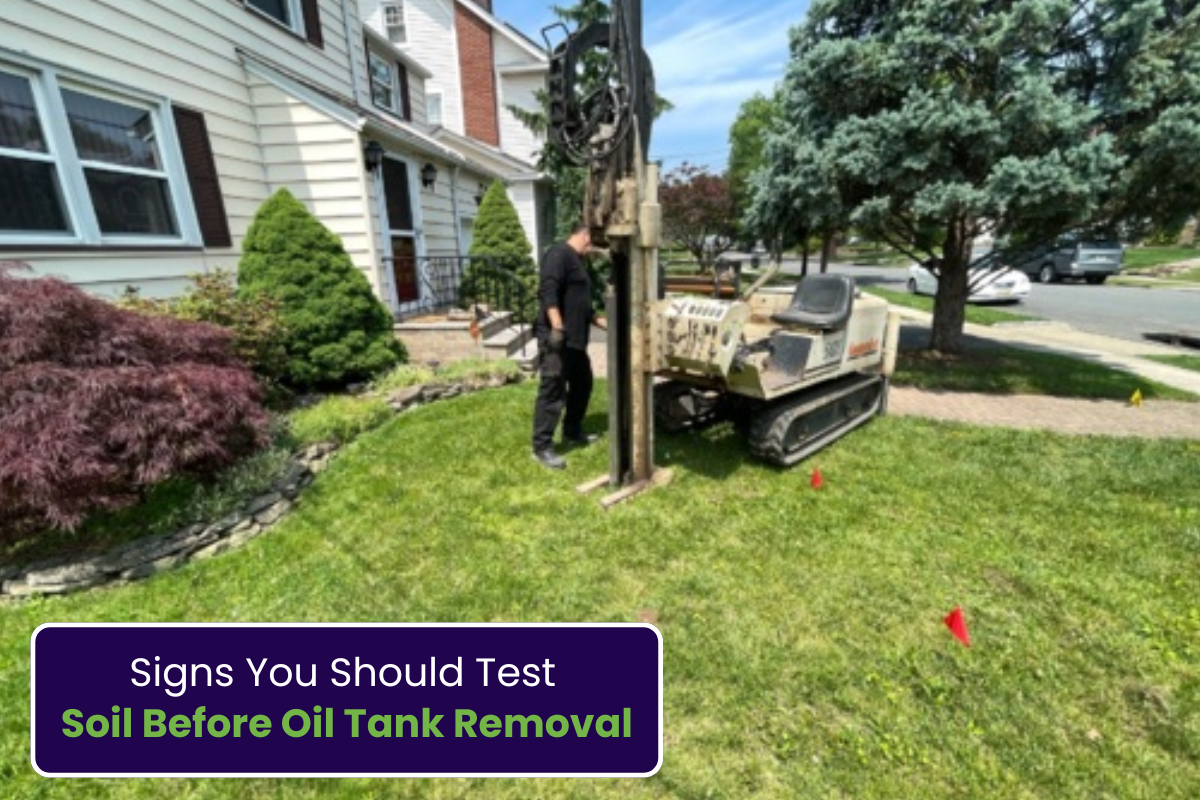
Warning Signs Your Oil Tank Needs Removal

Several clear indicators suggest it is time to consider oil tank removal. Visible leaks or pooling oil near the tank, strong odors of fuel, or signs of corrosion on the tank surface should prompt immediate action. Tanks that are over 20 to 30 years old, particularly those made from steel, are more likely to fail. Insurance companies may require removal if the tank is outdated or if there is evidence of past leakage. If you notice unexplained increases in fuel usage or receive warnings from local authorities during property assessments, these are also signals that your tank may need to be removed.

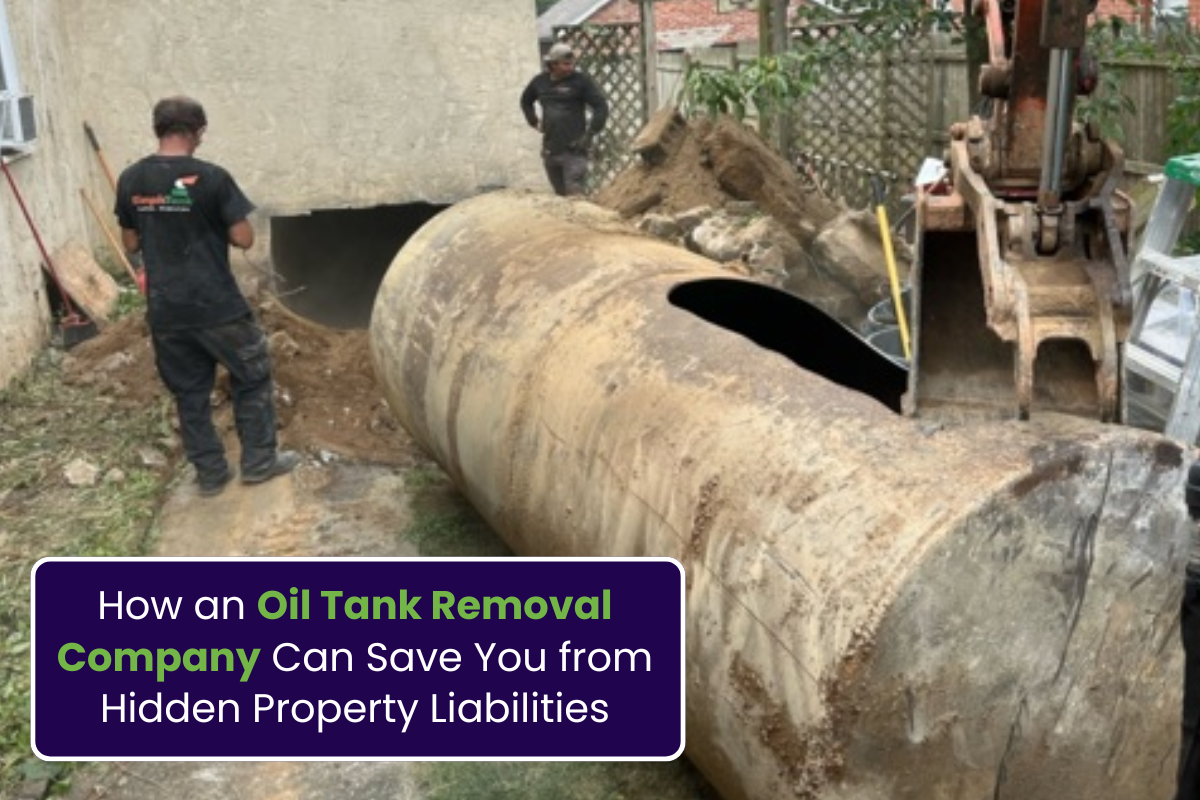
Risks of Keeping an Old Oil Tank

Leaving an old or damaged oil tank in place exposes your property to significant risks. One of the most serious is soil contamination, which can spread hazardous substances into the ground and even reach groundwater supplies. This not only endangers local ecosystems but can also trigger expensive cleanup requirements. Additionally, the presence of an unused or leaking tank can reduce your property value and make it difficult to sell. Legal liabilities may arise if contamination is discovered during a future transaction, leading to lawsuits or required remediation. Notable cases have shown property devaluation of tens of thousands of dollars when undisclosed tanks are found during home sales.

Regulatory Pressures and Property Impacts in 2025

State and local regulations regarding oil tank removal are tightening across the country in 2025. Many jurisdictions now enforce stricter deadlines for compliance, with increased fines for non-removal or improper abandonment of tanks. For example, the EPA estimates there are still over 550,000 underground storage tanks in the US, with thousands leaking each year. Homeowners face growing pressure from both regulators and mortgage lenders to address old tanks before they become a liability. For a full overview of these requirements and best practices, consult the Comprehensive oil tank removal guide, which details the step-by-step process and current legal standards.

Environmental, Insurance, and Market Considerations

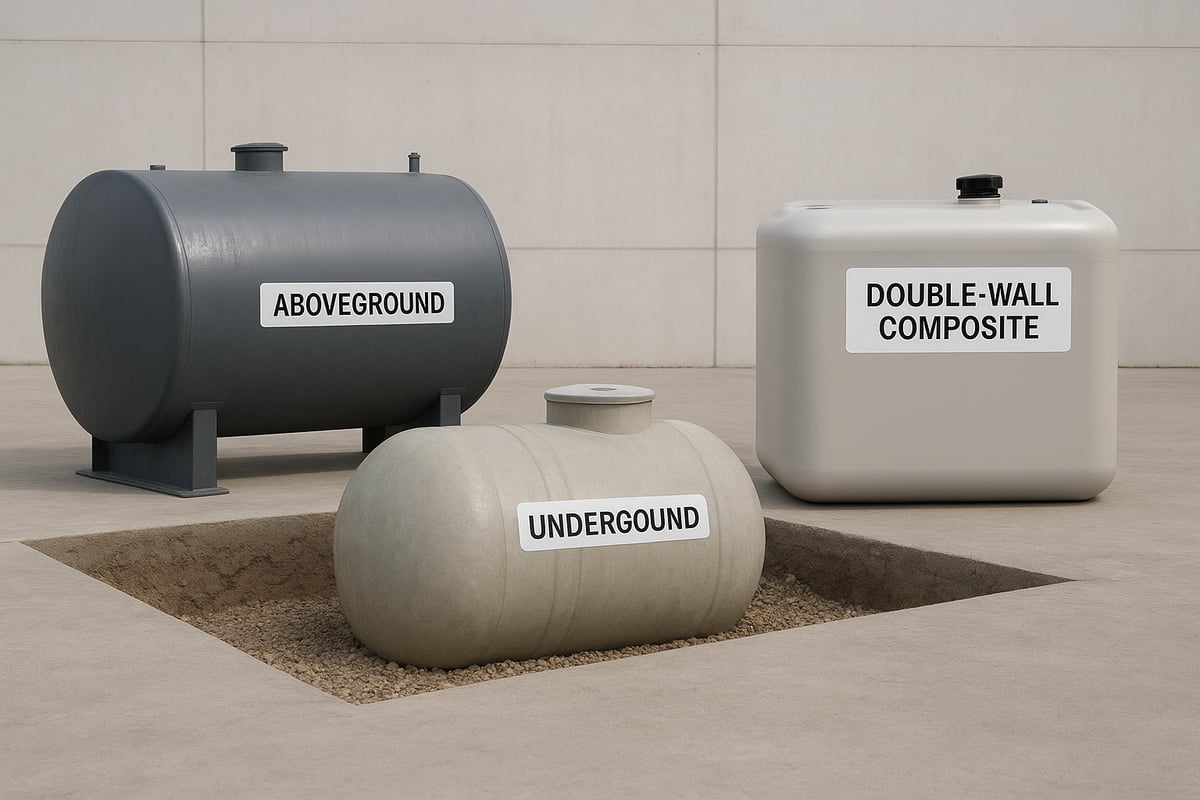
Environmental hazards from neglected tanks are a major concern. Leaking tanks can contaminate groundwater, affecting both your property and neighboring lots. Vapor intrusion from petroleum products can present health risks to residents. Insurance providers may deny coverage or increase premiums if a tank is present, and mortgage lenders could require removal before approving loans. The differences between underground and aboveground tanks also matter, as underground tanks are harder to monitor and more likely to leak undetected. Proactive oil tank removal is not only a regulatory requirement but also a smart move to maintain property value and ensure a safe living environment.

Legal and Regulatory Requirements for Oil Tank Removal in 2025

Navigating the legal landscape of oil tank removal in 2025 is more complex than ever for property owners. With rising environmental concerns and stricter oversight, understanding the rules that govern oil tank removal is essential to avoid costly penalties and ensure property safety.

Legal and Regulatory Requirements for Oil Tank Removal in 2025

Federal, State, and Local Regulations

Oil tank removal is regulated at multiple levels. Federally, the Environmental Protection Agency (EPA) oversees underground storage tanks, setting standards for leak detection, closure, and cleanup. However, state and local governments often enforce stricter rules that impact how oil tank removal is performed.

States like New Jersey and New York have adopted more rigorous standards in recent years. Local governments may also require additional steps, such as advance notifications and site-specific environmental safeguards. Always check both state and municipal codes before starting any oil tank removal project.

Permits, Documentation, and Testing Standards

Obtaining the proper permits is a mandatory step for oil tank removal. Most municipalities require homeowners to submit detailed applications, including site maps and tank specifications, before granting approval. In 2025, many regions have streamlined digital permitting, but delays can still occur if paperwork is incomplete.

Environmental standards now require comprehensive soil and groundwater testing following oil tank removal. These tests ensure that no contamination remains. Results must typically be submitted to local authorities as part of the closure process. Failing to provide this documentation can stall property sales or refinancing.

2025 Regulatory Updates in the Northeast

The Northeastern US, especially New Jersey, has introduced significant updates for oil tank removal. In 2025, New Jersey revised its permit process, mandating earlier notification to local fire officials and stricter inspection protocols. According to the New Jersey Heating Oil Tank Removal Bulletin, every residential oil tank removal must now be supervised by a qualified inspector, with detailed logs kept for all steps.

Other states in the region are following suit, adopting similar requirements. Homeowners should expect more frequent site visits and expanded documentation, ensuring every oil tank removal meets the latest environmental and safety standards.

Consequences of Non-Compliance

Ignoring oil tank removal regulations can lead to severe consequences. In New Jersey, average fines for non-compliance range from $5,000 to $25,000. Legal action is common if contamination is discovered after an improper removal, and unresolved violations can block property sales.

Lenders and insurers increasingly require proof of compliant oil tank removal before approving mortgages or issuing policies. Skipping steps or hiring unqualified contractors can jeopardize both property value and legal standing.

The Importance of Licensed and Insured Professionals

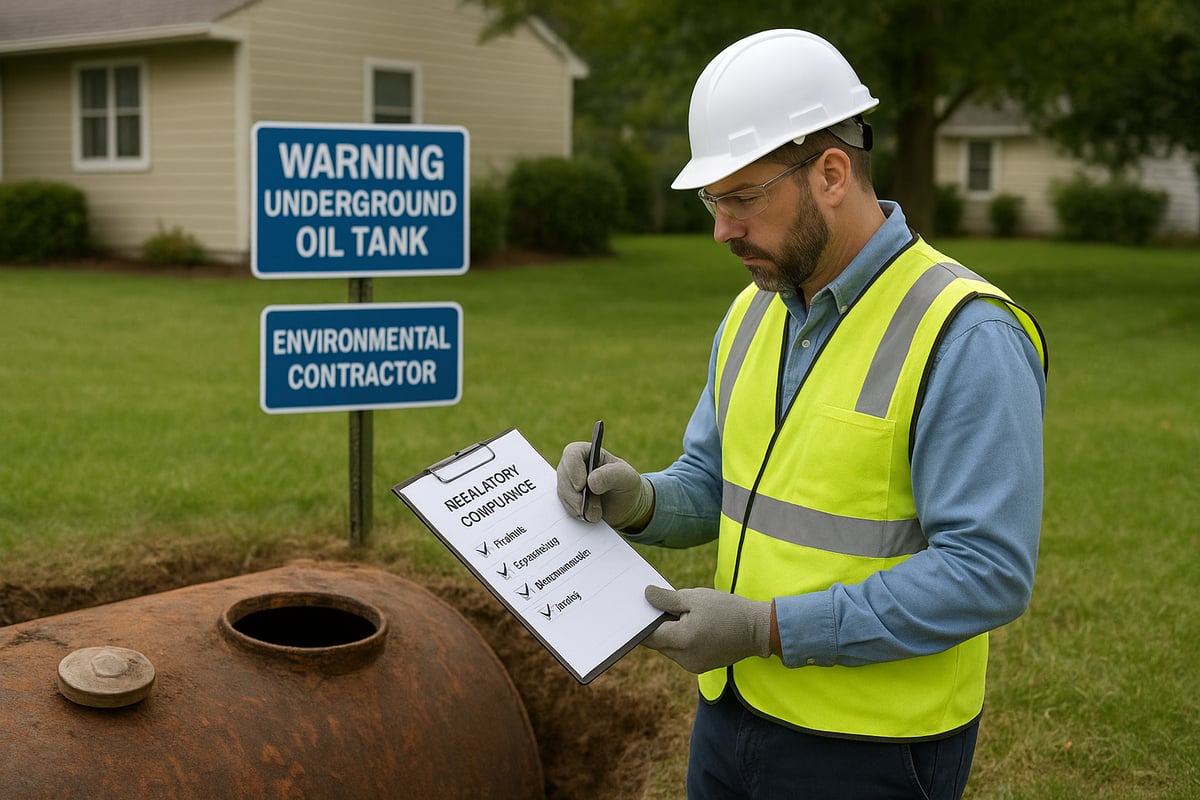
Working with licensed and insured contractors is vital for any oil tank removal. These professionals understand the evolving regulatory environment and possess the necessary credentials to secure permits, conduct safe removals, and complete required testing.

When selecting a contractor, verify their licensing status and request references. A reputable professional will provide clear contracts and guarantee full compliance with all oil tank removal regulations. This not only protects homeowners from fines but also ensures the long-term safety and value of the property.

Choosing the Right Oil Tank Removal Professional

Hiring the right oil tank removal professional is a decision that can affect your property’s safety, compliance, and future value. Mistakes or shortcuts can lead to costly environmental issues, insurance problems, or legal liabilities. With stricter regulations in 2025, it is more important than ever to choose a qualified expert for oil tank removal.

Choosing the Right Oil Tank Removal Professional

What to Look for in an Oil Tank Removal Professional

When searching for a contractor, consider these key qualities:

  • Licensing and Insurance: Always verify that your oil tank removal provider is properly licensed and fully insured.
  • Experience: Look for specialists with a proven track record and references in oil tank removal.
  • Reputation: Ask for client testimonials or check online reviews.
  • Transparency: Ensure you receive detailed estimates and clear contracts.

Specialized contractors are familiar with the latest environmental and legal requirements. In New Jersey, over 60% of oil tank removal projects are handled by such experts, demonstrating the value of working with professionals who understand the complexities involved.

Comparing Pricing Models: Fixed-Price vs Variable Pricing

Understanding how contractors charge for oil tank removal is essential. Here’s a quick comparison:

Model Pros Cons
Fixed-Price Predictable costs, no surprises, easier budgeting May be slightly higher if all risks are included
Variable Lower upfront estimate Risk of unexpected charges, less transparency

For a deeper dive into how these pricing models work, review Understanding oil tank removal costs. This resource explains what to expect from contracts and how to avoid hidden fees.

Questions to Ask Before Hiring

Before you commit, consider asking:

  • What is your process for oil tank removal and how long will it take?
  • Do you guarantee your work and offer post-removal support?
  • Can you provide documentation required for insurance or property sale?
  • Who will be on-site during the project?

Why Local, Employee-Owned Companies Matter

Choosing a local, employee-owned business brings added accountability and customer service. These companies are deeply invested in community reputation and are more likely to prioritize compliance, safety, and customer satisfaction.

Common Pitfalls: The Risks of Unlicensed Contractors

Homeowners sometimes try to save money by hiring unlicensed or inexperienced contractors. This often backfires, resulting in incomplete removal, environmental violations, or denied insurance claims. Always check credentials and references.

Selecting the right oil tank removal professional protects your investment and peace of mind. Take the time to research, ask questions, and choose a partner who will deliver safe, compliant, and efficient results.

Step-by-Step Oil Tank Removal Process

Removing an oil tank from your property is a detailed process that requires careful planning, strict compliance, and expert execution. As regulations tighten in 2025, understanding each phase of oil tank removal is crucial for minimizing risks and ensuring your property remains safe, compliant, and valuable.

Step-by-Step Oil Tank Removal Process

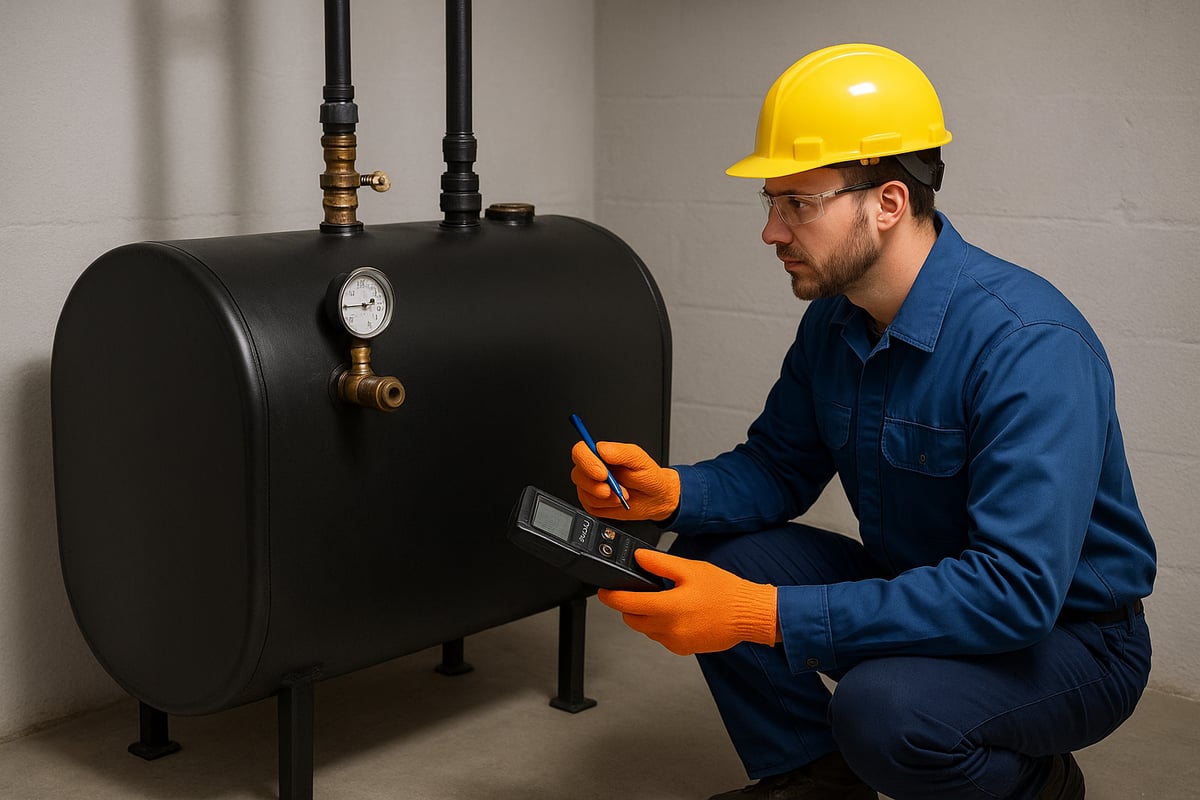
Step 1: Initial Site Assessment and Tank Location

The first step in any oil tank removal project is a thorough site assessment. Professionals use ground-penetrating radar and review historical property records to locate the exact position of the oil tank. This step helps determine whether the tank is aboveground or underground, its size, and its current condition.

A detailed assessment identifies potential hazards and ensures that the right equipment and removal strategies are used. For example, during property sales, undocumented tanks are sometimes discovered, complicating transactions. Early detection helps avoid legal and environmental setbacks.

Property owners should look for signs such as dead vegetation, stained soil, or unexplained odors, which may indicate a leaking tank. Accurate location and assessment set the stage for a safe and compliant oil tank removal process.

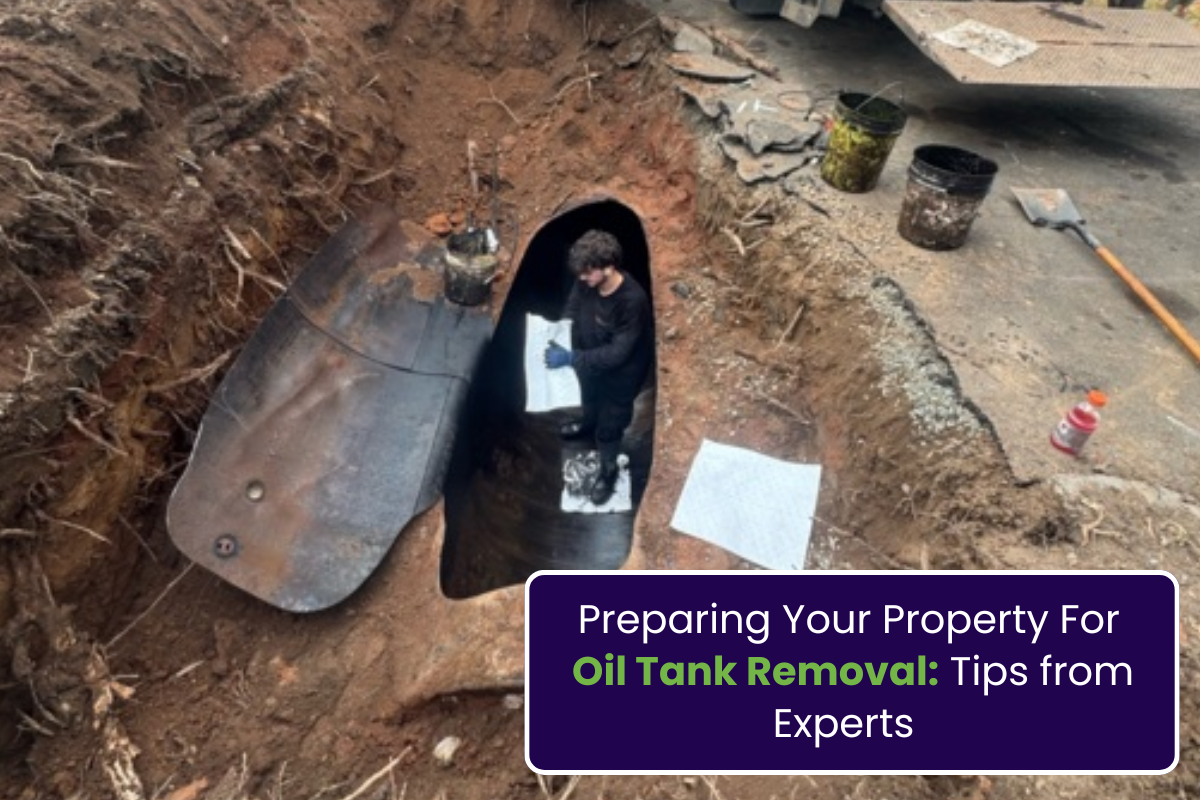
Step 2: Securing Permits and Preparing the Site

Before starting oil tank removal, obtaining the necessary municipal permits is essential. The application process typically involves submitting site plans and tank information to local authorities. Permit approval timelines can vary, so it's important to plan ahead.

On-site preparations include marking utilities, installing temporary fencing, and taking environmental precautions to protect nearby structures and landscaping. Safety protocols are strictly enforced to minimize risks to workers and property.

Proper preparation ensures that the oil tank removal proceeds smoothly, reduces the likelihood of delays, and keeps the project compliant with all legal requirements. Clear communication with your contractor and local officials is vital during this phase.

Step 3: Tank Cleaning and Preparation

Once permits are secured, the next phase of oil tank removal is cleaning the tank. All residual oil and sludge are carefully pumped out and disposed of according to EPA guidelines. This step is critical to prevent spills, soil contamination, and harmful fumes during removal.

Technicians use specialized equipment to clean the tank interior. They also check for any hazardous buildup that could pose additional risks. Following strict cleaning protocols protects both the environment and the crew.

A clean, empty tank is much safer to handle and transport. This meticulous preparation is a key part of a responsible oil tank removal strategy, reducing liability and ensuring compliance with health and safety regulations.

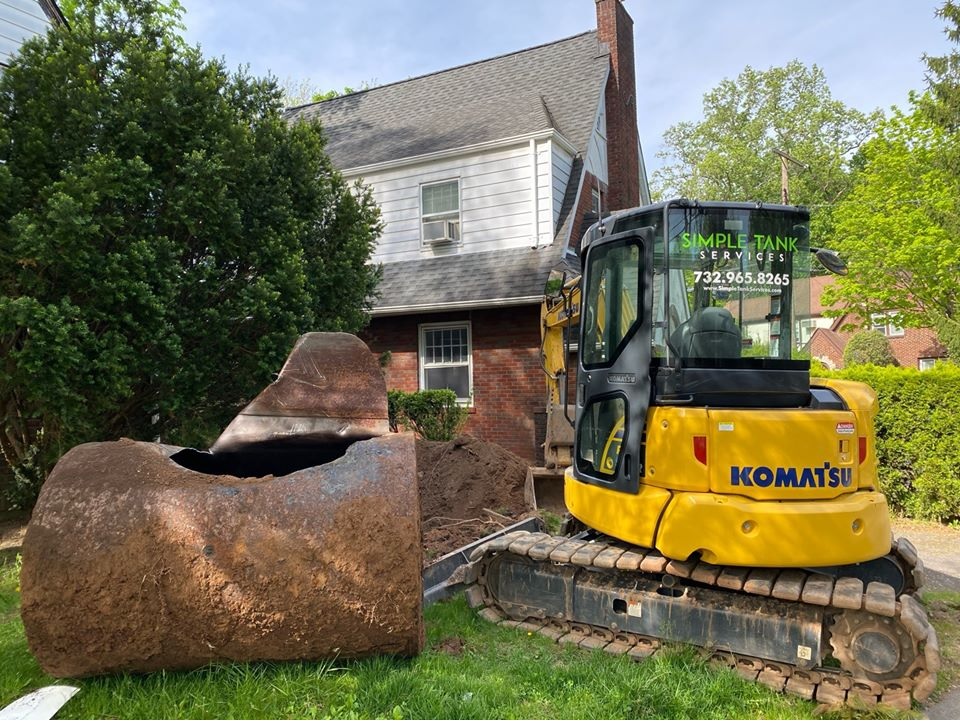
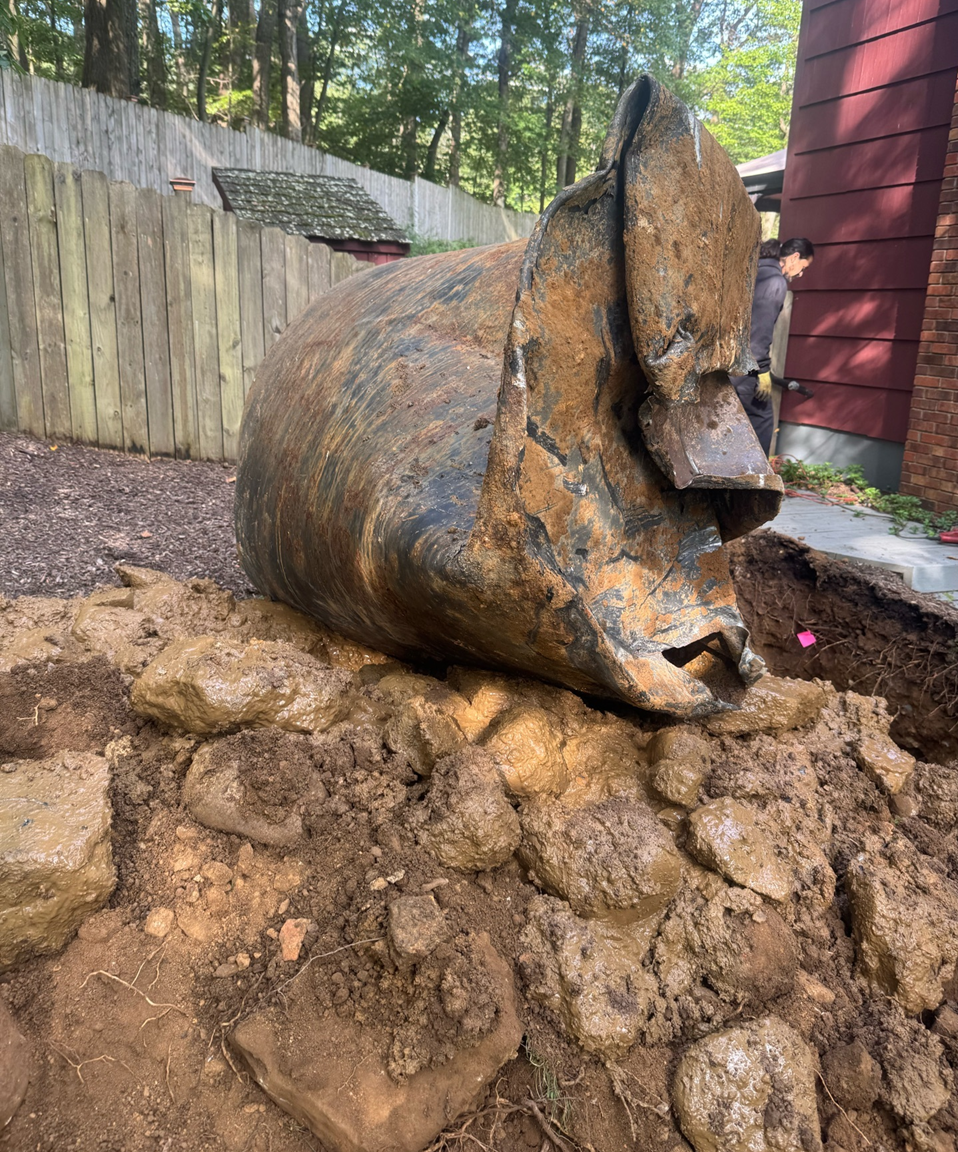
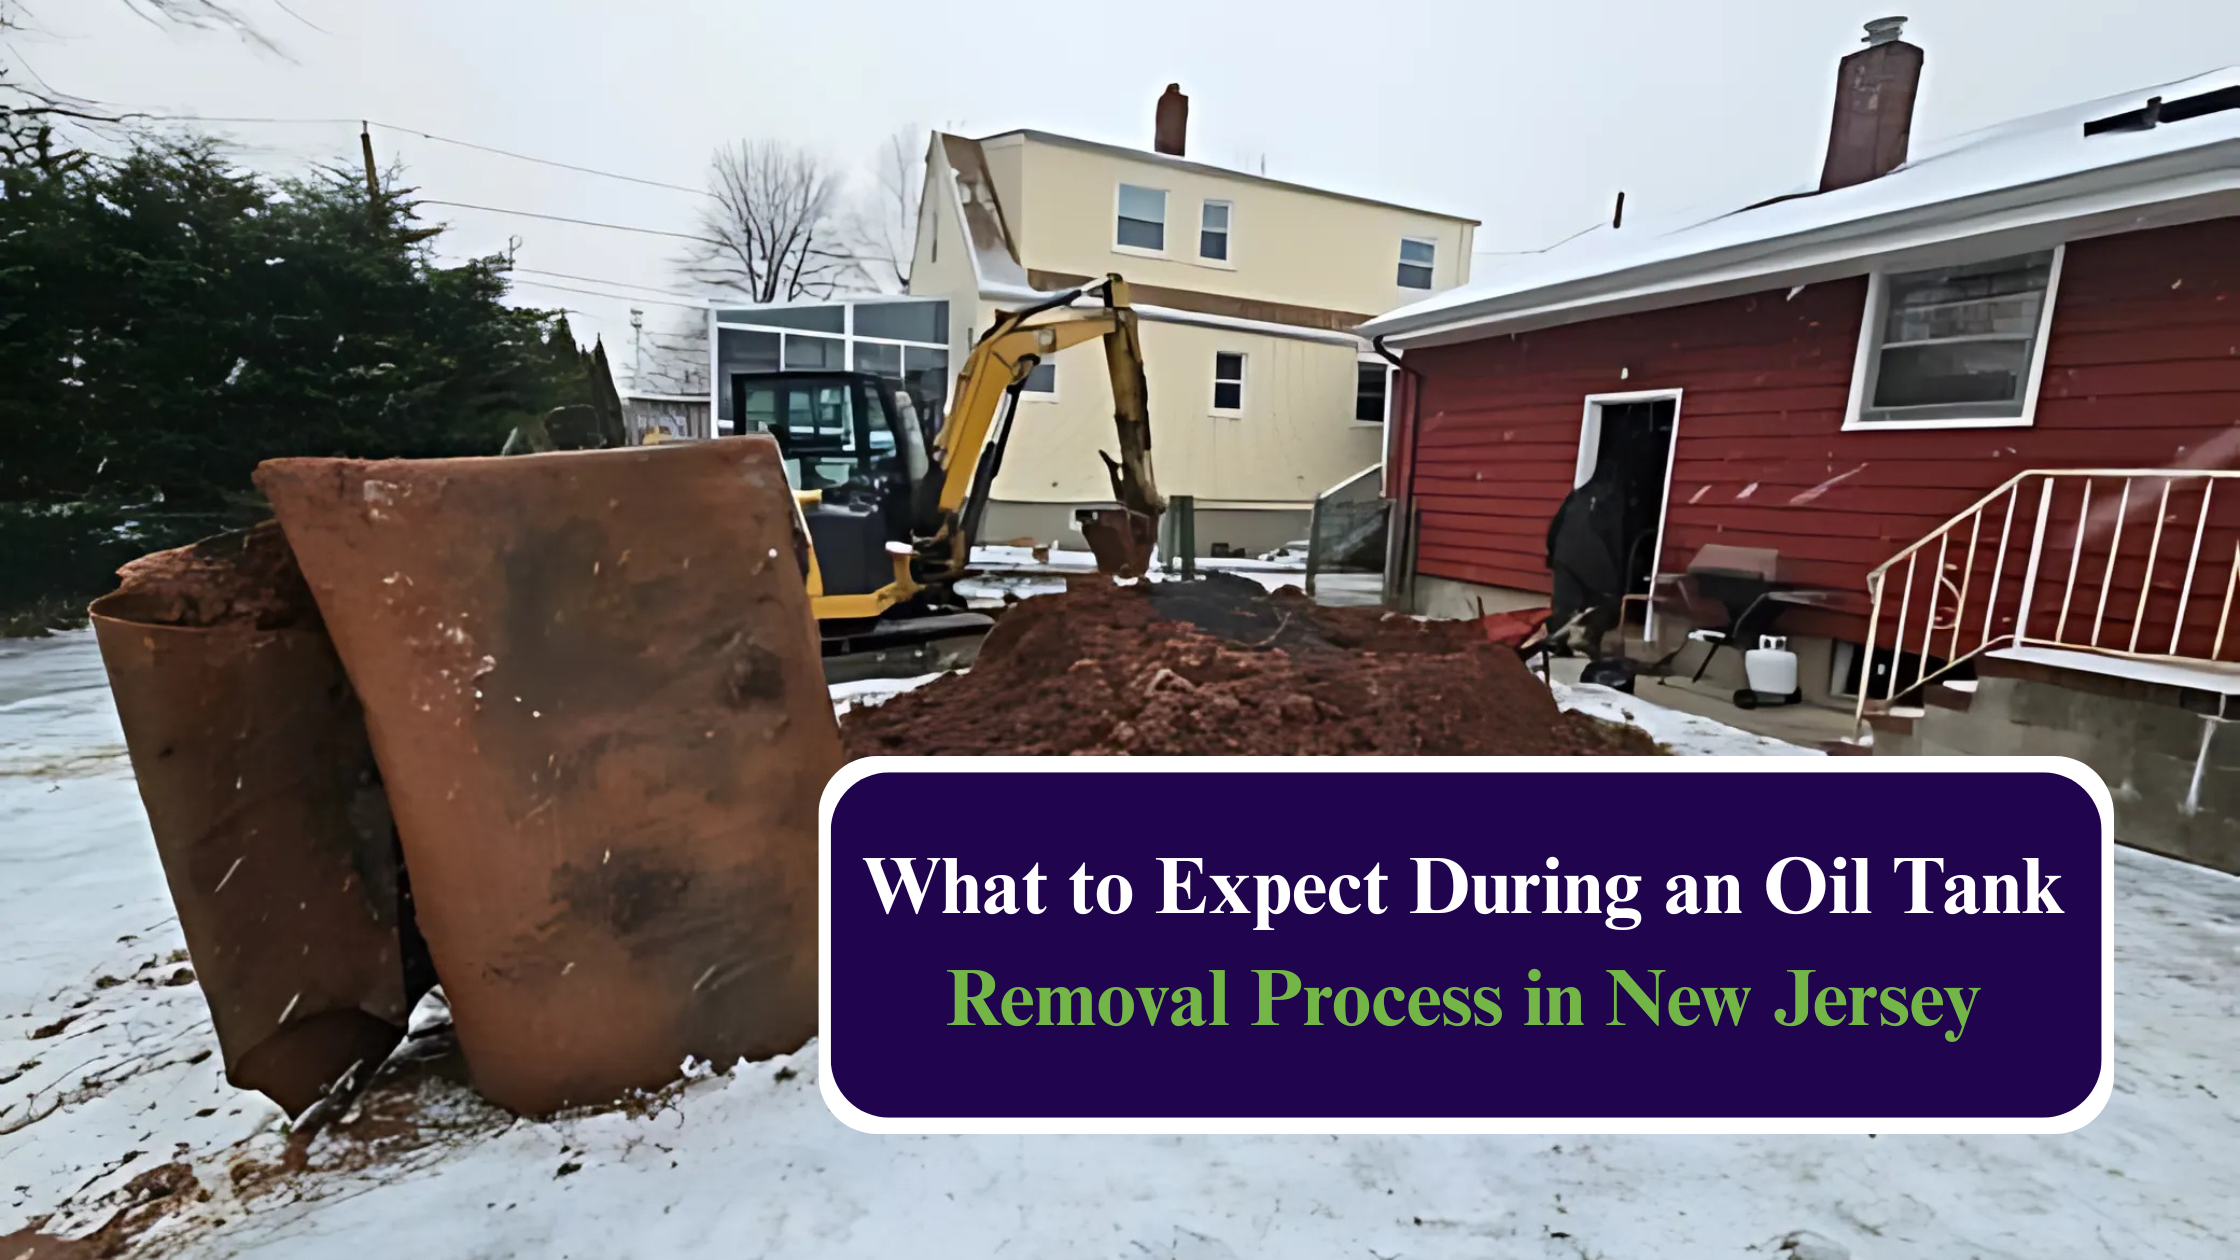
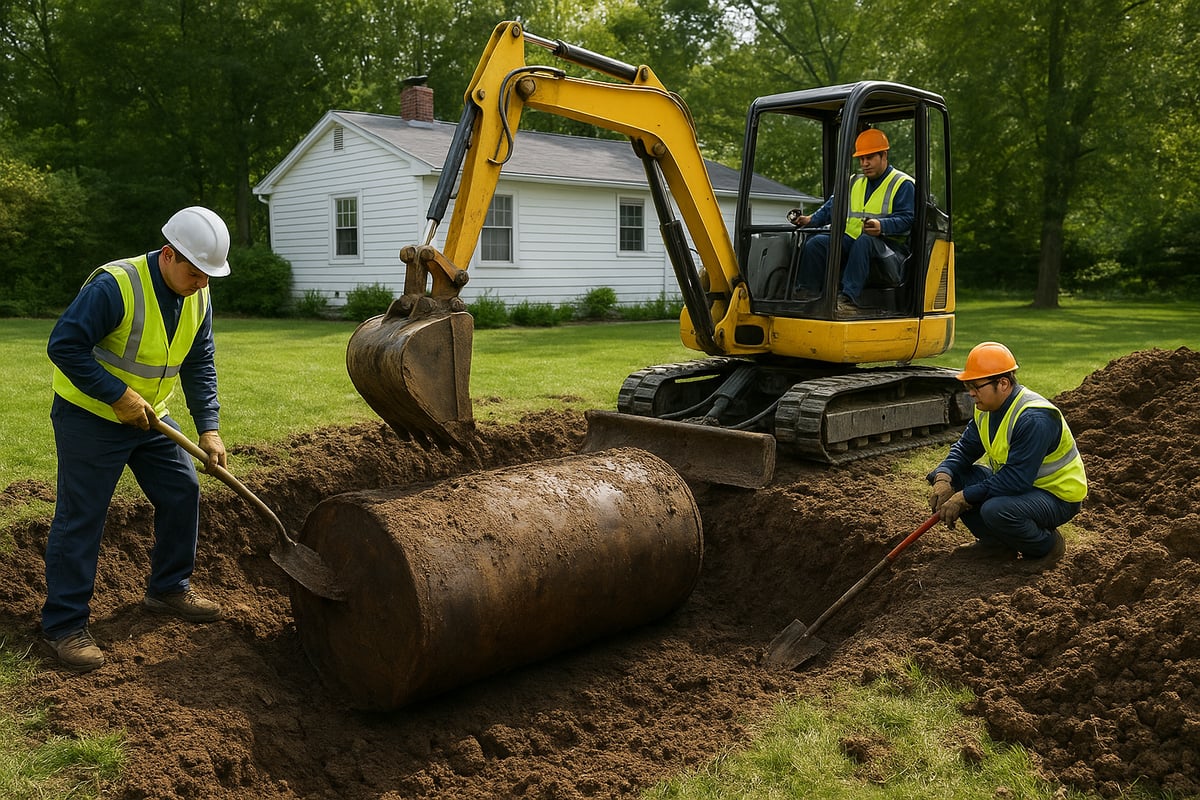
Step 4: Excavation and Physical Tank Removal

Excavation is where the oil tank removal process becomes highly visible. For underground tanks, crews use backhoes or mini-excavators to carefully dig around the tank, minimizing damage to surrounding property. Aboveground tanks require hoisting equipment and support platforms for safe removal.

Crews often encounter unexpected obstacles such as tree roots, rocks, or utility lines. Experienced professionals adjust their methods to overcome these challenges without causing property damage. For example, in dense urban areas, compact equipment and hand-digging may be necessary.

Throughout this step, contractors prioritize safety and environmental controls, ensuring that the oil tank removal disturbs as little of the property as possible. Proper excavation techniques are essential for a successful and compliant project outcome.

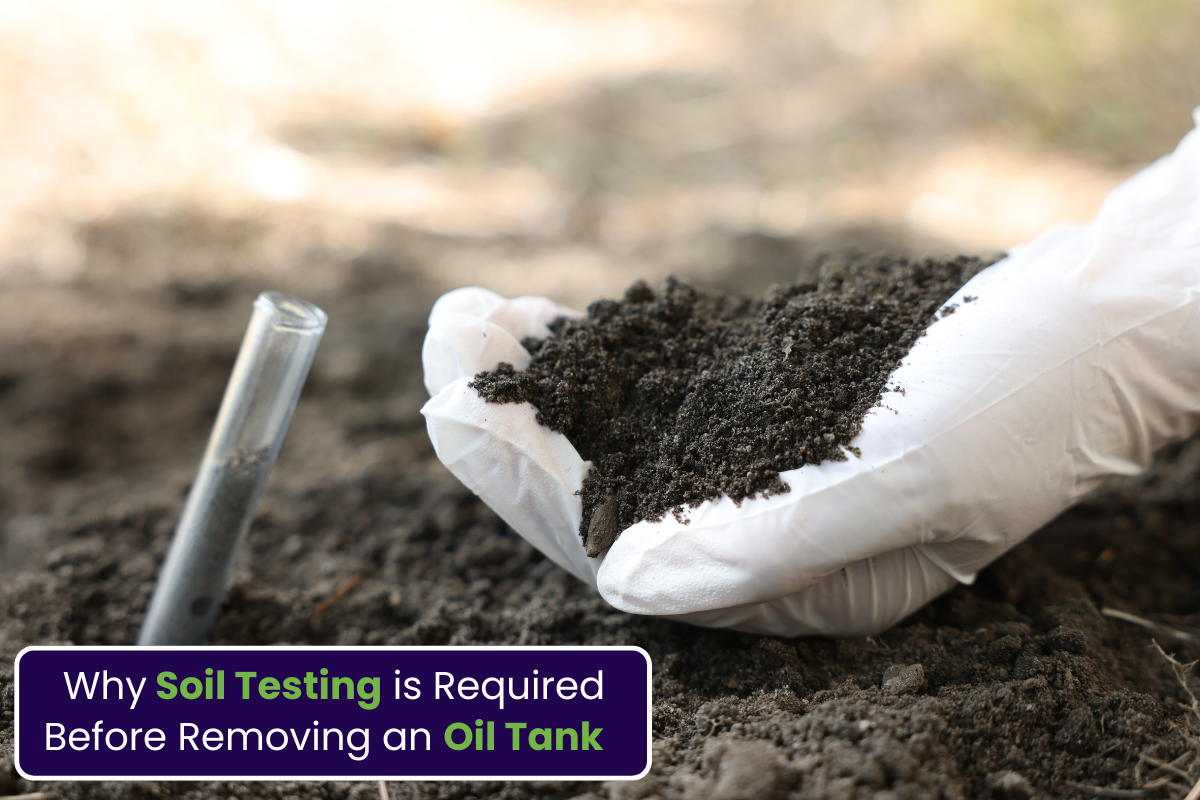
Step 5: Soil Testing and Environmental Assessment

After removing the tank, soil sampling is performed to detect any contamination. Samples are collected from multiple locations around the excavation and sent to certified laboratories for analysis. Regulatory thresholds determine if further action is needed.

If contamination is found, immediate remediation steps are initiated to protect groundwater and public health. Working with specialists ensures accurate results and compliance with local standards. For a detailed look at this process, see Soil testing after tank removal.

Soil testing is a non-negotiable step in oil tank removal, as it documents environmental conditions and supports property value during future real estate transactions.

Step 6: Site Restoration and Documentation

Once testing is complete, the site is restored to its original condition. Crews backfill the excavation, grade the soil, and repair landscaping or hardscaping as needed. Restoration ensures the property remains functional and visually appealing.

Final documentation includes detailed reports, photographs, and permits, which are provided to the homeowner. These records are essential for insurance purposes and future property sales.

Proper site restoration and thorough documentation conclude the oil tank removal process, giving property owners peace of mind and proof of compliance.

Step 7: Post-Removal Reporting and Compliance

The last phase involves submitting closure reports to the relevant authorities. These documents confirm that the oil tank removal was completed according to all regulations and that the site meets environmental standards.

Homeowners should retain all documentation for future reference, especially when selling the property. A successful property sale often depends on clear evidence that oil tank removal and remediation were handled correctly.

Staying organized and meeting all reporting requirements ensures long-term compliance, protects property value, and reduces legal risks associated with past oil tank storage.

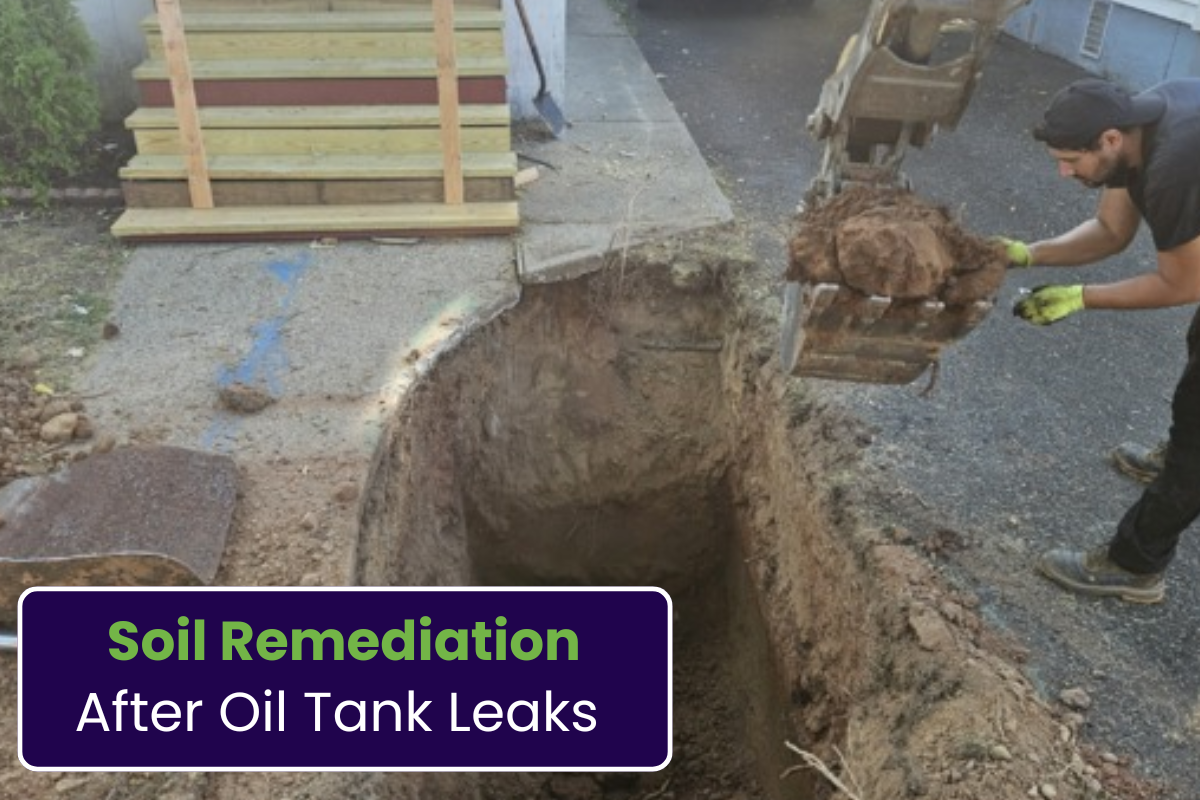
Soil Remediation and Environmental Cleanup After Tank Removal

After an oil tank removal, soil remediation becomes essential if tests reveal contamination. This step safeguards your property, health, and the environment from lingering pollutants. Contaminated soil can result from leaks, spills during removal, or years of undetected corrosion. Common indicators include strong petroleum odors, stained soil, or failed environmental tests. Addressing these issues quickly reduces risks to groundwater and property value. In 2025, stricter regulations require homeowners to act promptly when contamination is detected, making soil remediation a non-negotiable aspect of oil tank removal.

Soil remediation after oil tank removal relies on several proven methods. The most common is excavation, which involves removing contaminated soil and transporting it to a licensed disposal facility. Bioremediation uses naturally occurring microbes to break down pollutants in place, while chemical treatments neutralize or bind hazardous substances. The chosen method depends on contamination levels, soil type, and local regulations. For a detailed look at remediation standards and procedures, refer to Soil remediation in New Jersey, which outlines the latest accepted practices for safe, thorough cleanup.

The timeline and costs for soil remediation after oil tank removal vary by site and severity. In New Jersey, the average residential cleanup ranges from $8,000 to $20,000. Most projects last one to four weeks, including initial testing, active remediation, and follow-up assessments. Monitoring is crucial; property owners must ensure that post-removal soil meets regulatory standards before closing the project. Regular follow-up testing helps confirm that all contaminants have been addressed, protecting both your property and local water resources.

Hiring certified environmental professionals is critical for effective soil remediation after oil tank removal. These experts ensure compliance with state and federal standards while minimizing risks to your home and community. For example, a recent project in Bergen County involved prompt excavation and bioremediation, preventing petroleum from seeping into a nearby creek. By working with qualified specialists, homeowners avoid legal liabilities and secure their property value for future transactions. Always request documentation and maintain clear records for insurance and resale purposes.

Post-Removal Considerations and Preventative Measures

After completing oil tank removal, your responsibilities as a homeowner do not end. Ensuring your property remains safe, compliant, and valuable requires a series of important post-removal steps. Being proactive now can prevent costly problems later and position your property for future success.

Long-term Monitoring for Residual Contamination

Even after oil tank removal, trace contaminants can linger underground. Regular soil and groundwater testing is vital for detecting any delayed issues. Many states require ongoing monitoring, especially if minor contamination was found during the initial oil tank removal.

Homeowners should schedule periodic environmental assessments and keep records of all test results. Following state-specific guidelines, such as those listed in the Nevada Heating Oil Tank Regulations, ensures you remain compliant and eligible for potential state reimbursements if any future cleanup is needed.

Insurance Updates and Property Disclosures

Once oil tank removal is complete, contact your insurance provider to update your policy. Some insurers offer discounts or require documentation proving safe oil tank removal. Accurate records not only protect you from future liability but also streamline the process if you decide to sell your home.

Full disclosure of oil tank removal and environmental testing in property documents is required in many states. This transparency can prevent legal disputes and reassure potential buyers about the property’s safety and compliance.

Upgrading Heating Systems: Greener Alternatives

With the old tank gone, consider upgrading to a modern, efficient heating system. Many homeowners choose natural gas or heat pumps as eco-friendly alternatives after oil tank removal. In 2024, 40 percent of oil tank removals led to greener system upgrades, reflecting a growing trend toward sustainability.

Switching to cleaner energy not only lowers utility bills but also increases property value. Programs such as those described in the New York Senate Bill S1901 encourage homeowners to remove outdated tanks and install safer, more efficient heating solutions, often with financial incentives.

Preventing Future Environmental Issues

Prevent future issues by maintaining thorough documentation of all oil tank removal activities. Schedule regular inspections of your new heating system and surrounding property. Early detection of leaks or malfunctions can save thousands in remediation costs.

Keep all permits, environmental reports, and contractor warranties organized and accessible. These records will be critical if you refinance, sell, or face future inspections.

Grants, Rebates, and State Incentives

Many states and local governments offer grants, rebates, or low-interest loans to support oil tank removal and heating system upgrades. Research available programs in your area, as requirements and deadlines can change annually.

Some energy providers also offer rebates for switching to cleaner heating technologies. Taking advantage of these resources can significantly reduce the financial burden of oil tank removal and system modernization.

Maintaining Property Value and Compliance

To preserve property value, stay current with all local and state regulations regarding oil tank removal. Regularly update your insurance and maintain clear, accurate records. These steps will help ensure your property remains attractive to buyers and protected from environmental risks.

As you consider the essential steps for safe and compliant oil tank removal in 2025, remember that having a reliable partner can make all the difference. With rising regulations and the risks of property and environmental damage, it’s important to work with a team that values transparency and efficiency. At Simple Tank Services, you’ll benefit from fixed price solutions and the expertise of a dedicated, employee owned team committed to protecting your property and peace of mind. If you’re ready to take the next step or have questions about your specific situation, reach out through our Contact Us page.

Essential Guide to Oil Tanks: Installation & Maintenance 2025

Oil tanks play a vital role in keeping homes and businesses warm as we move into 2025. However, poor oil tanks management can lead to serious risks—leaks, environmental hazards, and costly repairs.

With stricter regulations and rising fuel prices, the demand for safe, efficient, and compliant oil tanks installation and maintenance is higher than ever. Choosing the right system and following best practices is essential for safety and cost savings.

This guide offers expert advice on selecting, installing, and maintaining oil tanks. You will learn about tank types, installation steps, regulations, maintenance, troubleshooting, and future trends.

Ready to protect your property and peace of mind? Follow the latest guidance to ensure your oil tanks are reliable and future-proof.

Understanding Oil Tanks: Types, Materials, and Uses

Selecting the right oil tanks is a crucial decision for property owners in 2025. The range of available options, materials, and applications continues to expand. Understanding these differences ensures safe, efficient, and compliant fuel storage for both homes and businesses.

Understanding Oil Tanks: Types, Materials, and Uses

Overview of Oil Tank Types

Oil tanks are available in two main types: aboveground and underground. Aboveground oil tanks are typically installed outdoors or in basements for easy access and inspection. Underground oil tanks are buried beneath the surface, saving space but requiring careful monitoring for leaks and corrosion.

For residential settings, aboveground oil tanks remain popular due to their accessibility and straightforward maintenance. Commercial properties may opt for larger underground oil tanks to maximize usable space and meet higher capacity needs. Construction also varies. Single-wall tanks offer basic containment, while double-wall tanks provide an added safeguard against leaks and environmental hazards. To learn more about compliance and safety for underground options, see these Underground oil tank regulations.

Common Materials Used in Oil Tanks

Oil tanks are constructed from a variety of materials, each offering unique benefits and trade-offs. The table below summarizes the most common options:

Material

Durability

Corrosion Resistance

Typical Lifespan

Common Environments

Steel

High

Moderate

15-25 years

Indoor, aboveground

Fiberglass

High

Excellent

30+ years

Underground, moist soils

Polyethylene

Moderate

High

15-20 years

Outdoor, variable climates

Composite

High

Superior

30+ years

Both aboveground/underground

Steel oil tanks are valued for their strength but require protection against rust. Fiberglass is a top choice for underground oil tanks, resisting corrosion even in damp soil. Polyethylene and composite materials offer lightweight, durable alternatives for a variety of settings.

Typical Uses and Applications

Oil tanks serve many vital roles in modern infrastructure. Common applications include:

  • Home heating oil storage for furnaces and boilers

  • Industrial and commercial fuel management systems

  • Waste oil collection and recycling operations

The choice of oil tanks depends on the intended use, with residential tanks focused on heating and commercial tanks often designed for large-scale fuel distribution or storage.

Key Considerations When Choosing a Tank

Choosing the right oil tanks requires careful assessment of several factors. Capacity must match property size and anticipated fuel usage. Environmental conditions, such as soil type, water table, and climate, influence both tank material and installation method. Warranty coverage also matters, with leading brands offering extended protection, such as Granby’s 20-year warranty or Roth’s insurance-backed options.

Latest Innovations for 2025

The oil tanks industry continues to evolve with new technology and safety features. Recent innovations include advanced corrosion-resistant coatings, reducing maintenance needs and extending tank lifespans. Smart tank monitoring systems now provide real-time data on fuel levels and leak detection. Trends in double-wall and secondary containment solutions offer enhanced environmental protection and help meet stricter regulatory standards.

Modern oil tanks combine durability, technology, and compliance to deliver safer, more efficient storage solutions for every property type.

Federal, State, and Local Regulations

Oil tanks are regulated by a combination of federal, state, and local agencies. The Environmental Protection Agency (EPA) sets national guidelines, but many states, such as Colorado and Rhode Island, require compliance with their own more detailed standards. For 2025, regulations around installation, maintenance, and decommissioning have become stricter, especially for new oil tanks. It is essential to consult both EPA mandates and your local building department to ensure your oil tanks meet every requirement.

Environmental Protection and Secondary Containment

Environmental protection is a top priority for oil tanks, particularly with the risk of leaks and contamination. Double-wall tanks and secondary containment systems are now standard for many installations, providing extra layers of defense. Leak detection and monitoring are not just best practices but often required by law. To better understand the potential risks and necessary solutions, review the risks of underground oil tank leaks. Integrating these safeguards into your oil tanks setup helps protect property, groundwater, and your financial liability.

Inspection, Permitting, and Reporting

Regular inspections are mandatory for oil tanks, and schedules can vary by jurisdiction. Permitting processes often include site assessments and documentation of tank specifications. Owners must maintain accurate records of all inspections, maintenance, and repairs to stay compliant. When issues are detected, prompt reporting to authorities is required. Keeping detailed records ensures that oil tanks are operating within legal limits and can help with warranty or insurance claims.

Insurance and Liability Considerations

Insurance is a critical component of owning oil tanks. Many states require specific coverage to address potential leaks or environmental damage. Owners should review manufacturer warranties and consider third-party insurance policies, like Roth’s $1 million contamination coverage, for added peace of mind. Comparing available options in a table can help clarify choices:

Insurance Type

Coverage Scope

Typical Requirement

Homeowner’s Insurance

Limited, may exclude tanks

Optional

Tank-Specific Policy

Leaks, contamination

Often required

Manufacturer Warranty

Defects, certain failures

Included with tank

Having the right insurance for oil tanks not only protects assets but is often a legal necessity.

Consequences of Non-Compliance

Non-compliance with regulations for oil tanks can result in serious financial and legal consequences. Fines and penalties may be imposed for improper installation, lack of inspection, or failure to report leaks. Environmental remediation costs can be significant if a spill occurs. Additionally, non-compliant oil tanks can decrease property value and complicate real estate transactions. Following all safety standards and legal requirements is essential to avoid these risks and ensure smooth property ownership.

Oil Tank Maintenance: Best Practices for Longevity

Proper maintenance is the key to ensuring your oil tanks remain safe, efficient, and reliable throughout their service life. Neglecting regular care can lead to leaks, costly repairs, and even environmental hazards. By following proven best practices, you can extend the lifespan of your oil tanks and protect your investment.

Oil Tank Maintenance: Best Practices for Longevity

Routine Inspection and Monitoring

Routine inspection is the cornerstone of oil tanks longevity. Visual checks should be performed monthly for signs of corrosion, leaks, or shifting. Look for stains beneath the tank, rust on surfaces, and any unusual odors. Smart monitoring devices are now available, providing real-time alerts for changes in fuel level or pressure.

Annual professional inspections are recommended. Certified technicians use advanced tools to detect hidden issues, ensuring early intervention. For a detailed checklist of what to look for and how to respond, consult the Oil tank maintenance FAQ.

Key points during routine checks:

  • Examine tank legs and supports for settlement.

  • Inspect all fittings, valves, and gauges for tightness.

  • Verify vent and fill pipes are unobstructed.

Regular attention helps prevent small issues from becoming major problems with oil tanks.

Cleaning and Servicing Procedures

Thorough cleaning is vital for preventing buildup that can compromise oil tanks efficiency. Over time, water, sludge, and contaminants accumulate at the bottom, increasing corrosion risk and reducing fuel quality.

Recommended cleaning intervals vary by usage, but a general rule is every 3–5 years. Technicians pump out residual fuel, remove debris, and flush internal surfaces. Filters, valves, and gauges should also be serviced during this process. Replacing worn components prevents blockages and ensures accurate readings.

Servicing steps include:

  • Draining and safely disposing of old fuel.

  • Rinsing tank interiors with approved solutions.

  • Replacing or cleaning filters and inspecting all seals.

Routine cleaning extends the life of oil tanks and supports optimal system performance.

Preventing and Addressing Corrosion

Corrosion is a primary threat to oil tanks integrity. Protective coatings, such as epoxy or polyurethane, are applied during manufacturing or as a maintenance measure. These coatings shield against moisture and chemical reactions that degrade metal over time.

For underground installations, sacrificial anodes may be used to attract corrosive elements away from the tank shell. Environmental controls, like proper drainage and tank coverings, further limit exposure to damaging conditions.

Consider a case study: Granby’s high-performance coatings have demonstrated impressive results, reducing corrosion rates and increasing tank lifespan by several years. Regularly inspecting the coating’s condition is essential for continued protection of oil tanks.

Winterization and Seasonal Maintenance

Cold weather poses unique challenges for oil tanks. Freezing temperatures can cause condensation inside the tank, introducing water that leads to sludge and corrosion. To prepare for winter, insulate exposed tanks and pipes, and consider installing tank heaters where temperatures drop below freezing.

Seasonal maintenance checklist:

  • Inspect for cracks or leaks caused by temperature fluctuations.

  • Ensure all insulation is intact and secure.

  • Remove any snow or ice buildup from outdoor tanks.

Using tank tubs or covers not only protects the tank from weather but also enhances aesthetics and extends the lifespan of oil tanks in harsh climates.

Record-Keeping and Documentation

Accurate documentation supports compliance, warranty claims, and resale value. Maintain a detailed log of all oil tanks maintenance activities, including inspections, cleanings, repairs, and component replacements. Record dates, findings, and technician details.

A sample maintenance log:

Date

Service Performed

Technician

Notes

2025-03-10

Annual Inspection

J. Smith

No issues detected

2025-06-15

Filter Replacement

A. Lee

Minor sediment found

2025-11-05

Winterization Check

J. Smith

Insulation improved

Tracking warranty and insurance coverage is equally important. Organized records ensure your oil tanks remain compliant and eligible for protection.

When to Replace or Upgrade Your Oil Tank

Even the best-maintained oil tanks eventually reach the end of their service life. Warning signs include persistent leaks, advanced corrosion, or repeated system failures. Modern tank technology offers improved safety, efficiency, and monitoring features that may justify an upgrade before failure occurs.

Manufacturer guidelines typically recommend replacement every 15–25 years, depending on material and environment. Newer models provide double-wall construction, enhanced coatings, and smart monitoring as standard features. Many manufacturers and local governments offer incentives for upgrading oil tanks, making the investment more affordable and beneficial.

When evaluating your current system, consider both safety and the potential for improved performance. Staying proactive with oil tanks replacement ensures peace of mind and long-term reliability.

Troubleshooting Common Oil Tank Issues

Proper troubleshooting is essential for maintaining safe and efficient oil tanks. Even the most robust systems can develop issues over time, so knowing how to identify and address these problems quickly protects both property and the environment.

Identifying and Addressing Leaks

Early detection of leaks in oil tanks is critical. Common warning signs include a persistent fuel odor, visible stains beneath or around the tank, and unexplained drops in system pressure. If you notice these symptoms, act immediately.

Use absorbent pads to contain small spills and prevent further spread. For larger leaks, isolate the area and contact a certified professional. Always follow local environmental reporting requirements for leaks. If a leak is severe or the tank is at the end of its lifespan, consider reviewing the Oil tank removal process to understand your next steps.

Dealing with Corrosion and Structural Damage

Corrosion can compromise the integrity of oil tanks, leading to leaks or structural failure. Assess the extent by inspecting the tank’s surface for rust, flaking paint, or bulging areas. Surface corrosion may be manageable with cleaning and protective coatings.

Temporary fixes, such as patching small holes, may buy time, but permanent solutions often involve replacing the affected section or the entire tank. If damage is extensive, always consult a qualified technician to ensure the oil tanks are safe and compliant.

Resolving Fuel Delivery and System Problems

Fuel delivery issues in oil tanks can disrupt heating or operations. Common causes include clogged filters, airlocks in the fuel line, or faulty pumps. Listen for unusual noises or check for inconsistent fuel flow.

To resolve these issues, start by cleaning or replacing filters. Bleed the system to eliminate airlocks and verify that all valves are open. Proper venting and pressure regulation are essential for optimal performance. If problems persist, schedule a professional inspection.

Managing Water and Sludge Accumulation

Water and sludge can accumulate inside oil tanks, reducing fuel quality and efficiency. Condensation, loose fittings, or damaged fill caps are frequent causes of water ingress. Over time, this leads to sludge that clogs lines and burners.

Regular cleaning and water removal are vital. Use water-detecting paste to check for contamination, and have the tank cleaned professionally if needed. Preventive measures include ensuring tight seals and using additives that break down sludge in oil tanks.

Professional Support and Emergency Services

Not all oil tanks issues can be solved with DIY methods. If you encounter persistent leaks, severe corrosion, or system malfunctions, engage a certified technician. Emergency response teams are available for major spills or hazardous situations.

Many local providers offer 24/7 service plans, ensuring rapid assistance when you need it most. Keeping contact information for trusted professionals on hand provides peace of mind and safeguards your investment.

Future Trends and Innovations in Oil Tank Technology

Emerging technologies are transforming oil tanks, making them safer, smarter, and more sustainable for both homes and businesses. Staying informed about these innovations is crucial for anyone considering new oil tanks or planning upgrades in 2025.

Smart Tank Monitoring and Automation

Oil tanks are becoming more intelligent, thanks to advancements in digital sensors and remote monitoring. Smart systems now provide real-time data on tank levels, temperature, and possible leaks. Many solutions integrate with home automation platforms, letting users track oil tanks from their smartphones or central dashboards.

Automated alerts inform owners of irregularities, minimizing risks and preventing costly spills. As a result, oil tanks are safer, and maintenance is more proactive. These innovations reduce downtime and help ensure uninterrupted heating or fuel supply.

Advanced Materials and Eco-Friendly Designs

Manufacturers are introducing new materials for oil tanks that resist corrosion and extend lifespan. Composite and high-grade polyethylene tanks are gaining popularity due to their durability and compatibility with biofuels. These materials help reduce environmental impact and improve safety.

Eco-friendly designs also include secondary containment and recyclable components. Some oil tanks now feature advanced insulation, minimizing heat loss and optimizing energy efficiency. Such trends reflect a growing demand for green solutions in fuel storage.

Regulatory Shifts and Industry Standards for 2025+

Regulations for oil tanks are evolving to address safety and environmental concerns. In 2025, many states are updating standards for design, installation, and leak detection. For example, Colorado’s new AST system design standards outline strict requirements for aboveground storage tank systems, ensuring compliance and safety.

These regulatory shifts encourage the adoption of double-wall oil tanks, advanced monitoring, and secondary containment. Keeping up with these changes helps owners avoid penalties and protect property value.

Market Insights and Consumer Preferences

The oil tanks market is shifting toward products with longer warranties and comprehensive insurance. Consumers prefer oil tanks that offer robust contamination coverage and easy integration with smart home systems. Data shows an uptick in proactive tank replacements, driven by tighter regulations and a desire for dependable performance.

Warranty-backed oil tanks are especially attractive to property owners looking for peace of mind and long-term security. As technology advances, user-friendly features and low-maintenance designs are also becoming top priorities.

Preparing for the Future: Upgrade Strategies

Evaluating existing oil tanks is essential for future readiness. Owners should assess tank age, material, and compliance with upcoming standards. Upgrading to modern oil tanks with smart monitoring and eco-friendly features can unlock insurance discounts and eligibility for local incentives.

Many regions offer rebates or tax benefits for installing advanced oil tanks. By planning upgrades now, owners ensure their fuel storage meets both today’s needs and tomorrow’s regulations, keeping properties safe and efficient.

Frequently Asked Questions About Oil Tanks

Curious about oil tanks and how to manage them effectively? Below, we answer the most common questions homeowners and business owners have about oil tanks, from lifespan to safety concerns.

What is the average lifespan of an oil tank?

Most oil tanks last between 15 and 30 years, depending on material, environment, and maintenance. Steel tanks may have a shorter life if exposed to moisture, while fiberglass models often last longer. Regular upkeep helps maximize oil tanks’ longevity.

How often should an oil tank be inspected and serviced?

Experts recommend inspecting oil tanks annually. This includes checking for leaks, corrosion, and ensuring all components function properly. A yearly professional inspection can prevent costly issues and maintain compliance with local regulations.

What are the warning signs of a failing oil tank?

Look for rust, damp spots, oil odors, or unexplained drops in fuel level. These symptoms can indicate leaks or structural problems. Early detection is key to preventing major oil tanks failures and environmental hazards.

Can old oil tanks be repaired, or should they always be replaced?

Minor issues like valve replacements or small leaks can sometimes be repaired. However, significant corrosion or structural damage usually means the tank should be replaced. For guidance on safe removal, consult New York heating oil tank removal guidelines.

What are the costs associated with installation and maintenance?

Installation costs for oil tanks vary widely based on tank size, type, and whether it’s aboveground or underground. Maintenance is generally affordable, especially when compared to the risks of neglect. Budget for annual inspections and cleaning.

Are there government programs or rebates for oil tank upgrades?

Many regions offer rebates or financial assistance for upgrading oil tanks, especially when replacing older models with safer, more efficient options. Check with your state energy office or local utility provider for current programs.

How do I choose between aboveground and underground tanks?

Aboveground oil tanks are easier to monitor and maintain, while underground tanks save space but may require more stringent compliance. Consider property layout, local regulations, and environmental factors when making your decision.

What should I do if I suspect a leak or contamination?

If you suspect an oil tanks leak, act quickly. Contact a certified technician and notify local authorities if needed. Prompt action minimizes environmental impact and may be legally required depending on your state.

After exploring the essential steps for selecting, installing, and maintaining your oil tank, you can see how crucial it is to work with a company that values transparency and reliability. At Simple Tank Services, we understand the challenges of oil tank management, from navigating regulations to ensuring your property’s safety and compliance. If you’re ready to take the next step or need expert guidance tailored to your specific needs, you can learn more about how we can help you protect your investment and the environment by visiting Our Services.

Soil Testing Before Oil Tank Removal: Why It’s Required and How Much It Costs

Removing an underground oil tank is a major property improvement step, especially for homeowners concerned about environmental safety or preparing their property for sale. But before removing the tank, one crucial step is always recommended — soil testing before oil tank removal. This process ensures the ground around the tank is safe, contamination-free, and compliant with state regulations. In this guide, we explain why soil testing matters, how it works, and what it typically costs.

Why Soil Testing Before Oil Tank Removal Is Important

Before any underground oil tank is removed, professionals perform soil testing to check if oil leakage has occurred. Many older steel tanks corrode over time, causing slow or significant leaks into the surrounding soil. This contamination can:

Harm the environment 

Increase property liability 

Delay real estate transactions 

Result in costly remediation 

Affect groundwater and nearby structures 

Soil testing allows property owners to identify issues early and avoid long-term damage.

Soil Testing Before Oil Tank Removal — What Does It Detect?

Soil testing is designed to identify soil contamination from heating oil, including:

1. Petroleum Hydrocarbons

These are chemicals found in heating oil. Their presence in the soil indicates leakage.

2. Volatile Organic Compounds (VOCs)

VOCs can spread through soil and create strong odors or harmful exposure risks.

3. Heavy Metals & Toxic Substances

Corrosion from the tank can release metals that are harmful to soil and groundwater.

4. Residual Oil Saturation

Testing determines how deep and widespread the contamination is.

This information helps determine whether simple removal is enough or if soil remediation is required.

How Soil Testing Works Before Oil Tank Removal

The soil testing process is straightforward and typically completed before excavation begins.

Step 1: Site Survey

A professional inspector visits your property and reviews the tank location, access points, and environmental concerns.

Step 2: Soil Sampling

Technicians drill small boreholes around the tank area and extract soil samples from different depths.

Step 3: Laboratory Testing

Samples are sent to an accredited environmental lab where they are tested for petroleum contamination and related chemicals.

Step 4: Reporting & Documentation

Results are compiled into an official report that shows contamination levels and whether cleanup is needed.

Step 5: Removal Planning

Based on results, your contractor determines the safest and most efficient way to remove the tank.

This process ensures compliance with environmental guidelines and allows smooth property transactions, especially during home sales.

Types of Soil Testing Used Before Oil Tank Removal

1. BASIC SOIL SCREENING (Initial Check)

This is a fast test using hand-held instruments to detect surface-level contamination.

2. LABORATORY ANALYSIS (Detailed EPA-Approved Testing)

The most accurate EPA-approved method. Technicians test samples for hydrocarbons, VOCs, and metals. Many homeowners use professional soil testing services to confirm whether simple tank removal or full remediation is needed..

3. Groundwater Testing (Optional but Sometimes Necessary)

If contamination reaches deep layers, groundwater testing determines if oil has spread further.

How Much Does Soil Testing Cost Before Oil Tank Removal?

The cost depends on the testing method, number of samples, and state requirements, but here’s a typical price range:

1. Basic Soil Testing Costs ($250 – $650)

This includes 2–3 soil samples and general contamination screening.

2. Detailed Laboratory Soil Testing ($800 – $2,000)

This includes:

Multiple samples

Deep-level testing

Lab-certified reports

Compliance documentation

3. Additional Cost Factors Influencing Price

-Tank size

-Property access

-Depth of tank

-Number of samples required

-Local soil conditions

-State environmental regulations

-Presence of groundwater

Although soil testing adds upfront cost, it can save thousands in potential remediation issues later.

Oil Tank Removal Costs Without and With Contamination

Understanding the cost difference helps property owners prepare.

Oil Tank Removal Without Contamination

Most clean removals cost $1,500 – $3,000 depending on tank size and excavation difficulty.

Oil Tank Removal With Contamination

If soil testing detects contamination, cleanup may cost $3,000 – $15,000+ depending on severity.

This is why soil testing is an essential step — it prevents surprise expenses during removal.

Benefits of Soil Testing Before Oil Tank Removal

1. Ensures Environmental Safety

Soil testing protects your property and surrounding areas from contamination risks.

2. Avoids Legal Liability

If contamination spreads to neighboring land, you may be held responsible. Testing prevents future disputes.

3. Speeds Up Real Estate Transactions

Home buyers expect tank removal to be documented properly. Soil test reports provide proof of property safety.

4. Helps Plan the Removal Process

Knowing contamination levels helps contractors choose the right removal strategy.

5. Saves Money in the Long Run

Early detection reduces cleanup costs and minimizes excavation complexity.

Signs You May Need Soil Testing Before Tank Removal

While all tank removals should include testing, you may need urgent soil analysis if you notice:

Oil smell in soil

Discolored grass or vegetation

Wet or mushy ground above tank

High oil usage from your heating system

History of tank leakage

These signs indicate active or past leakage.

FAQs

1. Is soil testing required for every oil tank removal?

In most states, yes — especially when selling a home or removing an underground storage tank.

2. How long does soil testing take?

Sampling takes less than an hour, while lab results typically arrive in 2–5 business days.

3. Can I remove a tank without soil testing?

Not recommended. It may lead to legal or environmental issues later.

4. What happens if contamination is found?

Professionals will plan soil remediation, which may include excavation, soil disposal, and backfilling.

5. Does homeowner’s insurance cover contamination?

Some policies may include limited coverage, but this varies by company and policy type.

Summary

Soil testing before oil tank removal is a crucial step that protects your property, ensures environmental safety, and prevents costly surprises. It confirms whether contamination exists, guides the removal process, and provides the documentation needed for real estate and legal compliance. For reliable inspection, sampling, and tank removal services, Simple Tank Services offers professional expertise and environmentally responsible solutions tailored to every property’s needs.


Soil Remediation After an Oil Tank Leak: How to Remove Contaminated Soil the Right Way

Oil tank leaks pose serious environmental and structural risks, especially when the contamination reaches the soil beneath a property. Whether the tank is above-ground or buried, even a small leak can introduce harmful hydrocarbons into the ground, affect groundwater quality, damage landscaping, and trigger compliance issues with local environmental regulations. That’s why understanding the right steps for soil remediation after an oil tank leak is critical for homeowners, property managers, and contractors.

Proper remediation isn’t just about removing polluted soil. It’s about following a systematic, science-backed process to restore site safety, prevent long-term environmental damage, and meet regulatory standards. Below is a complete, professional guide on how contaminated soil should be removed the right way—and why working with qualified specialists is essential.

Initial Assessment and Leak Confirmation

The soil remediation process begins with a thorough assessment to confirm whether the oil tank has leaked and to what extent. Environmental professionals typically:

Inspect the tank for corrosion, cracks, or failed components

Collect soil samples from different depths and surrounding areas

Use laboratory testing (TPH, BTEX, PAH analysis) to measure contamination levels

Evaluate groundwater risk if the leak has penetrated deeper layers

This diagnostic phase determines the scope of remediation, the excavation depth required, and the potential need for regulatory reporting.

Site Planning and Compliance Review

Oil leaks often fall under state and local environmental laws. Before any soil removal begins, it’s essential to:

Check for mandatory reporting requirements

Identify if the site needs permits

Prepare a remediation action plan (RAP)

Coordinate with environmental authorities, if required

A professional oil tank removal company typically handles this compliance workflow to ensure the project meets all technical and legal standards.

Safe Excavation of Contaminated Soil

Once the plan is approved, the excavation phase begins. This step requires precision and safety:

Key Activities Include:

Marking utility lines before digging

Using the right equipment to remove soil in controlled layers

Separating contaminated and non-contaminated soil

Minimizing dust and preventing the spread of pollutants

Transporting contaminated soil to an approved disposal facility

The depth of excavation depends on lab results. In some cases, soil may need to be removed several feet below the original leak site.

Treatment or Disposal of Contaminated Soil

After excavation, professionals decide whether the soil should be treated on-site or transported offsite for specialized processing.

Common Treatment Options:

Bioremediation: Using microorganisms to break down hydrocarbons

Thermal desorption: Heating soil to vaporize contaminants

Chemical oxidation: Adding oxidizing agents to neutralize pollutants

If the contamination level is high, disposal at a licensed facility becomes the safest and legally compliant approach.

Backfilling and Site Restoration

Once the polluted soil is removed and the remaining ground tests clean, the next step is rebuilding the site.

Professionals will:

Place clean fill soil that meets environmental standards

Compact soil in layers to maintain ground stability

Regrade the area to restore drainage

Rebuild landscaping or structures if needed

Proper restoration ensures the property remains safe, functional, and compliant.

Final Testing and Documentation

After remediation, the site must undergo final testing:

Confirm no residual hydrocarbon contamination exists

Validate groundwater safety if applicable

Produce closure reports for regulatory compliance

Final documentation protects property owners during real estate transactions and insurance claims.

Why Professional Soil Remediation Matters

Handling contaminated soil requires environmental expertise, proper testing, specialized equipment, and regulatory knowledge. Professional soil remediation services ensure:

Accurate contamination assessment

Safe and compliant soil removal

Environmental preservation

Reduced long-term liability

Attempting DIY removal is unsafe, legally risky, and rarely effective.

FAQs

1. How do I know if my oil tank is leaking?

Common signs include oily odors near the tank, dead vegetation, unexplained spikes in heating oil usage, and visible stains. Soil testing provides definitive confirmation.

2. Is soil remediation always required after a tank leak?

Yes. Even small leaks can contaminate soil and groundwater. Local regulations typically require cleanup to prevent long-term hazards.

3. How long does the soil remediation process take?

Depending on contamination severity, soil volume, and state approvals, remediation can take from a few days to several weeks.

4. What does soil remediation usually cost?

Costs vary based on excavation depth, disposal fees, treatment methods, and site access. Professional assessment provides accurate estimates.

5. Can contaminated soil affect property value?

Absolutely. Unresolved contamination can decrease property value, complicate sales, and lead to future liability. Proper remediation protects investment.

Summary

Effective soil remediation after an oil tank leak requires a structured, compliance-focused process—from detailed site assessment and safe excavation to proper disposal and final testing. Following the right steps not only protects the environment but also safeguards your property’s long-term value. Partnering with experienced professionals ensures the cleanup is accurate, efficient, and fully compliant with environmental regulations.

How Can I Get Rid of an Old Oil Tank Safely and Legally in NJ? Complete Homeowner Guide

If you live in New Jersey and have discovered an old oil tank buried underground or sitting in your basement, it’s crucial to handle it properly. Old and unused oil tanks can become serious liabilities—posing environmental, financial, and even legal risks. Whether your home once relied on oil heating or you recently bought a property with a tank on-site, understanding how to remove or decommission it safely is essential. This guide explains everything New Jersey homeowners need to know about safely and legally getting rid of an old oil tank while ensuring compliance with state regulations.

Why Removing an Old Oil Tank Matters

Oil tanks, especially older steel models, tend to corrode over time. When this happens, leaks can occur—seeping oil into the soil and groundwater. This not only causes environmental damage but can also lead to thousands of dollars in cleanup costs. In some cases, homeowners even face property devaluation or difficulties selling their home due to the potential contamination risk.

Here’s why timely removal is essential:

  • Environmental Protection: Leaking tanks contaminate soil and water, harming ecosystems and nearby properties.

  • Home Value Preservation: A property with an old or unregistered tank may raise red flags during inspection, discouraging potential buyers.

  • Legal Compliance: New Jersey has specific regulations on oil tank abandonment, removal, and cleanup. Non-compliance could lead to penalties or liability for environmental damage.

Step 1: Identify the Type and Location of Your Oil Tank

Before taking any action, determine whether your tank is above-ground or underground (UST).

  • Above-Ground Tanks (ASTs): These are usually located in basements, garages, or near the property. They’re easier to inspect and remove.

  • Underground Storage Tanks (USTs): Common in older NJ homes, USTs are buried and require professional inspection to assess integrity and leakage.

You can often locate an underground tank using property records, old heating invoices, or through professional tank detection services.

Step 2: Hire Licensed Professionals for Inspection

New Jersey law mandates that oil tank work—especially involving underground tanks—must be handled by certified contractors. A professional inspection includes:

  • Checking for leaks or corrosion

  • Soil sampling to detect contamination

  • Assessing the tank’s structural integrity

Hiring experts who specialize in oil tank services in New Jersey ensures that every step is done safely and in compliance with state and environmental regulations.

Step 3: Choose Between Removal or Decommissioning

Once inspected, you’ll have two main options depending on the tank’s condition and your future plans for the property:

  • Tank Removal: The most recommended and permanent solution. It involves excavating the tank, draining any remaining oil, cleaning it, and transporting it to an approved disposal facility.

  • Tank Decommissioning (Abandonment): Involves cleaning the tank, filling it with an inert material like sand or foam, and leaving it in place. However, it still requires proper documentation and inspection to confirm it’s safe.

Remember, underground tank removal is often required if the tank is leaking or poses potential environmental risk.

Step 4: Obtain the Required Permits

Before removal or decommissioning, most New Jersey municipalities require permits. These permits ensure that the work complies with NJ Department of Environmental Protection (NJDEP) standards.
A professional contractor will handle permit applications, coordinate with local inspectors, and provide all necessary documentation once the work is completed.

Step 5: Conduct Soil Testing (If Necessary)

If your tank is underground, soil testing is critical. It detects whether oil leakage has contaminated the surrounding area. If contamination is found, you may need soil remediation, which includes excavation and proper disposal of affected soil. Licensed contractors submit these results to the NJDEP for approval.

Step 6: Get a Tank Closure Report

After the tank has been safely removed or decommissioned, you’ll receive a Tank Closure Report. This report provides proof that the process was handled according to state regulations and that no contamination remains. It’s especially valuable when selling your home or refinancing your mortgage, as many lenders require this certification.

Step 7: Never Attempt DIY Removal

Oil tank removal is not a do-it-yourself project. Handling fuel residues, disposing of contaminated soil, and ensuring proper documentation all require professional knowledge and equipment. Attempting DIY removal can result in serious safety hazards, costly fines, and long-term environmental damage.

Cost Considerations for Oil Tank Removal in NJ

The cost of removing or decommissioning an oil tank in New Jersey typically depends on factors such as:

  • Tank size and location (underground vs. above-ground)

  • Soil contamination level

  • Required testing and permits

While prices vary, professional oil tank services in New Jersey are a worthwhile investment. Proper removal not only ensures safety but also protects your home’s value and prevents potential future expenses related to contamination or regulatory violations.

Final Thoughts

Old oil tanks may seem harmless if they’re not in use, but hidden leaks or corrosion can create bigger problems down the road. Whether you’re planning a renovation, selling your property, or simply taking preventive steps, it’s best to act now. Hire a licensed and experienced company that specializes in oil tank removal and environmental safety to manage the process efficiently and lawfully.

For professional, certified, and environmentally responsible oil tank solutions, trust Simple Tank Services, your reliable partner for safe and compliant tank removal in New Jersey.

Preparing Your Property for Oil Tank Removal: Tips from Experts

Removing an oil tank from your property is not as simple as digging it up and hauling it away. It involves a series of crucial steps that ensure safety, compliance with environmental laws, and the protection of your property’s value. Whether you are preparing for an underground or above-ground oil tank removal, taking the right preparatory measures can make the process smoother, faster, and more cost-effective. Here are some expert-recommended tips to help you get your property ready for a safe and efficient oil tank removal.

Understand the Importance of Proper Preparation

Oil tank removal is a complex task that requires careful planning. If not handled correctly, it can lead to soil contamination, fuel leaks, and even regulatory penalties. Proper preparation ensures that the removal process is compliant with local laws and minimizes risks to the environment and property. Before scheduling the job, it’s essential to know the type of tank installed, its location, and its condition. This helps the professionals create a removal plan tailored to your specific property needs.

Hire a Licensed Oil Tank Removal Company

The most crucial step in preparing for oil tank removal is hiring a professional and licensed oil tank removal company. Experienced contractors understand the environmental regulations, safety standards, and technical requirements associated with tank removals. They will inspect your site, determine the best removal strategy, and handle permits or inspections required by local authorities. Working with experts ensures the job is completed safely and efficiently, without unexpected delays or costly mistakes. Always verify that the company is certified, insured, and experienced in both residential and commercial tank removals.

Schedule a Pre-Removal Inspection

A professional inspection before the actual removal can identify potential challenges, such as leaks, corrosion, or soil contamination. During this stage, the technician may use ground-penetrating radar (GPR) or soil testing to assess the tank’s condition. This step is vital because it provides a clear understanding of whether the tank has been compromised and if remediation may be required afterward. A pre-removal inspection also helps the contractor estimate the time and cost involved more accurately.

Secure All Necessary Permits

Oil tank removal often requires permits from local environmental or building authorities. These permits ensure that the removal process complies with environmental safety standards. A professional oil tank removal company usually assists with filing the required paperwork and securing approvals on your behalf. However, as the property owner, you should confirm that all permits are in place before the project begins. Skipping this step can result in fines, delays, or legal complications later on.

Prepare the Surrounding Area

Before the removal team arrives, make sure the work area is accessible and free from obstacles. Clear away any outdoor furniture, vehicles, or landscaping materials that might obstruct equipment or personnel. If the tank is underground, ensure that the area above it is not covered with heavy structures, such as driveways or decks, which could complicate access. For indoor or basement tanks, clear pathways to allow workers to move safely in and out of the space.

Drain and Clean the Tank

To prevent spills or contamination, the oil tank must be emptied before removal. Professionals will safely pump out any remaining oil or sludge and clean the tank using specialized equipment. This step ensures the tank is safe to transport and minimizes environmental risks. Never attempt to drain or clean the tank yourself — it requires professional-grade equipment and disposal methods to comply with environmental regulations.

Be Ready for Post-Removal Testing

Once the tank is removed, environmental testing is often required to check for soil contamination or leaks that might have occurred over time. If contamination is detected, remediation may be necessary to restore soil quality and ensure your property meets environmental standards. Post-removal testing is not just a regulatory step — it also protects your property value, especially if you plan to sell in the future.

Keep Documentation for Future Reference

After the removal process, your contractor should provide documentation such as inspection reports, environmental test results, and certificates of completion. Keep these records in a safe place — they serve as proof that the tank was properly removed and can be useful during property sales, insurance claims, or future inspections.

Final Words

Preparing your property for oil tank removal requires careful coordination, expert guidance, and adherence to environmental standards. From obtaining the right permits to ensuring proper cleanup and documentation, every step plays a vital role in maintaining safety and compliance. By following these expert tips and working with a trusted oil tank removal company, you can protect your property from potential hazards and future liabilities.

For professional, reliable, and environmentally responsible oil tank removal services, homeowners and businesses alike trust Simple Tank Services, where expertise meets safety and precision.

How an Oil Tank Removal Company in NJ Can Save You from Hidden Property Liabilities

Owning a property in New Jersey comes with its perks, but it also brings hidden responsibilities—one of which could be the presence of an underground oil tank. Many homeowners and property investors may not even realize that an old, forgotten oil tank can pose serious environmental and financial risks. Engaging a professional oil tank removal company in NJ is more than a precaution; it’s an essential step toward protecting your property from hidden liabilities.

Understanding the Risks of Abandoned Oil Tanks

Underground oil tanks, especially those that have been neglected for years, can develop leaks. These leaks are not only harmful to the environment but also extremely costly to manage. Contaminated soil and groundwater resulting from leaking tanks can lead to severe legal and financial obligations. Homeowners might face fines, cleanup costs, and even lawsuits if the contamination spreads beyond their property boundaries.

Moreover, hidden oil tanks can complicate property sales or transfers. Buyers are often wary of properties with potential environmental hazards. Failing to disclose an old oil tank may result in liability claims, making the property difficult to sell or refinance.

The Role of an Oil Tank Removal Company

A professional oil tank removal company in NJ specializes in safely extracting and disposing of underground and above-ground oil tanks. Their expertise goes beyond simply removing the tank—they assess the surrounding soil, check for leaks, and ensure that the property complies with state and federal environmental regulations.

One of the key advantages of hiring such a company is their ability to conduct thorough site evaluations. Experienced teams use modern detection equipment to locate tanks, determine their condition, and identify any signs of contamination. Once the tank is removed, the team can provide certification, proving that the property is safe and compliant, which is crucial when selling or refinancing your home.

Importance of Soil Remediation

Even after the tank is removed, residual contamination in the soil may remain. This is where soil remediation comes into play. Soil remediation involves cleaning, removing, or neutralizing pollutants in the ground to restore it to a safe and usable condition. A professional oil tank removal company often partners with soil remediation experts to ensure that any contamination is fully addressed.

Proper soil remediation not only protects your health and the environment but also safeguards you from future liabilities. Contaminated soil left untreated can lead to regulatory penalties and expensive remediation costs down the line, making early intervention vital.

Financial Benefits of Professional Removal

While some property owners may consider DIY tank removal, the financial risks often outweigh the cost savings. Professional oil tank removal services help prevent costly environmental fines, legal claims, and potential decreases in property value. Insurance providers may also offer better coverage terms for properties that have undergone certified tank removal and soil remediation.

Additionally, proactive removal and remediation can increase your property’s marketability. Prospective buyers and investors are more confident in purchasing a property that has been professionally inspected and cleared of environmental hazards, which can translate into faster sales and better prices.

Compliance with Regulations

New Jersey has strict regulations regarding oil tank removal and environmental safety. Licensed oil tank removal companies ensure that all work is compliant with state laws and industry best practices. They handle permits, disposal, and reporting requirements, saving you the burden of navigating complex legal processes.

Compliance is not just about following the law—it’s about protecting yourself from potential liability. A certified removal and remediation report can serve as legal proof that you took responsible steps to maintain a safe property.

Peace of Mind for Homeowners

At the end of the day, hiring a professional oil tank removal company in NJ is about peace of mind. Knowing that your property is free from hidden hazards allows you to enjoy your home or investment without worry. It eliminates the uncertainties associated with aging infrastructure and environmental contamination while ensuring long-term safety and compliance.

Final Words

Hidden oil tanks can be a silent threat to property owners in New Jersey, posing environmental, financial, and legal risks. Engaging a professional oil tank removal company ensures the safe extraction of tanks and provides access to essential soil remediation services. This proactive approach not only mitigates potential liabilities but also enhances property value, marketability, and peace of mind. Whether you are a homeowner or real estate investor, investing in certified tank removal and soil remediation is a smart, responsible step toward protecting your property and your future.