How Much Does Basement Oil Tank Removal Cost in New Jersey?

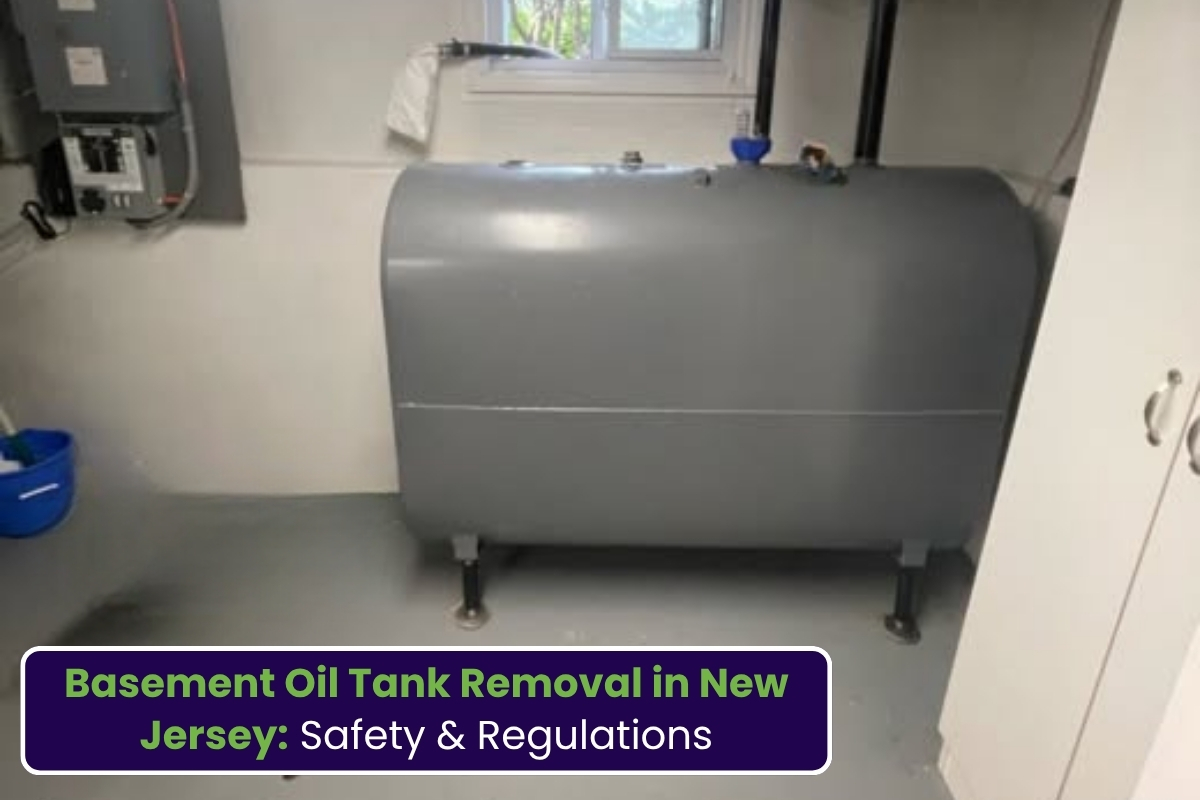
Many older homes across New Jersey still contain heating oil tanks in their basements. While these tanks were once a common heating solution, aging systems can create environmental concerns, safety risks, and challenges during property sales. Because of this, many homeowners are now considering basement oil tank removal to protect their homes and maintain property value.
The overall process involves more than simply removing a tank. Contractors often need to inspect the tank, clean residual oil, secure permits, disconnect fuel lines, and safely dispose of old materials. Understanding these steps can help homeowners make informed decisions and avoid future complications. In this guide, we will explain the important factors involved in basement oil tank removal in New Jersey, discuss environmental considerations, and help homeowners understand what to expect during the process.

Understanding Basement Tank Removal Services

Basement tank removal services typically include inspection, preparation, tank cleaning, fuel line disconnection, and safe removal from the property. Professional contractors also evaluate whether the tank shows signs of corrosion, leakage, or structural weakness before beginning work.
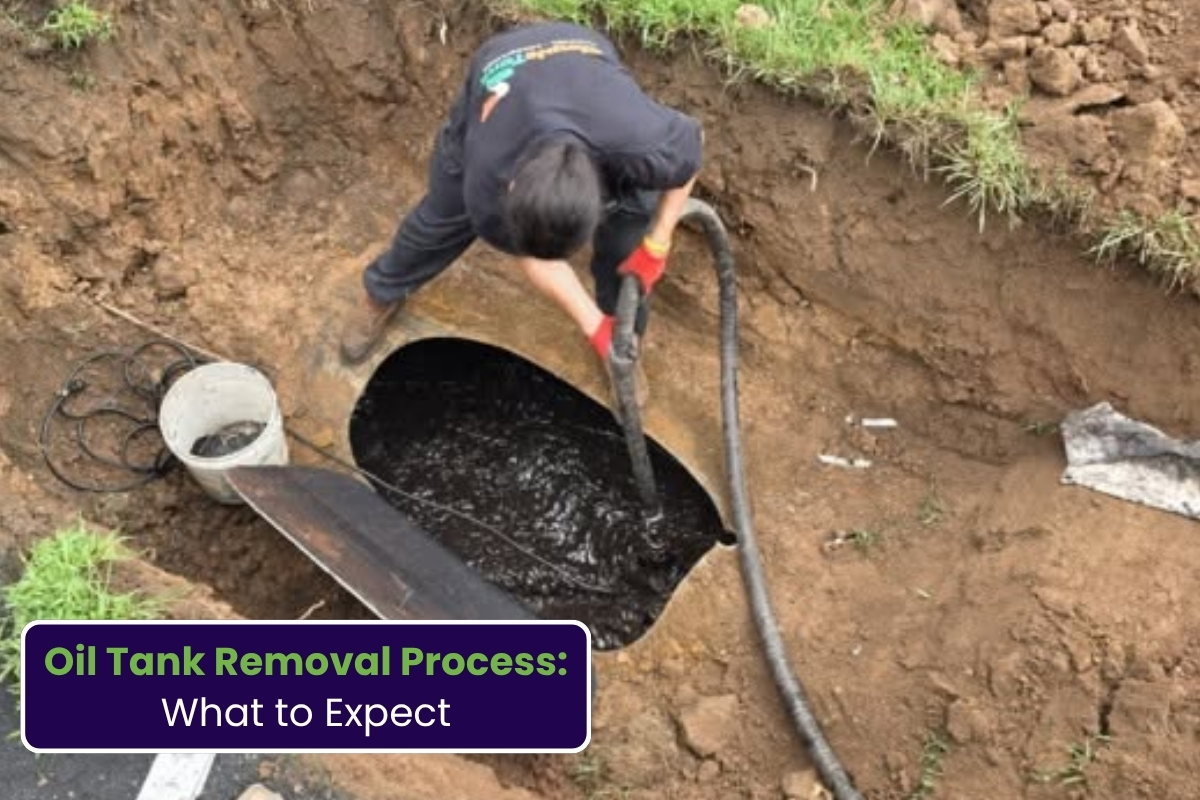
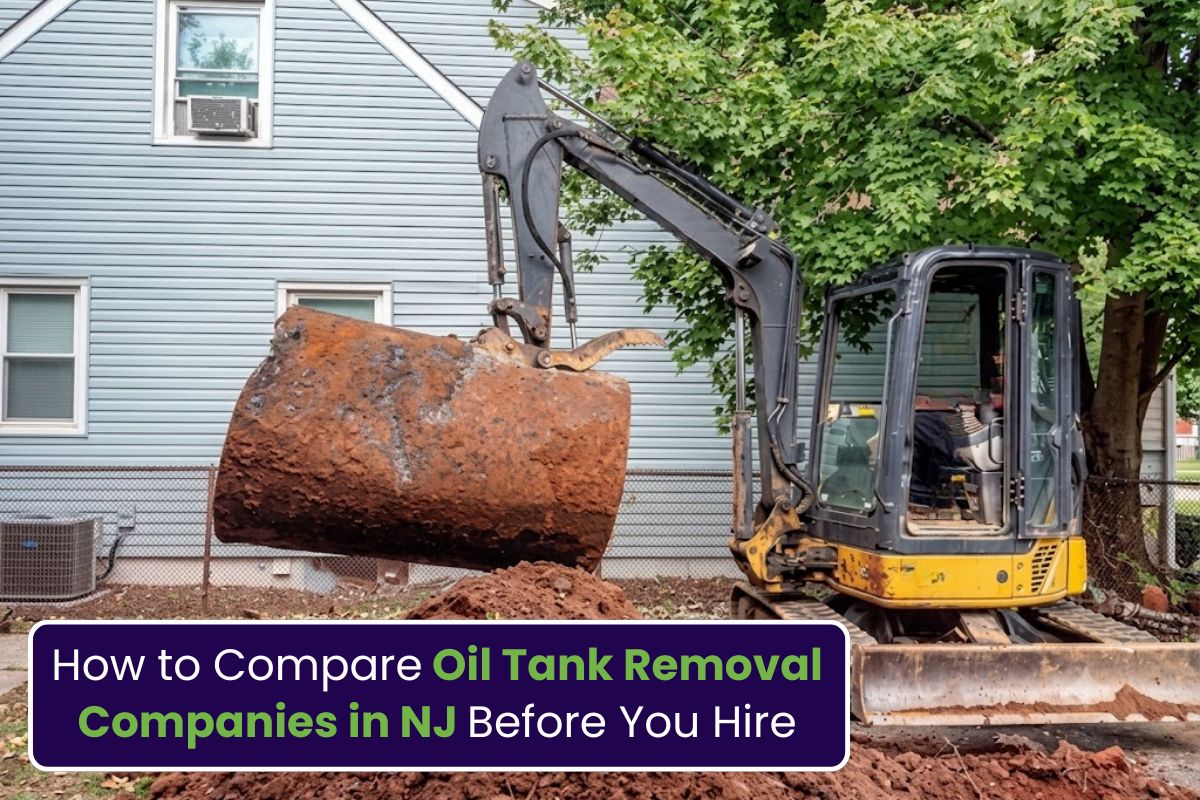
Older basement tanks may contain sludge, oil residue, or rust buildup that requires careful handling. Removal specialists use proper equipment and safety procedures to reduce environmental risks and protect indoor air quality during the process. Homeowners should also understand that basement access can affect the complexity of removal. Narrow staircases, confined spaces, or oversized tanks may require additional planning and specialized equipment.

Important Factors That Affect Oil Tank Removal Cost

Several factors influence the oil tank removal cost for residential properties in New Jersey. One of the biggest considerations is the tank’s condition. A clean and structurally stable tank is usually easier to remove than a damaged or deteriorated system. Other important factors include:

-Tank size and location

-Ease of basement access

-Presence of sludge or oil residue

-Required permits and inspections

-Environmental testing requirements

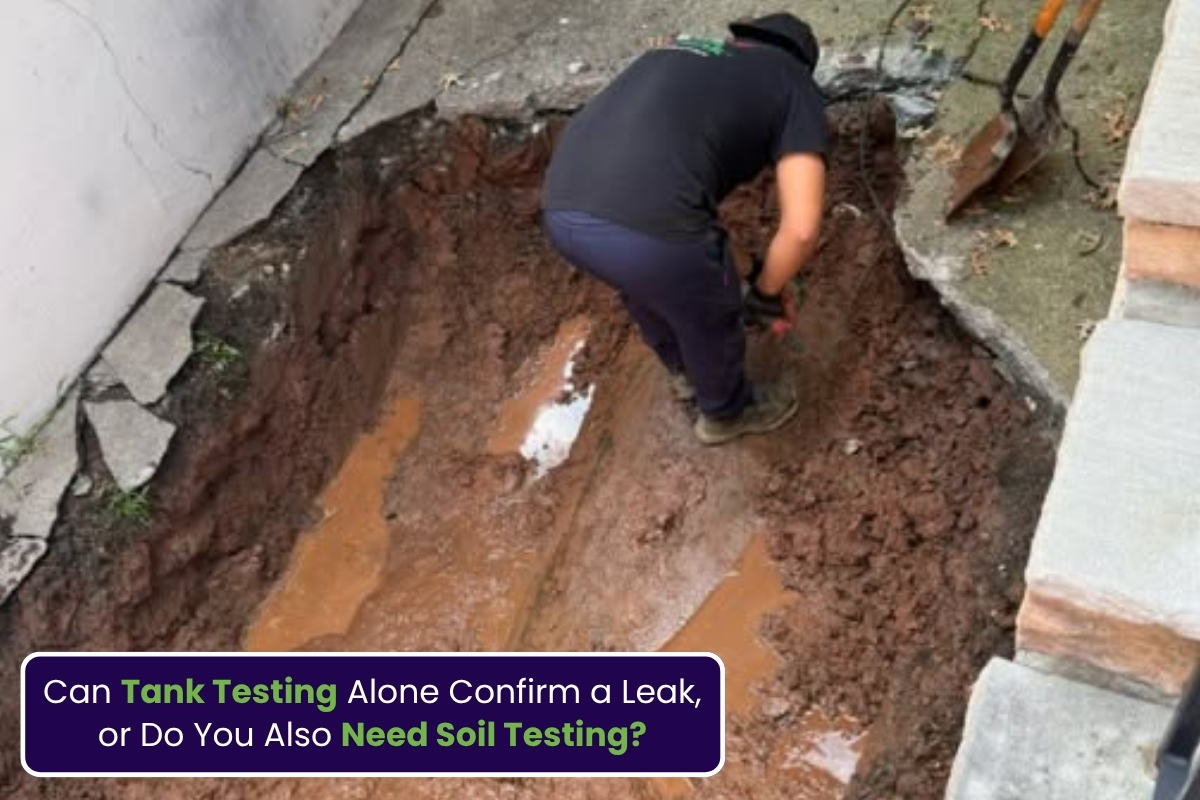
-Need for soil or contamination assessment

If a contractor discovers evidence of leakage or contamination, additional environmental services may become necessary. This is why early inspections are important for homeowners with aging oil tanks.

Why Proper Oil Tank Disposal Matters

Safe oil tank disposal is an essential part of the removal process. Old tanks cannot simply be discarded as ordinary construction waste because they may contain hazardous residue or petroleum byproducts.
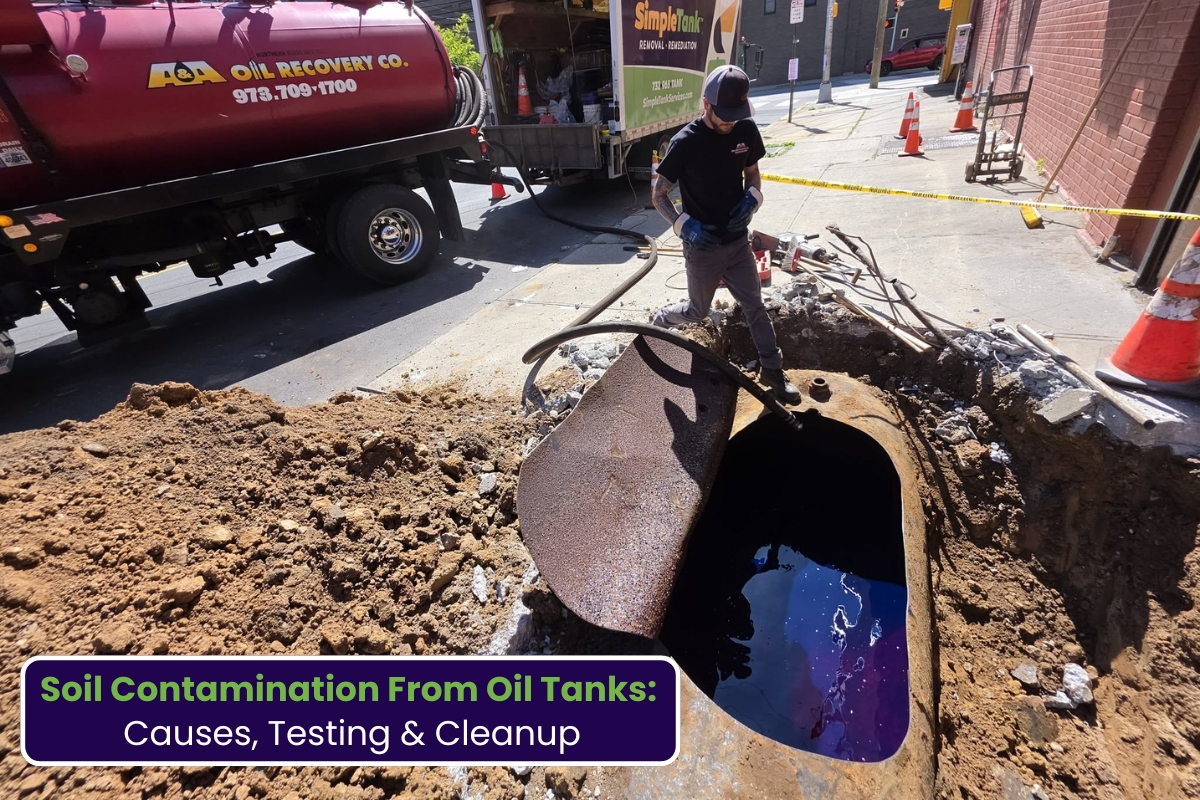
Licensed contractors follow state and local environmental regulations to ensure proper disposal procedures. Tanks are typically drained, cleaned, cut if necessary, and transported to approved recycling or disposal facilities. Improper disposal can lead to environmental penalties and contamination concerns. Working with experienced professionals helps homeowners avoid unnecessary risks and ensures compliance with New Jersey environmental guidelines.

Understanding Heating Oil Tank Removal Cost Considerations

The heating oil tank removal cost can vary depending on the complexity of the project and the condition of the tank. Indoor tanks located in basements often require careful maneuvering to avoid damaging walls, flooring, or stairways during removal.
Another important consideration is whether the tank is still connected to an active heating system. Contractors may need to disconnect pipes, remove old fuel lines, and inspect surrounding areas before proceeding. Homeowners searching for reliable solutions for oil tank removal in New Jersey should also prioritize contractors with environmental experience and proper licensing. Choosing qualified professionals helps ensure the project is completed safely and according to regulations.

Risks Associated With Old Oil Tank Removal

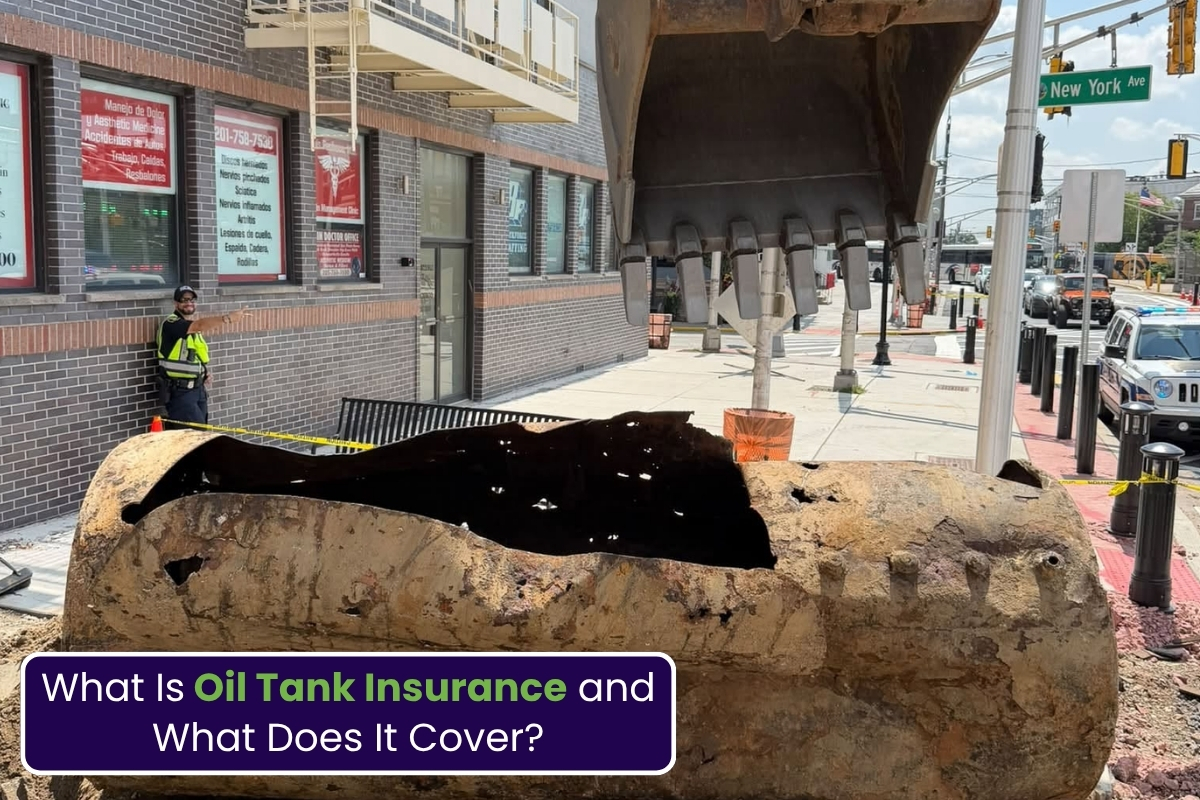
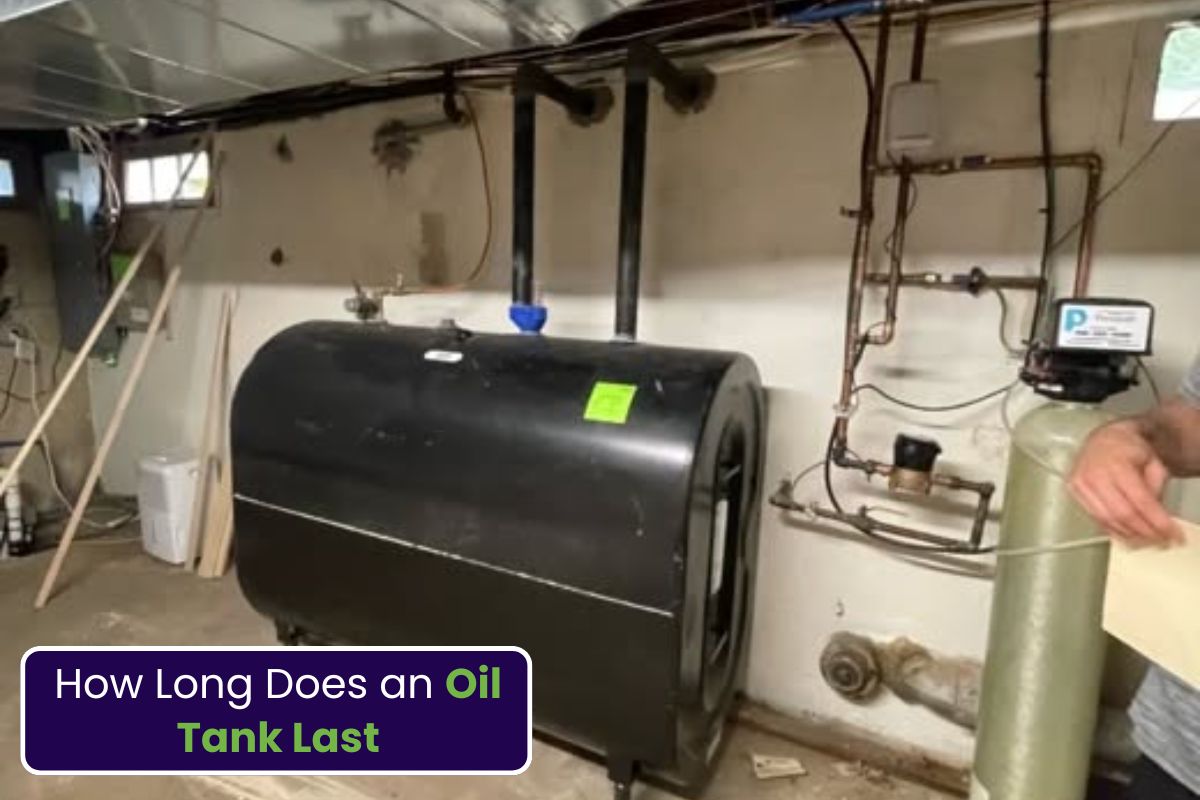
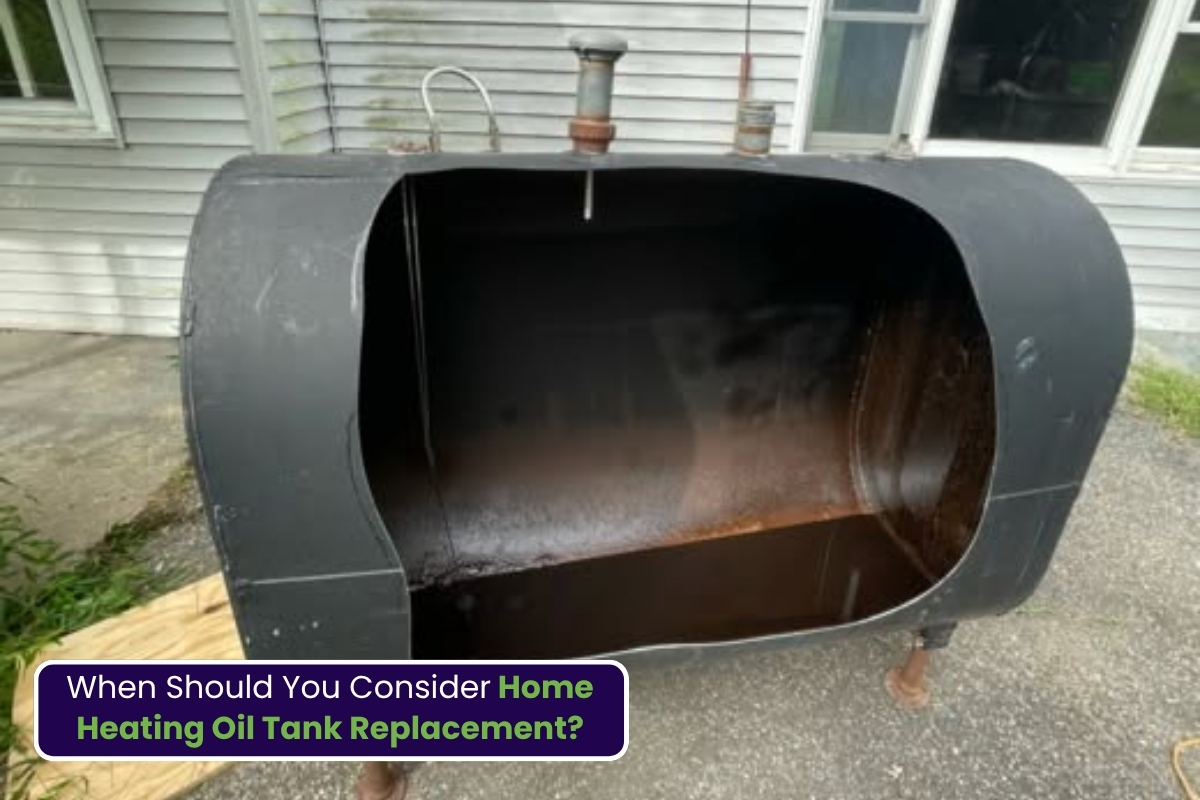
Old oil tank removal is often recommended when tanks show signs of aging, rust, or deterioration. Even tanks that appear stable from the outside may have hidden corrosion inside. Some common warning signs include:

-Rust or visible corrosion

-Oil odors in the basement

-Staining near the tank base

-Uneven tank positioning

-Frequent heating issues

-Moisture buildup around the tank

Leaving an aging tank in place for too long may increase the likelihood of leaks and environmental damage. Removing older systems proactively can help homeowners avoid more serious problems later.

Basement Fuel Tank Removal and Home Safety

Basement fuel tank removal plays an important role in maintaining a safe living environment. Aging tanks can create indoor air quality concerns if fumes or oil vapors begin escaping into enclosed spaces.
In addition, older tanks may weaken structurally over time, increasing the possibility of sudden leaks. Basement leaks can spread quickly through flooring and foundation areas, creating expensive cleanup challenges. Professional removal helps eliminate these risks while also improving overall home safety and reducing future environmental concerns.

Underground and Basement Oil Tank Removal Differences

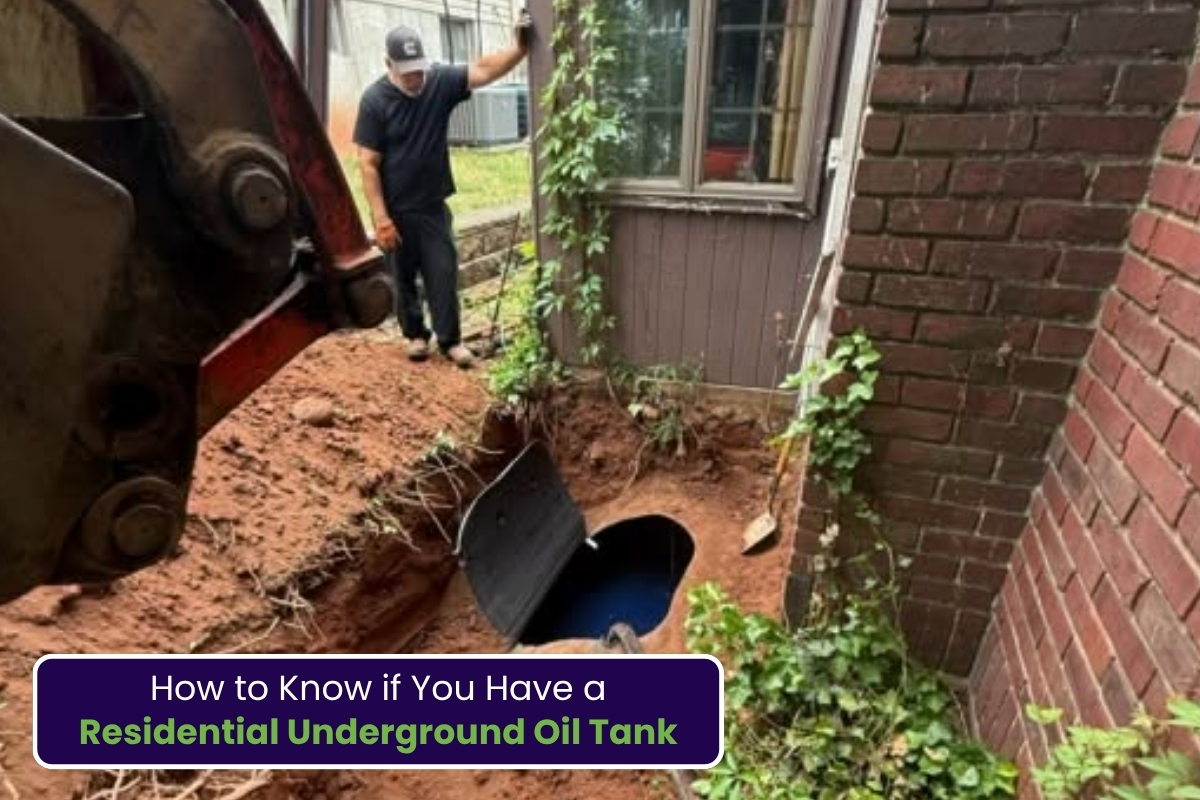
Underground and basement oil tank removal projects involve different procedures and environmental considerations. Basement tanks are typically easier to access because they are located inside the home, while underground tanks often require excavation and soil testing.
However, basement systems can still present challenges if the tank is oversized or located in a difficult-to-reach area. Contractors must evaluate ventilation, accessibility, and potential contamination risks before starting the removal process. Understanding these differences helps homeowners prepare for inspections and choose the appropriate removal strategy for their property.

Why Oil Tank Cleaning and Removal Go Together

Oil tank cleaning and removal are usually performed together to ensure safe handling and transportation of the tank. Before removal, contractors clean out remaining fuel, sludge, and hazardous residue from inside the system. This cleaning process helps:

-Reduce fire hazards

-Prevent spills during removal

-Improve workplace safety

-Ensure environmental compliance

-Allow proper disposal or recycling

Professional cleaning is especially important for older tanks that have accumulated heavy sludge over many years of use.

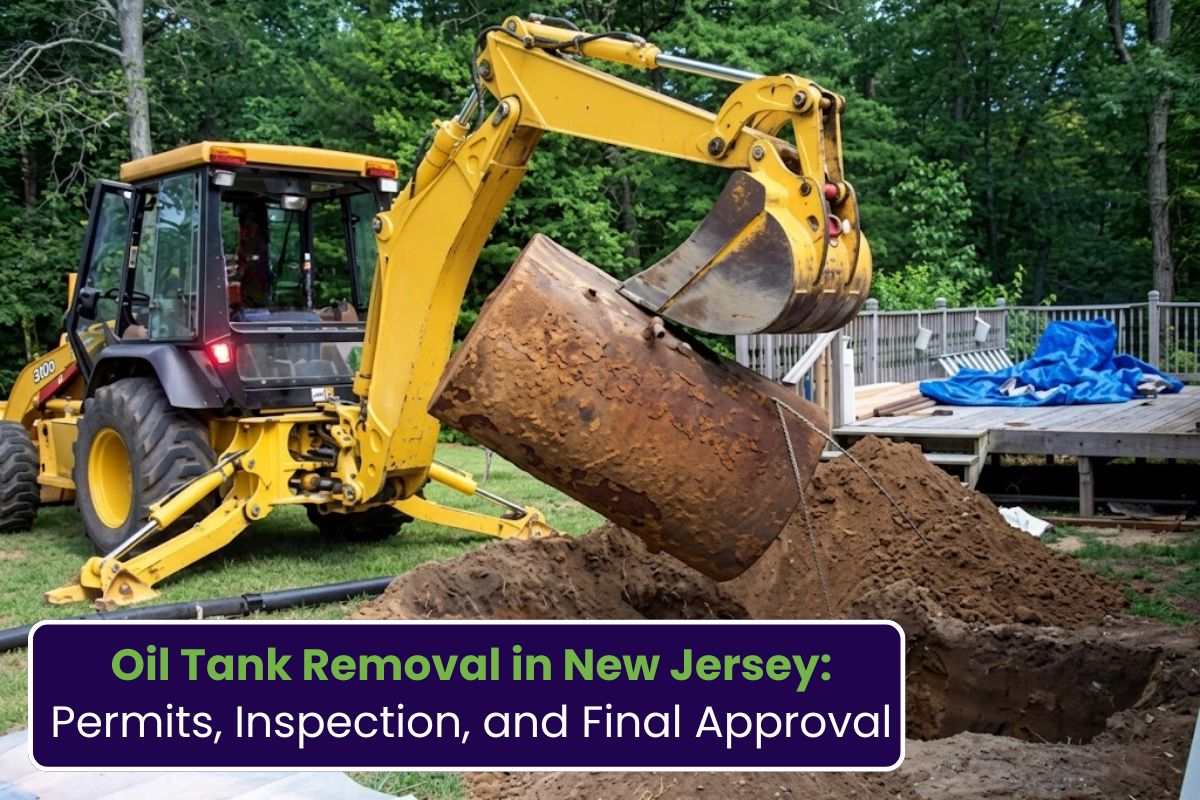
Understanding Oil Tank Removal Permits in New Jersey

Oil tank removal permits are often required before work can begin. Permit requirements may vary depending on the municipality and the type of tank being removed.
Permits help ensure that removal work follows environmental and construction regulations. Some towns may also require inspections after removal to confirm the property is safe and compliant. Working with experienced contractors can simplify the permit process because they often handle documentation, scheduling, and inspection coordination on behalf of homeowners.

Why Leaking Oil Tank Removal Requires Immediate Attention

Leaking oil tank removal should never be delayed. Even small leaks can spread into flooring, concrete, and nearby structures, potentially leading to environmental contamination.
In some cases, oil may seep into surrounding soil or groundwater, creating long-term cleanup concerns. Fast action helps minimize damage and may reduce the extent of remediation work required. Homeowners who notice strong odors, staining, or unexplained moisture near their oil tank should contact professionals for inspection as soon as possible.

The Role of Environmental Oil Tank Services

Environmental oil tank services are designed to protect both homeowners and surrounding ecosystems during the removal process. These services may include:

-Environmental inspections

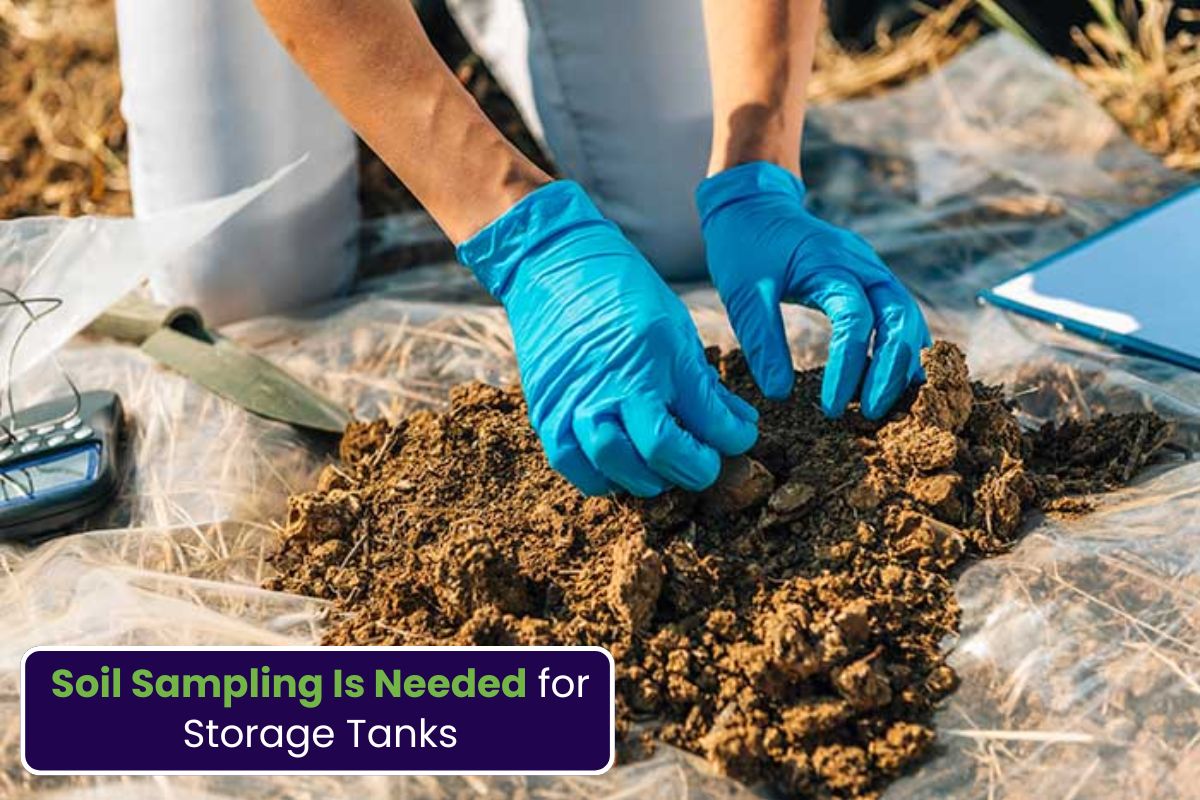
-Soil testing

-Groundwater evaluation

-Contamination assessments

-Site remediation recommendations

Environmental professionals help identify potential risks early and ensure all removal work complies with state environmental standards. These services are especially important for older homes where tanks may have been in place for decades without inspection.

What Is Basement Oil Tank Decommissioning?

Basement oil tank decommissioning refers to the process of safely taking an oil tank out of service. This may involve disconnecting the system, removing residual fuel, cleaning the tank, and preparing it for removal or abandonment according to local regulations.
Decommissioning helps reduce environmental risks while ensuring the heating system is safely shut down. Proper documentation may also be useful for future home sales or property inspections. Many homeowners choose professional decommissioning services to ensure every step is completed correctly and safely.

FAQs

Q1. How do I know if my basement oil tank should be removed?

Signs such as rust, oil odors, corrosion, staining, or an aging heating system may indicate the tank should be inspected or removed.

Q2. Are permits required for basement oil tank removal in New Jersey?

Yes, many municipalities in New Jersey require permits before removal work begins.

Q3. Can an old basement oil tank leak without visible damage?

Yes. Internal corrosion may cause hidden leaks before visible exterior damage appears.

Q4. Why is oil tank cleaning necessary before removal?

Cleaning removes sludge and oil residue, helping ensure safer handling and proper disposal.

Q5. What happens if contamination is discovered during removal?

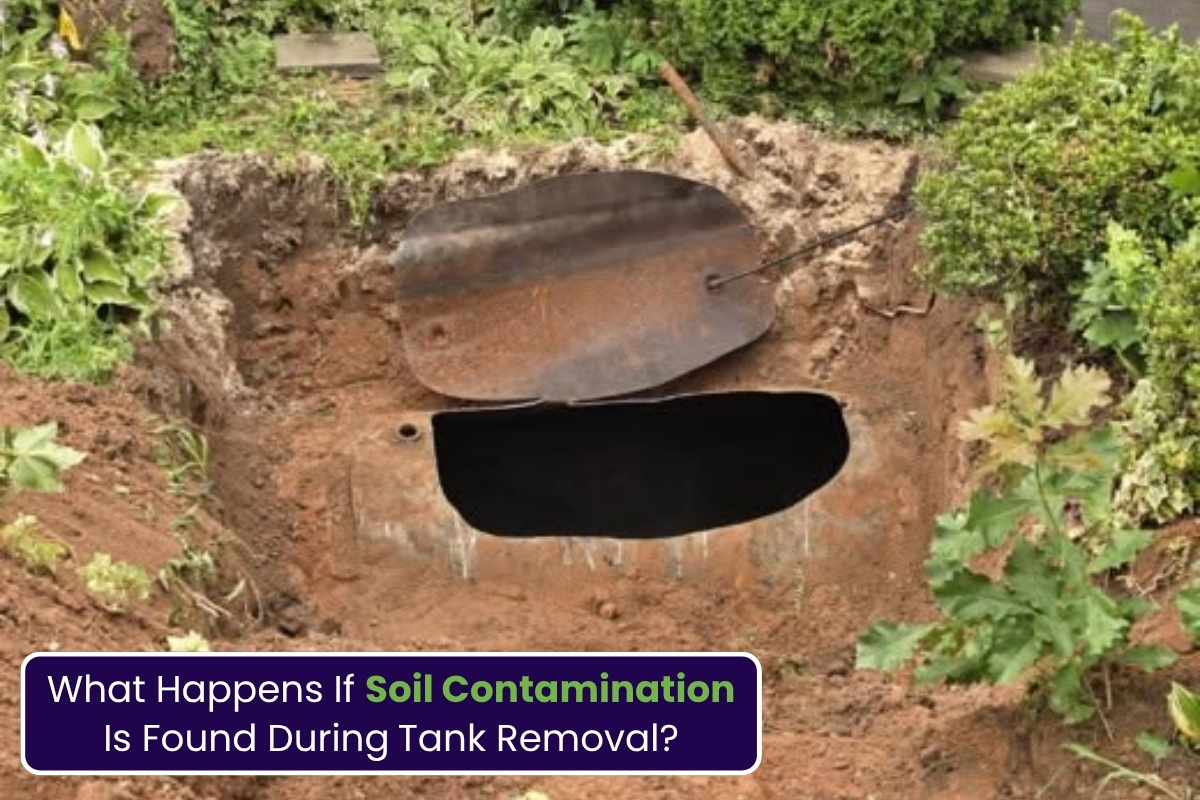
Environmental professionals may recommend soil testing, remediation, or additional cleanup procedures.

Summary

Basement oil tank removal is an important step for homeowners looking to improve safety, reduce environmental risks, and prepare their property for the future. From inspections and permits to cleaning and disposal, every stage of the process should be handled carefully by experienced professionals. Companies like Simple Tank Services help homeowners navigate the removal process with professional environmental solutions and reliable service across New Jersey.

How Oil Tank Removal in New Jersey Help Protect Homes from Leaks and Soil Contamination

Older oil tanks can create serious problems for homeowners when they begin to corrode, crack, or leak underground. Many residential properties across New Jersey still have aging heating oil tanks buried beneath yards, driveways, or basements. Over time, these tanks may release oil into the surrounding soil, leading to contamination, environmental concerns, and structural risks.
Proper oil tank removal is one of the most effective ways to protect homes from hidden leaks and long-term damage. By safely removing outdated tanks and addressing contaminated soil early, homeowners can reduce environmental risks and maintain the value and safety of their properties. This guide explains how professional oil tank services help prevent leaks, improve environmental safety, and support healthier residential properties throughout New Jersey.

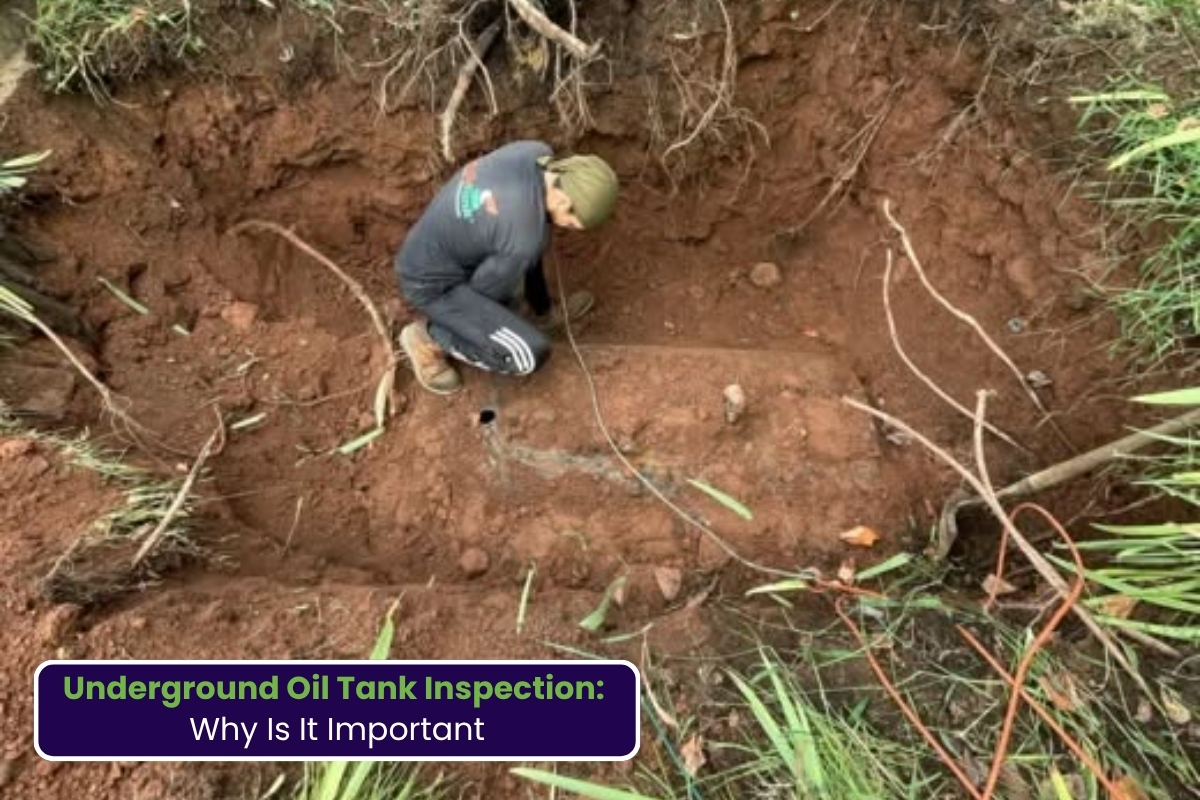
Understanding Underground Oil Tank Removal and Why It Matters

Many homes built decades ago used underground oil tanks to store heating fuel. While these systems were common in the past, aging tanks can eventually rust and leak beneath the surface. Since underground damage is often difficult to detect early, small leaks may continue for years before homeowners notice signs of contamination.
Professional underground oil tank removal helps eliminate this hidden risk by safely excavating old tanks before they fail completely. Removing outdated tanks also helps homeowners avoid environmental complications that may affect future property sales or renovations. Common warning signs of an aging underground tank include:

-Unusual fuel odors around the property

-Dying grass or dark soil patches

-Increased heating oil consumption

-Rust or corrosion near exposed piping

-Soil discoloration around the tank area

Early removal can prevent larger environmental problems and protect nearby groundwater from contamination.

The Importance of Oil Tank Leak Prevention for Residential Properties

One of the biggest concerns with old heating systems is the possibility of fuel leaks. Even a small amount of leaking oil can spread into surrounding soil and create long-term environmental hazards. Effective oil tank leak prevention starts with regular inspections and timely tank replacement. Homeowners who remove aging tanks before they fail can avoid major contamination issues and reduce risks to nearby structures and landscaping.

Signs of a Leaking Oil Tank

-Strong petroleum smells indoors or outdoors

-Oil stains near the tank area

-Heating system performance issues

-Wet or contaminated soil near buried tanks

-Sudden increases in fuel usage

Preventive action is always safer than waiting for visible contamination to appear.

Why Soil Contamination Cleanup Is Essential After a Leak

When heating oil enters the ground, it can affect both soil quality and nearby water sources. Fuel contamination may spread quickly beneath the surface, especially during periods of heavy rain or flooding. Professional soil contamination cleanup helps restore affected areas by removing polluted soil and preventing further environmental damage. Cleanup professionals use specialized equipment and environmental testing methods to identify the extent of contamination and safely remove impacted materials. Ignoring contaminated soil may lead to:

-Environmental hazards

-Unpleasant odors around the property

-Damage to landscaping

-Groundwater pollution

-Difficulties during property transactions

Timely cleanup helps restore safety and reduces long-term environmental concerns.

How Heating Oil Tank Removal Supports Long-Term Property Safety

Aging heating systems often become unstable as tanks weaken over time. Corroded tanks can eventually collapse or leak unexpectedly, especially when exposed to moisture underground. Professional heating oil tank removal improves long-term property safety by eliminating outdated systems before they become hazardous. Removing old tanks also creates opportunities for homeowners to upgrade heating systems and improve energy efficiency.
At this stage, many homeowners researching oil tank removal in New Jersey also look for ways to prevent future contamination risks and maintain property value through proper environmental protection measures. Removing old tanks before problems develop is one of the most effective ways to avoid future structural and environmental complications.

Safe Oil Tank Excavation and Environmental Protection

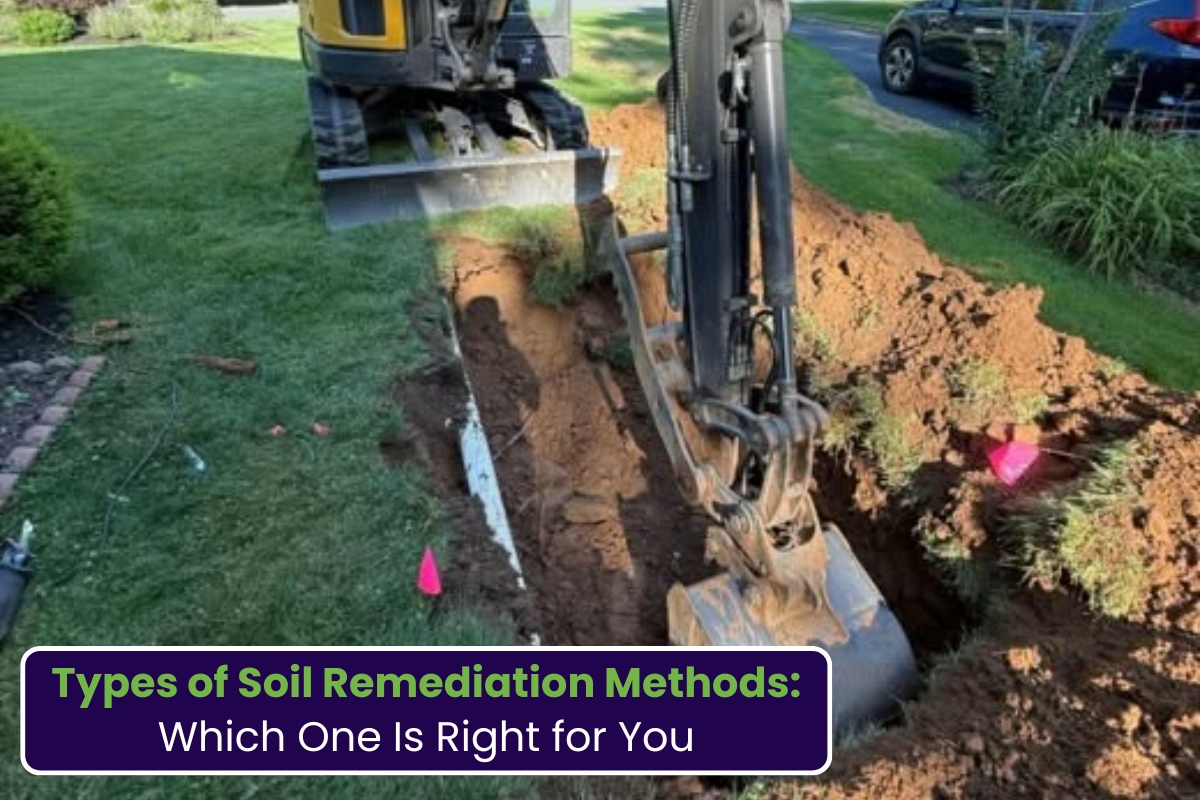
Professional oil tank excavation requires careful planning and specialized equipment to avoid unnecessary property damage. Excavation teams follow environmental safety guidelines while removing underground tanks and surrounding contaminated materials. During excavation, professionals typically:

-Locate the underground tank

-Remove remaining oil safely

-Excavate surrounding soil carefully

-Inspect the tank for leaks or corrosion

-Dispose of the tank according to environmental regulations

Proper excavation protects nearby landscaping, underground utilities, and neighboring properties from additional risks.

Why Contaminated Soil Removal Helps Prevent Further Damage

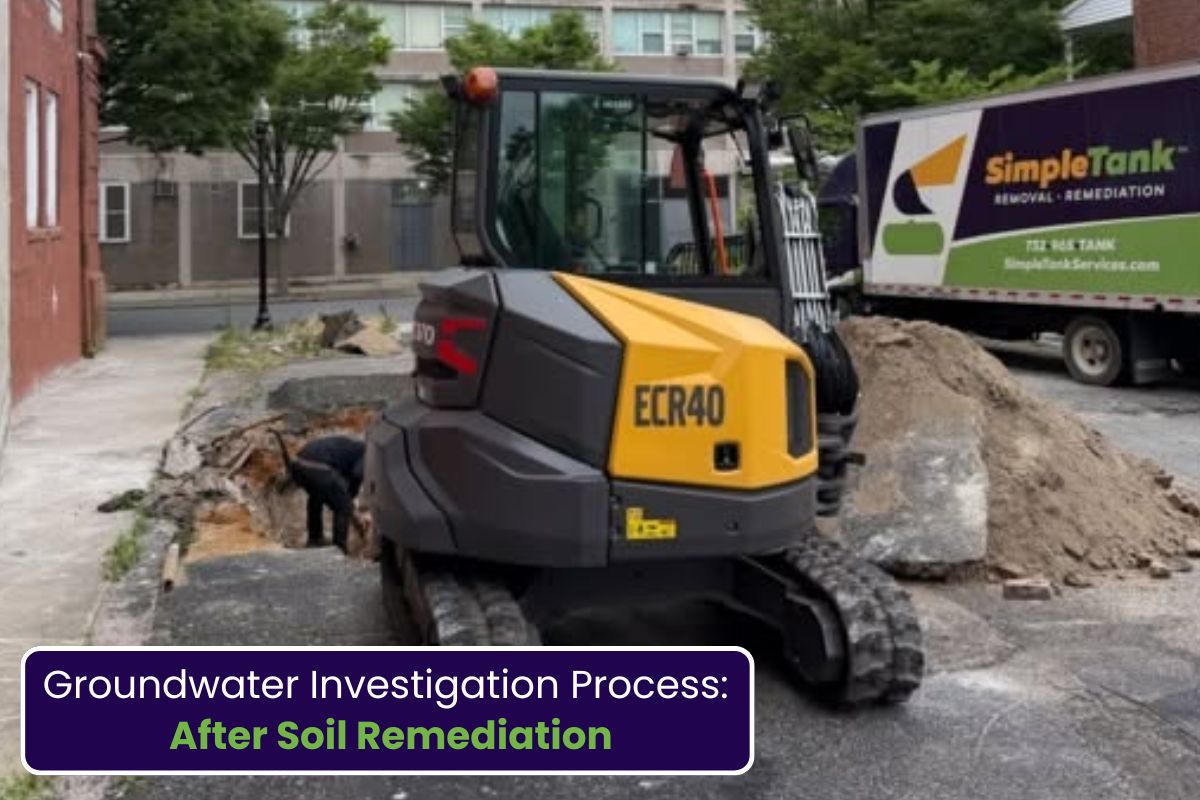
If a leaking tank has already affected the ground, contaminated soil removal becomes an important part of the restoration process. Removing polluted soil helps stop contamination from spreading deeper into surrounding areas. Specialized cleanup crews identify affected sections of soil and remove contaminated materials using approved environmental procedures. Once removal is complete, replacement soil may be added to restore the property safely. This process supports:

-Healthier outdoor environments

-Improved soil quality

-Safer residential conditions

-Reduced environmental liability

-Better long-term property protection

Removing contaminated soil early also helps reduce complications during future construction or landscaping projects.

Environmental Cleanup and Property Protection After Oil Tank Removal

Comprehensive environmental cleanup is often necessary when old oil tanks leak underground. Environmental professionals may conduct inspections, testing, and remediation services to restore affected areas safely. Cleanup efforts focus on:

-Preventing contamination spread

-Protecting groundwater quality

-Restoring soil conditions

-Meeting environmental safety requirements

-Reducing future property risks

Environmental restoration helps homeowners regain confidence that their property is safe for long-term use.

How Home Oil Tank Services Support Safer Residential Properties

Reliable home oil tank services involve more than just removing old tanks. Professional providers also inspect systems, identify potential environmental concerns, and recommend proper remediation steps when needed. Comprehensive services may include:

-Tank inspections

-Leak detection

-Soil testing

-Tank excavation

-Environmental assessments

-Site restoration

Working with experienced professionals helps homeowners address hidden risks before they become major environmental issues.

Finding the Right Leaking Oil Tank Solution for Older Homes

Every property requires a different leaking oil tank solution depending on the age of the tank, location of contamination, and surrounding environmental conditions. Professional environmental specialists evaluate the situation carefully before recommending the safest approach. Solutions may involve tank removal, remediation services, soil replacement, or additional environmental testing.

Benefits of Professional Tank Removal

-Reduced environmental risks

-Improved property safety

-Protection against future contamination

-Safer outdoor conditions

-Better long-term property maintenance

Addressing leaks early is critical for minimizing environmental damage.

Property Contamination Prevention Starts with Early Action

The best form of property contamination prevention is proactive maintenance and timely oil tank removal. Waiting too long to remove aging tanks increases the risk of hidden leaks and soil damage. Homeowners can help protect their property by:

-Scheduling regular inspections

-Monitoring fuel usage patterns

-Replacing outdated systems

-Investigating unusual odors immediately

-Removing abandoned underground tanks

Preventive measures support safer residential environments and reduce the chances of major environmental cleanup projects later.

Why Oil Tank Cleanup Services Are Important After Tank Removal

Professional oil tank cleanup services help ensure contaminated materials are handled safely after removal. Cleanup crews follow environmental guidelines to remove polluted soil, clean affected areas, and restore the property. Cleanup services are especially important when:

-Tanks show signs of corrosion

-Fuel odors remain after removal

-Soil testing reveals contamination

-Nearby groundwater may be affected

Complete cleanup reduces long-term environmental concerns and supports safer property conditions.

The Importance of Safe Oil Tank Removal Practices

Professional safe oil tank removal protects homeowners, workers, and the environment throughout the removal process. Improper handling of old tanks may increase contamination risks or create safety hazards. Licensed professionals follow strict environmental procedures to:

-Drain remaining oil safely

-Remove hazardous materials properly

-Prevent additional spills during excavation

-Dispose of tanks according to regulations

Safe removal practices help minimize environmental damage while protecting surrounding structures and landscaping.

Understanding Oil Tank Environmental Risks for Homeowners

Many homeowners underestimate the potential oil tank environmental risks associated with aging underground systems. Leaking fuel may contaminate soil, groundwater, and nearby ecosystems if left untreated. Environmental risks may include:

-Soil degradation

-Groundwater contamination

-Harm to nearby vegetation

-Structural foundation issues

-Long-term environmental liability

Understanding these risks encourages homeowners to act early before contamination spreads further.

Why Soil Testing After Oil Leak Is Necessary

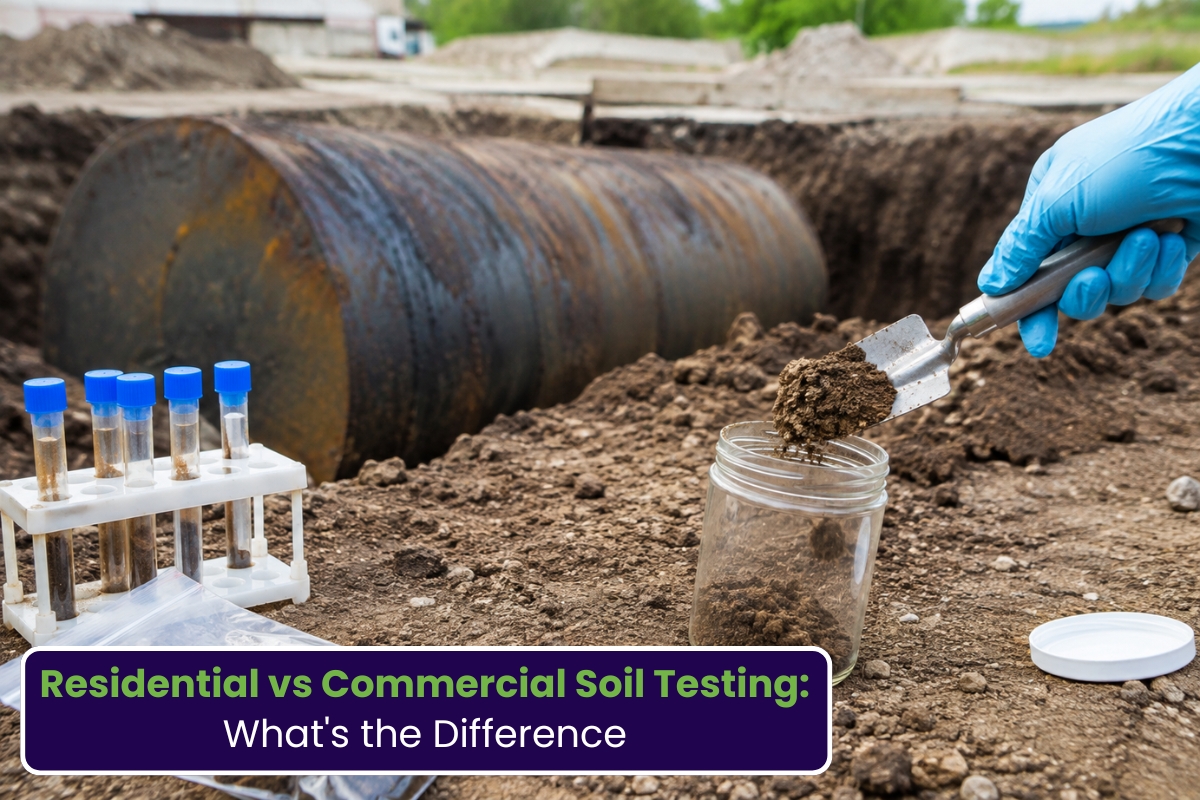
Professional soil testing after oil leak helps determine the extent of contamination beneath the property surface. Testing allows environmental specialists to identify affected areas and develop the most effective remediation strategy.

Why Soil Testing Matters

-Detects hidden contamination

-Supports proper cleanup planning

-Helps prevent future environmental issues

-Confirms restoration effectiveness

-Protects long-term property safety

Testing is often one of the most important steps after discovering a leaking underground tank.

How Oil Tank Remediation Services Restore Contaminated Properties

Professional oil tank remediation services focus on restoring contaminated areas after leaks occur. Remediation specialists use environmental cleanup methods to remove pollutants and improve soil safety. These services may include:

-Soil excavation

-Environmental testing

-Groundwater assessments

-Contaminated material disposal

-Site restoration work

Remediation helps homeowners protect both their property and the surrounding environment from long-term contamination effects.

FAQs

Q1. What are the signs that an underground oil tank may be leaking?

Common signs include fuel odors, dead vegetation, soil discoloration, rusted pipes, and unexpected increases in heating oil usage.

Q2. Why is underground oil tank removal important?

Removing old underground tanks helps prevent leaks, soil contamination, and environmental damage that may affect residential properties.

Q3. What happens if contaminated soil is found during tank removal?

Environmental professionals typically remove polluted soil and perform remediation services to restore the affected area safely.

Q4. Is soil testing necessary after an oil leak?

Yes. Soil testing helps identify contamination levels and guides proper cleanup and restoration efforts.

Q5. How does oil tank removal help protect property value?

Removing aging tanks reduces environmental risks and helps prevent complications during future property sales or renovations.

Summary

Protecting residential properties from leaks and contamination starts with proactive oil tank maintenance and safe removal practices. From underground tank excavation to environmental cleanup and soil testing, every step plays an important role in preventing long-term property damage. Professional remediation and cleanup services help homeowners maintain safer living environments while reducing environmental risks associated with aging heating oil systems. For homeowners looking for trusted environmental support and responsible tank removal solutions, Simple Tank Services provides professional assistance focused on safety, compliance, and long-term property protection.

Advanced Soil Remediation Techniques for Cleaning Contaminated Land in New Jersey

Soil contamination is a growing environmental concern across residential, commercial, and industrial properties. In a state like New Jersey, where older underground storage tanks, industrial activities, and oil leaks are common, proper soil cleanup is essential for protecting public health and the environment. Modern remediation technologies now make it possible to restore polluted land safely and efficiently while reducing environmental impact.

Advanced soil remediation techniques help remove harmful contaminants from the ground and support long-term environmental safety. Whether contamination is caused by leaking oil tanks, industrial waste, fuel spills, or hazardous chemicals, professional remediation services are designed to restore soil quality and prepare land for safe future use.

Understanding Contaminated Soil Cleanup and Why It Matters

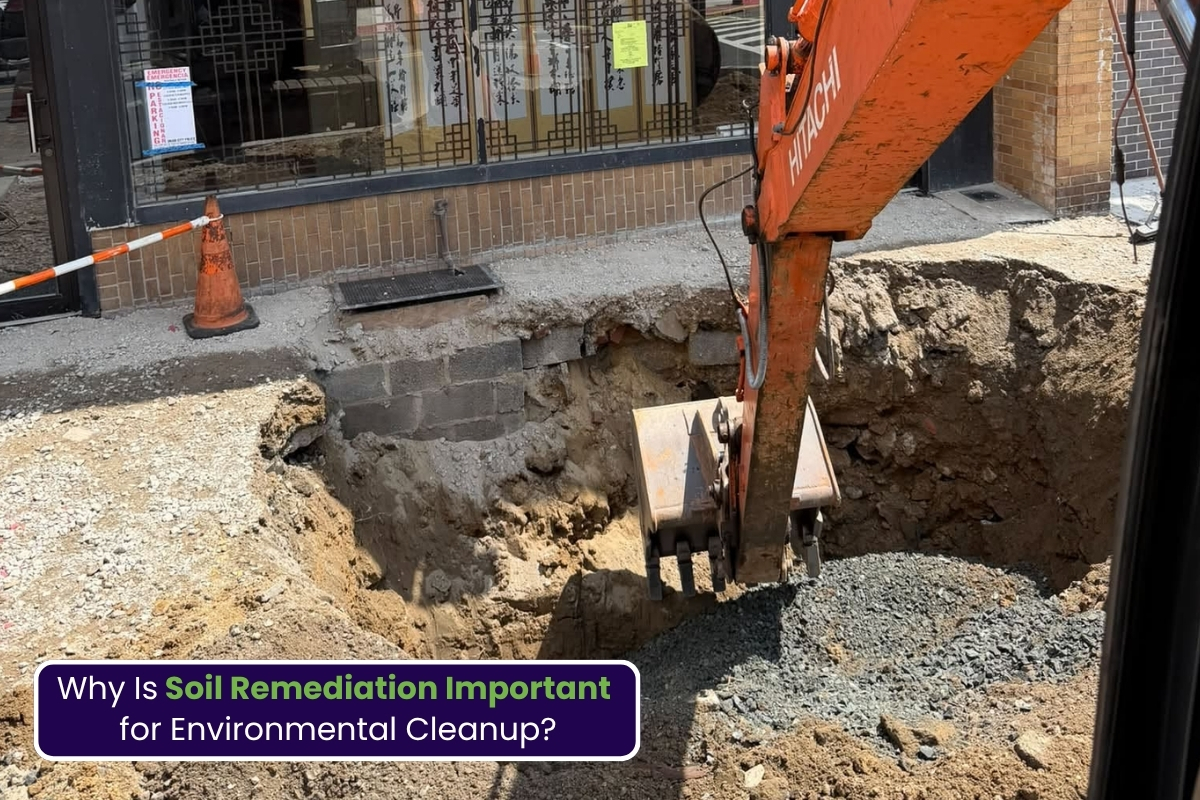
Contaminated soil cleanup is the process of identifying, treating, and removing pollutants from soil to restore environmental safety. Soil contamination can occur from fuel leaks, industrial waste disposal, chemical spills, or aging underground tanks. If left untreated, pollutants can spread into groundwater and nearby ecosystems. Professional cleanup methods focus on reducing contamination levels while following environmental regulations. Early remediation also prevents structural damage, health risks, and long-term environmental problems.

Common Sources of Soil Contamination

-Underground oil tank leaks

-Industrial chemical spills

-Fuel storage system failures

-Improper waste disposal

-Oil spill runoff into soil

Environmental Remediation Solutions for Safer Properties

Environmental remediation involves restoring contaminated land through scientific cleanup methods. Modern environmental remediation techniques combine soil testing, contamination assessment, excavation, and treatment systems to improve land conditions safely. Today’s remediation projects prioritize environmentally responsible approaches that minimize disruption to surrounding areas. Environmental professionals use advanced tools and monitoring systems to ensure the cleanup process meets state and federal standards. Many remediation projects also include groundwater monitoring and long-term environmental assessments to prevent future contamination issues.

Soil Contamination Removal Through Advanced Technology

Modern soil contamination removal methods are more efficient than traditional excavation-only approaches. Depending on contamination severity, professionals may use a combination of biological, chemical, and thermal treatment systems. Some advanced remediation methods include:

-Bioremediation using microorganisms

-Soil vapor extraction systems

-Thermal desorption treatment

-Chemical oxidation processes

-Stabilization and solidification methods

These technologies help reduce pollutants while preserving as much natural soil structure as possible.

Land Restoration Services for Residential and Commercial Properties

Land restoration services play a major role in returning contaminated properties to safe, usable conditions. After contamination is removed, the soil may need stabilization, grading, or replacement to support future construction or landscaping. Restoration projects are important for:

-Residential developments

-Commercial properties

-Industrial redevelopment sites

-Public infrastructure projects

Professional restoration also improves property value and environmental compliance.

Polluted Soil Treatment Methods for Long-Term Results

Polluted soil treatment focuses on eliminating harmful substances while improving soil health. Different treatment approaches are selected based on the type of contaminant and the level of pollution present. Eco-conscious treatment methods are becoming increasingly popular because they reduce waste and preserve surrounding ecosystems. Many remediation experts now prioritize sustainable cleanup technologies that lower environmental impact.

Benefits of Modern Soil Treatment

-Reduced environmental damage

-Improved soil stability

-Safer groundwater conditions

-Faster cleanup timelines

-Long-term contamination control

Oil Contaminated Soil Cleanup After Tank Leaks

Oil contaminated soil cleanup is one of the most common remediation services in New Jersey due to aging underground storage tanks. Fuel leaks can spread quickly through soil layers and contaminate nearby groundwater sources. Professional cleanup teams begin by locating the source of contamination and removing affected soil. Specialized treatment methods are then used to eliminate petroleum-based pollutants. In many cases, remediation specialists also inspect surrounding structures and utilities to ensure contamination has not spread further underground.

Hazardous Soil Removal for Environmentally Sensitive Areas

Hazardous soil removal requires careful planning and compliance with environmental safety standards. Contaminated soil containing toxic substances must be handled, transported, and disposed of properly to prevent additional environmental damage. Safety measures often include:

-Controlled excavation procedures

-Air quality monitoring

-Protective containment systems

-Regulated disposal methods

Proper hazardous waste management is essential for protecting workers, nearby residents, and natural ecosystems.

Choosing Experienced Soil Cleanup Contractors in New Jersey

Hiring experienced soil cleanup contractors is critical for successful remediation projects. Qualified professionals understand local environmental regulations and use industry-approved cleanup technologies. Reliable contractors typically provide:

-Comprehensive site assessments

-Soil testing and laboratory analysis

-Customized remediation plans

-Environmental documentation support

-Post-cleanup monitoring services

If your property requires professional assistance, understanding the process of Soil Remediation in New Jersey can help property owners make informed environmental decisions and reduce future liability risks.

Underground Oil Tank Cleanup and Environmental Safety

Underground oil tank cleanup projects often involve both tank removal and soil remediation. Older tanks may corrode over time, allowing fuel to leak into surrounding soil. Professional cleanup services include:

-Tank excavation and removal

-Contaminated soil testing

-Leak source identification

-Environmental reporting

-Site restoration procedures

Proper cleanup helps property owners avoid long-term environmental complications and future property issues.

Environmental Cleanup Services Supporting Sustainable Development

Environmental cleanup services are essential for supporting sustainable land development and urban redevelopment projects. Restoring contaminated land allows communities to safely reuse properties while protecting environmental resources. Modern remediation projects focus on balancing environmental safety with sustainable development goals. This approach helps reduce waste and preserve valuable land resources.

Contaminated Land Restoration for Future Property Use

Contaminated land restoration improves the condition of polluted properties so they can be safely reused. Restoration projects often include soil replacement, vegetation recovery, erosion control, and environmental monitoring. Proper restoration creates safer conditions for:

-Homes and residential communities

-Commercial construction

-Parks and recreational spaces

-Industrial redevelopment projects

Long-term environmental monitoring also ensures restored land remains stable and safe over time.

Eco-Friendly Soil Treatment for Sustainable Soil Remediation

Eco-friendly soil treatment methods are becoming a preferred solution for many remediation projects. These sustainable soil remediation techniques reduce environmental impact while effectively removing contaminants. Green remediation methods may include:

-Biological treatment systems

-Natural soil recovery methods

-Low-emission cleanup equipment

-Soil recycling technologies

These environmentally responsible approaches support cleaner ecosystems and healthier communities.

Oil Spill Soil Cleanup and Emergency Response Planning

Oil spill soil cleanup requires immediate action to prevent contamination from spreading. Rapid response teams assess the affected area, contain the spill, and begin remediation procedures quickly. Emergency cleanup plans typically include:

-Spill containment barriers

-Soil sampling and analysis

-Pollutant removal procedures

-Site recovery monitoring

Fast response efforts help minimize environmental damage and reduce cleanup complexity.

Site Contamination Cleanup and Long-Term Environmental Protection

Site contamination cleanup is a critical step in protecting land, water, and surrounding communities from harmful pollutants. Advanced remediation technologies now allow environmental professionals to address contamination more accurately and efficiently. Long-term cleanup success depends on:

-Accurate environmental assessments

-Proper remediation planning

-Ongoing monitoring systems

-Sustainable restoration practices

Effective cleanup protects both public health and future land use opportunities.

FAQs

Q1. What is soil remediation?

Soil remediation is the process of removing or treating contaminants in soil to restore environmental safety and improve land usability.

Q2. What causes soil contamination?

Common causes include underground oil tank leaks, industrial waste disposal, fuel spills, chemical leaks, and improper hazardous waste handling.

Q3. How long does soil remediation take?

The timeline depends on the level of contamination, property size, and remediation method being used.

Q4. Is contaminated soil dangerous?

Yes. Contaminated soil can affect groundwater, nearby ecosystems, and human health if not properly treated.

Q5. What is the most eco-friendly soil remediation method?

Bioremediation is considered one of the most environmentally friendly methods because it uses natural microorganisms to break down pollutants.

Summary

Advanced remediation technologies are transforming how contaminated land is restored across New Jersey. From oil contaminated soil cleanup to eco-friendly treatment systems, modern solutions provide safer and more sustainable environmental restoration options for residential and commercial properties. Professional remediation services help property owners address contamination issues responsibly while supporting long-term environmental protection. Businesses like Simple Tank Services help property owners navigate complex cleanup projects with reliable environmental remediation expertise.

How Groundwater Gets Contaminated in New Jersey and Ways to Prevent It

Groundwater is one of the most important natural resources in New Jersey, supplying drinking water to millions of homes and businesses. However, contamination of groundwater has become a growing concern due to industrial activities, agricultural practices, and improper waste disposal. Understanding how contamination happens and how to prevent it is essential for maintaining clean and safe water. This guide explains the key causes, risks, and solutions related to groundwater contamination, helping property owners and businesses make informed decisions.

Groundwater Pollution Causes and Their Impact

Groundwater contamination occurs when harmful substances seep into the soil and reach underground water sources. Common groundwater pollution causes include:

-Industrial waste and chemical spills

-Leaking underground storage tanks

-Agricultural runoff (fertilizers and pesticides)

-Improper disposal of hazardous materials

-Landfills and septic system leaks

These pollutants can travel through soil layers and contaminate aquifers, making water unsafe for drinking and daily use. Soil and water pollution are closely linked, meaning contamination in one often affects the other.

How to Prevent Groundwater Contamination Effectively

Taking preventive measures is the most effective way to protect groundwater. To prevent groundwater contamination, consider the following steps:

-Properly dispose of chemicals and hazardous waste

-Maintain septic systems regularly

-Use environmentally safe fertilizers and pesticides

-Inspect underground storage tanks for leaks

-Avoid dumping waste into drains or open land

Simple actions can significantly reduce the risk of long-term contamination and protect drinking water sources.

Groundwater Protection NJ: Why It Matters

Groundwater protection NJ is critical due to the state’s dense population and industrial activity. Protecting groundwater ensures:

-Safe drinking water for communities

-Healthy ecosystems and agriculture

-Reduced health risks from contaminated water

-Long-term environmental sustainability

At this stage, it’s important to understand the broader issue of groundwater contamination in New Jersey, as it affects both residential and commercial properties across the state.

Contaminated Well Water and Associated Risks

Contaminated well water is a serious issue for many property owners. Wells can easily become polluted if contaminants enter the surrounding soil.

Well Water Contamination Risks

-Bacteria and viruses

-Heavy metals like lead and arsenic

-Chemicals from industrial or agricultural sources

Regular testing is essential to detect contamination early and ensure water safety.

Water Safety and Drinking Water Safety Measures

Ensuring water safety is essential for public health. Drinking water safety can be improved by:

-Testing water quality regularly

-Installing certified filtration systems

-Avoiding exposure to contaminated sources

-Following local environmental guidelines

Safe drinking water is not just a convenience—it is a necessity for a healthy life.

Soil and Water Pollution: A Connected Problem

Soil and water pollution often occur together. Contaminated soil allows harmful substances to seep into groundwater, spreading pollution over a larger area.

Preventing soil contamination through responsible waste management and reduced chemical use is key to protecting groundwater resources.

Groundwater Cleanup Methods and Solutions

Once contamination occurs, cleanup can be complex and time-consuming. Common groundwater cleanup methods include:

-Pump and treat systems

-Soil vapor extraction

-Bioremediation using natural bacteria

-Chemical treatment processes

These methods help remove or neutralize pollutants, restoring water quality over time.

Water Filtration Solutions for Safer Water

Clean and safe water is essential for both homes and businesses, especially in areas where contamination may be a concern. Choosing the right water filtration solution helps remove harmful impurities, improve taste, and ensure water is safe for everyday use.

Common Water Filtration Options

-Activated Carbon Filters
Activated carbon filters are one of the most widely used and affordable solutions. They work by absorbing contaminants such as chlorine, bad odors, and certain chemicals, improving both taste and smell.

-Reverse Osmosis Systems
Reverse osmosis (RO) systems use a semi-permeable membrane to remove dissolved solids, heavy metals, and harmful substances. This method is highly effective for producing clean and purified drinking water.

-UV Purification Systems
UV purification systems use ultraviolet light to kill bacteria, viruses, and other microorganisms. This chemical-free method is ideal for ensuring microbiologically safe water.

These systems improve water quality and ensure safe consumption, especially in areas with known contamination issues. By selecting the right filtration system, you can significantly enhance water quality and ensure safer consumption for your family or business.

Groundwater Contamination Prevention Tips

Protecting groundwater is essential for maintaining clean and safe water supplies for homes, agriculture, and businesses. Since groundwater is often hidden beneath the surface, contamination can go unnoticed until it becomes a serious problem. Taking preventive steps can help reduce risks and preserve water quality for the long term.

Practical Tips to Prevent Groundwater Contamination

-Store Chemicals Safely
Always keep chemicals like pesticides, oils, and cleaning agents in sealed containers and away from soil or water sources. Proper storage reduces the risk of leaks and spills that can seep into the ground.

-Avoid Overuse of Fertilizers
Excessive use of fertilizers can lead to harmful chemicals seeping into the soil and contaminating groundwater. Use only the recommended amounts and consider eco-friendly alternatives when possible.

-Fix Leaks in Storage Tanks Immediately
Underground or above-ground storage tanks can develop leaks over time. Regularly inspect tanks and repair any leaks quickly to prevent hazardous substances from entering the groundwater.

-Conduct Routine Environmental Inspections
Regular site inspections help identify potential contamination risks early. Monitoring soil conditions and nearby water sources can prevent long-term environmental damage.

-Educate Communities About Water Conservation
Raising awareness about responsible water use and pollution prevention encourages communities to take part in protecting groundwater resources.

Why Prevention Matters

Preventing groundwater contamination not only protects human health but also preserves ecosystems and reduces the need for costly cleanup efforts. Small actions today can make a significant difference in ensuring clean water for future generations. Prevention is always more cost-effective and sustainable than remediation.

FAQs

Q1. What is the main cause of groundwater contamination?

The main causes include industrial waste, agricultural runoff, and leaking storage tanks.

Q2. How can I tell if my well water is contaminated?

You may notice unusual taste, odor, or color, but testing is the most reliable method.

Q3. Can groundwater contamination be reversed?

Yes, but it requires specialized groundwater cleanup methods and can take time.

Q4. How often should I test my water?

At least once a year, or more frequently if you live in a high-risk area.

Q5. What is the best way to protect groundwater?

Proper waste disposal, regular maintenance, and using eco-friendly products are key steps.

Summary

Groundwater contamination is a serious issue that affects water safety, public health, and the environment. By understanding its causes and taking preventive measures, individuals and businesses can protect valuable water resources. Professional services like Simple Tank Services play an important role in identifying risks, preventing contamination, and ensuring long-term groundwater protection.

Why Underground Oil Tank Testing in New Jersey Is Essential Before Buying a Home

Buying a home is one of the biggest investments you’ll ever make. While most buyers focus on visible aspects like structure, interiors, and location, there’s one hidden factor that can lead to massive financial and environmental risks: underground oil tanks.

In older homes across New Jersey, underground heating oil tanks were commonly used. Many of these tanks are still buried beneath properties, often forgotten. Without proper testing, these tanks can leak, contaminate soil, and create serious legal liabilities for homeowners.

That’s why Underground Oil Tank Testing in New Jersey is not just an optional step, it’s a critical part of the home-buying process.

Understanding Underground Oil Tanks and Their Risks

Underground oil tanks were widely used for heating purposes, especially in homes built before the 1980s. Over time, these tanks corrode due to moisture and soil conditions, increasing the risk of leaks.

A leaking oil tank can lead to:

– Soil contamination

– Groundwater pollution

– Expensive environmental cleanup

– Legal issues during property transfer

Many buyers only discover these issues after purchasing the property, which can cost thousands of dollars in remediation. This makes Oil Tank Testing in New Jersey an essential precaution before closing any deal.

Why Oil Tank Testing Matters Before Buying a Home

Protects You from Hidden Costs

A buried oil tank may not be visible during a standard home inspection. However, if it leaks, cleanup costs or more. Testing helps identify problems early so you can negotiate repairs or reconsider the purchase.

Ensures Environmental Safety

New Jersey has strict environmental regulations. Contaminated soil can harm surrounding ecosystems and groundwater. Testing ensures the property complies with environmental standards and avoids future legal trouble.

Helps in Property Value Assessment

A property with a leaking oil tank loses value instantly. Buyers are less likely to invest in homes with environmental risks. Proper testing provides transparency and helps maintain fair property value.

Required by Lenders and Insurance Providers

Many lenders and insurance companies require proof of oil tank testing before approving loans or policies. Skipping this step could delay or even cancel your home purchase.

Types of Underground Oil Tank Testing in New Jersey

Understanding the different testing methods can help you make informed decisions. Here are the three most common and reliable techniques:

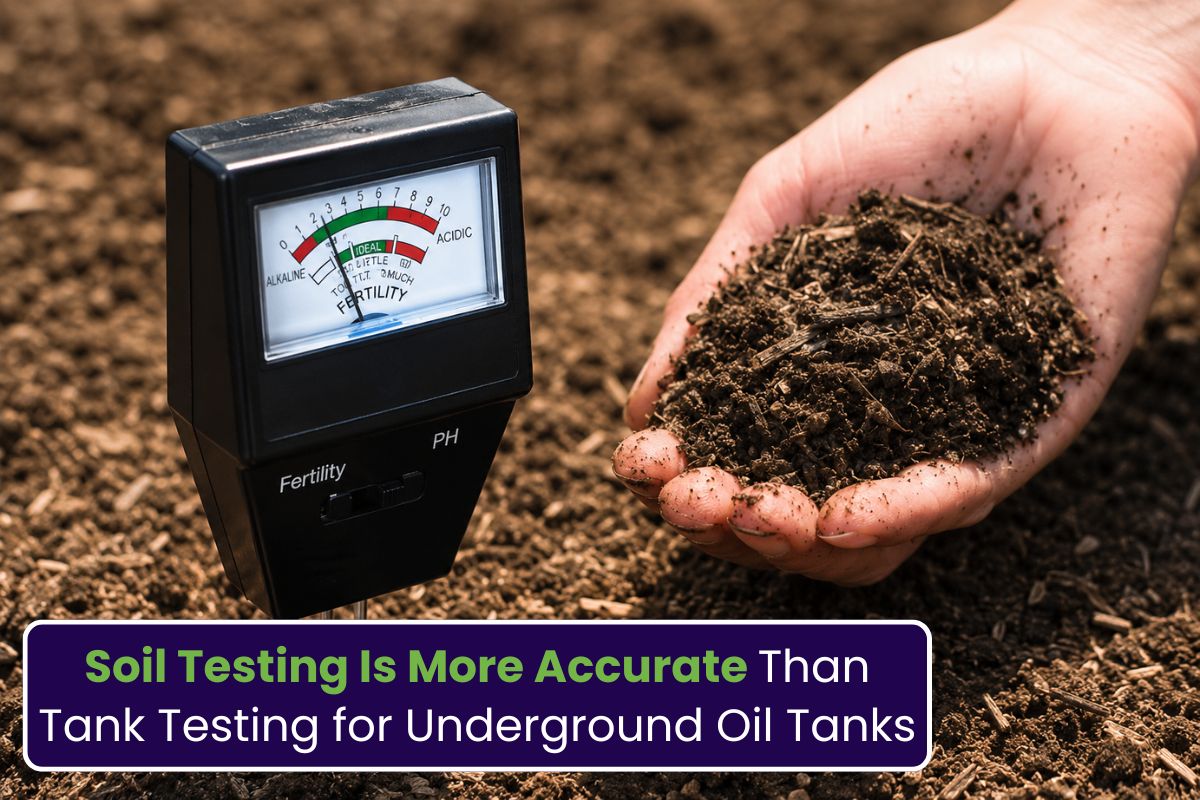
Soil Testing (Soil Sampling Analysis)

This is one of the most widely used methods for detecting leaks. Professionals collect soil samples around the suspected tank area and analyze them for petroleum contamination.

How It Works:

– Samples are taken from different depths

– Tested in a certified lab

– Results indicate presence of oil contamination

Why It Matters:

Soil testing is highly accurate and provides clear evidence of leaks. It is often recommended when the tank’s condition is unknown.

Tank Sweep (Magnetic Scanning)

A tank sweep uses advanced scanning equipment to detect the presence of underground metal tanks.

How It Works:

– Technicians scan the property using magnetometers

– Detect buried metal objects

– Identify tank location and size

Why It Matters:

This method is crucial when you’re unsure whether a tank exists on the property. It prevents unexpected discoveries after purchase.

Pressure Testing (Tank Integrity Testing)

Pressure testing checks whether the tank is structurally sound and leak-free.

How It Works:

– Tank is pressurized with air or liquid

– Monitored for pressure drops

– Indicates leaks or structural damage

Why It Matters:

This test is ideal for tanks that are still in use or recently decommissioned. It ensures the tank is not actively leaking.

Signs That a Property May Have an Underground Oil Tank

Even if a tank isn’t visible, certain clues can indicate its presence:

– Older homes (built before 1985)

– Oil fill pipes or vent pipes outside

– Unusual patches of dead grass

– Strong petroleum odors

– Historical records showing oil heating

If you notice any of these signs, scheduling Underground Oil Tank Testing in New Jersey becomes even more important.

The Cost of Skipping Oil Tank Testing

Ignoring oil tank testing can lead to serious consequences:

Financial Risks

Cleanup costs can escalate quickly depending on the extent of contamination.

Legal Liabilities

New Jersey laws hold property owners responsible for environmental damage even if the leak occurred before purchase.

Resale Challenges

Selling a home with an undisclosed oil tank issue can be difficult and may reduce buyer interest.

How Oil Tank Testing Supports Smart Home Buying Decisions

A well-informed buyer always looks beyond the surface. Oil tank testing provides:

– Clear understanding of property condition

– Strong negotiation leverage

– Peace of mind for long-term investment

It transforms a risky purchase into a confident decision.

Choosing the Right Professionals for Testing

Not all testing services are the same. It’s important to choose experienced professionals who follow New Jersey environmental standards.

Look for:

– Licensed and certified technicians

– Advanced testing equipment

– Transparent reporting

– Proven track record

Experienced providers ensure accurate results and help guide you through next steps if issues are found.

What Happens If a Leak Is Found?

If testing reveals contamination, don’t panic. There are solutions available:

– Tank removal

– Soil remediation

– Environmental cleanup

In many cases, buyers can negotiate with sellers to cover these costs or reduce the property price accordingly.

FAQs

Q1. Why is oil tank testing important before buying a home?

Oil tank testing helps detect hidden leaks or contamination, protecting buyers from unexpected repair costs and legal issues.

Q2. How much does underground oil tank testing cost in New Jersey?

Costs vary depending on the testing method, but typically range from a few hundred to a few thousand dollars.

Q3. Can I buy a house with an underground oil tank?

Yes, but it’s essential to test the tank first and understand any risks or cleanup responsibilities involved.

Q4. How long does oil tank testing take?

Most testing procedures can be completed within a few hours, but lab results for soil testing may take a few days.

Q5. What happens if contamination is found?

If contamination is detected, cleanup and remediation will be required. Buyers can negotiate with sellers to cover these costs.

Summary

Buying a home without checking for underground oil tanks is like signing a contract with unknown risks. From environmental hazards to financial burdens, the consequences can be severe.

That’s why Underground Oil Tank Testing in New Jersey is an essential step for every homebuyer. It protects your investment, ensures compliance with regulations, and gives you peace of mind.

If you’re planning to purchase a property, working with trusted professionals like Simple Tank Services can make the process smooth and reliable. Their expertise ensures accurate testing and helps you make informed decisions before closing the deal.

What Are the Most Effective Soil Remediation Methods Used for Residential and Commercial Projects?

Soil contamination is a major environmental concern that affects both residential and commercial properties. Whether caused by industrial activity, fuel leaks, agricultural chemicals, or improper waste disposal, contaminated soil can pose serious risks to human health and the environment.

Understanding the most effective soil remediation methods is essential for property owners, developers, and businesses looking to restore land safely and efficiently. With advancements in technology and growing awareness of sustainable practices, a wide range of soil remediation techniques are now available to address different types of contamination.

In this guide, we’ll explore the most effective soil cleanup methods, how they work, and which solutions are best suited for residential and commercial projects.

What Is Soil Remediation?

Soil remediation is the process of removing, reducing, or neutralizing contaminants in soil to make it safe for use. Contaminants can include:

– Petroleum hydrocarbons

– Heavy metals such as lead and arsenic

– Industrial chemicals and solvents

– Pesticides and herbicides

These pollutants can negatively impact ecosystems, contaminate groundwater, and create health hazards. That’s why using proper soil decontamination methods is critical.

Effective environmental soil remediation ensures that land is safe for construction, agriculture, or redevelopment while also meeting environmental standards.

In-Situ vs. Ex-Situ Soil Remediation Methods

There are two main categories of soil remediation methods, and understanding the difference is key to choosing the right solution.

In-Situ Soil Remediation Methods

In-situ methods treat contaminated soil directly on-site without excavation.

Advantages:

– Lower cost

– Minimal disruption

– Suitable for large areas

Best for:

– Residential properties

– Sites with moderate contamination

Ex-Situ Soil Remediation Techniques

Ex-situ methods involve excavating contaminated soil and treating it either on-site or off-site.

Advantages:

– Faster results

– Greater control over treatment

– Effective for heavily contaminated soil

Best for:

– Commercial projects

– Construction site soil cleanup

Most Effective Soil Remediation Methods

Below are the most widely used and effective soil remediation techniques for residential and commercial projects.

Bioremediation of Soil

Bioremediation is one of the most popular and eco-friendly soil remediation methods.

How it works:
Microorganisms break down contaminants into harmless substances such as water and carbon dioxide.

Best for:

– Petroleum-contaminated soil

– Organic pollutants

Benefits:

– Eco-friendly soil remediation

– Cost-effective soil cleanup method

– Minimal environmental disruption

This method is ideal for projects focused on sustainability.

Phytoremediation Techniques

Phytoremediation uses plants to absorb or stabilize contaminants in the soil.

How it works:
Plants take in pollutants through their roots and store them in their tissues.

Best for:

– Light to moderate contamination

– Residential land cleanup

Benefits:

– Improves soil quality over time

– Low-cost and sustainable

– Enhances landscape appearance

Soil Vapor Extraction (SVE)

Soil vapor extraction (SVE) is an effective method for removing volatile contaminants.

How it works:
A vacuum system extracts contaminated vapors from the soil for treatment.

Best for:

– Petroleum and solvent contamination

– Commercial site remediation

Benefits:

– Fast and efficient

– Proven results

– Suitable for various soil types

Air Sparging Soil Treatment

Air sparging is often used in combination with SVE to enhance results.

How it works:
Air is injected into the soil to volatilize contaminants, making them easier to extract.

Best for:

– Groundwater and soil contamination

– Fuel-related pollutants

Benefits:

– Speeds up remediation process

– Works well with other methods-

– Effective for deeper contamination

Chemical Oxidation Soil Remediation

This method uses chemicals to rapidly break down contaminants.

How it works:
Oxidizing agents are injected into the soil to destroy harmful substances.

Best for:

– Hazardous soil cleanup

– Industrial contamination

Benefits:

– Rapid results

– Highly effective

– Works in both in-situ and ex-situ soil remediation

Soil Washing Method

Soil washing removes contaminants by separating them from soil particles.

How it works:
Water or chemical solutions wash the soil, isolating pollutants for treatment.

Best for:

– Heavy metals

– Large-scale projects

Benefits:

– Reduces contaminated soil volume

– Allows reuse of clean soil

– Efficient for construction site soil cleanup

Thermal Desorption Soil Treatment

This method uses heat to remove contaminants.

How it works:
Soil is heated to vaporize pollutants, which are then captured and treated.

Best for:

– Severe contamination

– Petroleum-based pollutants

Benefits:

– Highly effective

– Fast results

– Suitable for complex contamination

Soil Stabilization and Solidification

This method prevents contaminants from spreading rather than removing them.

How it works:
Binding materials are mixed with soil to lock contaminants in place.

Best for:

– Heavy metals

– Commercial land remediation

Benefits:

– Prevents groundwater contamination

– Cost-effective

– Improves soil strength

Excavation and Disposal of Contaminated Soil

One of the most straightforward soil cleanup methods.

How it works:
Contaminated soil is removed and disposed of at a licensed facility.

Best for:

– Small residential projects

– Highly contaminated sites

Benefits:

– Immediate results

– Simple and reliable

– Ensures complete removal

Encapsulation Soil Remediation

Encapsulation isolates contaminants to prevent exposure.

How it works:
A barrier is placed over contaminated soil to contain pollutants.

Best for:

– Brownfield remediation

– Commercial redevelopment

Benefits:

– Cost-effective

– Reduces risk

–  Suitable for long-term containment

Choosing the Right Soil Remediation Method

Selecting the best soil remediation solution depends on several key factors:

– Type and concentration of contamination

– Soil characteristics

– Project size (residential vs commercial)

– Budget and timeline

– Regulatory requirements

For example:

– Residential projects often benefit from bioremediation and phytoremediation

– Commercial projects may require SVE, chemical oxidation, or excavation

Benefits of Effective Soil Remediation

Using the right land remediation techniques provides long-term advantages:

– Improves soil quality and safety

– Removes heavy metals from soil

– Treats petroleum-contaminated soil

– Supports eco-friendly soil remediation

– Increases property value

– Enables safe development and construction

Proper remediation also ensures compliance with environmental standards and reduces future risks.

FAQs

Q1. What is the best soil remediation method for residential properties?

Bioremediation and phytoremediation are commonly used because they are eco-friendly, cost-effective, and minimally disruptive.

Q2. Which soil remediation techniques are most effective for commercial projects?

Soil vapor extraction, chemical oxidation, and excavation are widely used due to their speed and effectiveness.

Q3. What is the difference between in-situ and ex-situ soil remediation?

In-situ methods treat soil on-site, while ex-situ methods involve removing soil for treatment elsewhere.

Q4. How long does soil remediation take?

The duration varies depending on the method and contamination level, ranging from a few days to several months.

Q5. What factors affect the cost of soil remediation?

Costs depend on contamination type, project size, chosen method, and required equipment.

Final Words

Choosing the most effective soil remediation methods is essential for restoring contaminated land and ensuring safe use for residential and commercial purposes. From eco-friendly options like bioremediation and phytoremediation to advanced techniques such as chemical oxidation and thermal desorption, there are solutions available for every type of contamination.

Understanding how these soil remediation techniques work allows property owners and developers to make informed decisions. By working with experienced professionals like Simple Tank Services, you can ensure the right approach is selected for your specific site conditions. Investing in the right soil cleanup methods helps protect the environment, meet regulatory requirements, and maximize the value of your property.

Why Soil Testing Is the Smartest Way to Prevent Property Damage and Hidden Contamination

When it comes to protecting your property, what you don’t see beneath the surface can cause the most damage. Many property owners focus on visible features like buildings, landscaping, and utilities, but the condition of the soil plays a crucial role in long-term safety and stability.

Undetected soil issues can lead to structural damage, environmental hazards, and expensive repairs. That’s why soil testing is considered one of the smartest and most proactive steps you can take. Whether you’re buying land, planning construction, or maintaining an existing property, understanding your soil conditions can save you time, money, and stress.

What Is Soil Testing and Why Does It Matter?

Soil testing is the process of collecting and analyzing soil samples to determine their composition, stability, and potential contamination. It provides valuable insights into the physical and chemical properties of the ground beneath your property.

These tests can reveal:

– Soil type and structure

– Drainage capabilities

– pH levels and nutrient content

– Presence of contaminants such as chemicals or heavy metals

Without soil testing, you’re essentially making decisions without knowing what lies beneath. This uncertainty can lead to serious consequences, especially when building or installing systems like septic tanks.

How Soil Testing Prevents Property Damage

One of the primary reasons soil testing is essential is its ability to prevent costly property damage. Soil conditions directly impact the stability and durability of structures.

Identifying Weak or Unstable Soil

Not all soil is suitable for construction. Some types may shift, settle, or erode over time, causing foundations to crack or become uneven. Soil testing helps identify these risks before construction begins, allowing for proper planning and reinforcement.

Avoiding Drainage Issues

Poor drainage is a common cause of property damage. Water that doesn’t drain properly can accumulate around foundations, leading to leaks, mold growth, and structural deterioration.

By understanding how your soil handles water, you can implement the right drainage solutions and prevent long-term damage.

Preventing Soil Erosion

Erosion can weaken the ground and compromise the integrity of your property. Soil testing helps determine erosion risks and guides the use of protective measures such as grading, vegetation, or retaining structures.

Detecting Hidden Soil Contamination

One of the biggest threats to any property is contamination that isn’t immediately visible. Soil can become polluted from a variety of sources, and without testing, these hazards often go unnoticed.

Common Sources of Soil Contamination

– Leaking underground storage tanks

– Industrial or commercial activities

– Agricultural chemicals like pesticides and fertilizers

– Failing septic systems

– Improper waste disposal

These contaminants can remain in the soil for years, posing risks to human health, groundwater, and the surrounding environment.

Why Early Detection Matters

Soil testing allows you to detect contamination early, before it spreads or worsens. Addressing the issue at an early stage is significantly more affordable and less complicated than dealing with widespread environmental damage.

The Importance of Soil Testing for Septic Systems

If your property relies on a septic system, soil testing is not optional, it’s essential. The soil acts as a natural filter that treats wastewater before it returns to the environment.

Different soil types affect how well a septic system performs:

– Clay soil: Holds water, increasing the risk of system failure

– Sandy soil: Drains quickly but may not filter contaminants effectively

– Loamy soil: Offers balanced drainage and filtration

Without proper soil testing, installing a septic system can lead to contamination, system breakdowns, and costly repairs. This is why soil testing is a critical step before any septic installation or replacement.

Why Soil Testing Is Critical Before Buying or Developing Property

Soil testing is a smart investment for anyone involved in real estate or property development. It provides the information needed to make confident, informed decisions.

For Property Buyers

Before purchasing land, soil testing ensures that the property is safe and suitable for your intended use. It helps you avoid buying land with hidden contamination or structural risks.

For Property Developers

Developers rely on soil testing to design safe and efficient structures. It helps avoid delays, redesigns, and unexpected expenses during construction.

For Property Owners

Even if you already own your property, soil testing can identify potential issues early and help you maintain its value over time.

Soil Testing in New Jersey: Why It’s Especially Important

Soil conditions and environmental regulations can vary by region, making localized testing even more important. For example, soil testing in New Jersey is often required due to strict environmental guidelines and the presence of older properties with potential underground storage tanks or aging septic systems.

In areas with a history of industrial activity or dense development, the risk of soil contamination can be higher. Conducting soil testing in New Jersey ensures compliance with local regulations while protecting your investment from unexpected liabilities.

Additionally, proper testing helps property owners meet environmental standards and avoid fines or delays during property transactions or construction projects.

The Soil Testing Process: What to Expect

Understanding how soil testing works can help you see its value more clearly. While the exact process may vary, it generally includes:

Site Inspection

Professionals evaluate the property to determine the best sampling locations.

Soil Sampling

Samples are collected from different areas and depths to ensure accurate results.

Laboratory Analysis

The samples are tested for:

– Chemical composition

– Contaminants

– Moisture levels

– Soil structure

Detailed Reporting

You receive a report outlining the findings along with recommendations for addressing any issues.

This process provides a clear picture of your soil’s condition and helps guide your next steps.

Signs You May Need Soil Testing

While soil testing is always a good preventive measure, certain warning signs indicate it’s especially necessary:

– Unusual odors coming from the ground

– Poor plant growth or dead patches in landscaping

– Standing water or persistent drainage issues

– Nearby industrial or agricultural activity

– History of fuel tanks or chemical storage on the property

If you notice any of these signs, soil testing should be a priority to avoid further complications.

Long-Term Benefits of Soil Testing

Investing in soil testing offers benefits that extend far beyond immediate problem detection:

Cost Savings

By identifying issues early, you can avoid expensive repairs and environmental cleanup.

Improved Safety

Soil testing protects your family, tenants, or occupants from exposure to harmful contaminants.

Better Property Planning

Accurate soil data allows for smarter decisions when building, landscaping, or installing systems.

Environmental Protection

Testing helps prevent pollution and supports sustainable land use practices.

Increased Property Value

A property with verified soil safety is more attractive to buyers and investors.

FAQs

Q1. Why is soil testing important before buying a property?

Soil testing helps identify hidden issues like contamination, poor drainage, or unstable ground. It ensures the property is safe and suitable for construction, helping buyers avoid costly repairs and environmental risks.

Q2. What contaminants can soil testing detect?

Soil testing can detect harmful substances such as petroleum products, heavy metals, pesticides, and chemicals from old storage tanks or industrial activity. Early detection helps prevent health hazards and environmental damage.

Q3. How much does soil testing in New Jersey cost?

The cost of soil testing in New Jersey varies depending on factors like property size, type of testing required, and site conditions. Basic tests may be affordable, while more detailed contamination analysis can increase the overall cost.

Q4. When should I conduct soil testing on my property?

Soil testing should be done before buying land, starting construction, installing a septic system, or if contamination is suspected. Regular testing is also recommended for long-term property maintenance.

Q5. Can soil testing help prevent septic system failure?

Yes, soil testing plays a critical role in septic system performance. It ensures the soil has the right drainage and filtration properties, helping prevent system failure, contamination, and expensive repairs.

Final Thoughts

Soil testing is one of the most effective ways to protect your property from hidden risks and costly damage. It provides the knowledge you need to make informed decisions, whether you’re buying, building, or maintaining a property.

Ignoring soil conditions can lead to serious consequences, including contamination, structural issues, and financial losses. On the other hand, proactive soil testing helps you identify problems early and take the right steps to address them.

From preventing foundation damage to detecting harmful contaminants, soil testing is a smart investment that pays off in the long run. If you want to safeguard your property and avoid unexpected expenses, working with experienced professionals like Simple Tank Services ensures accurate testing, reliable results, and peace of mind.

Preparing for Underground Heating Oil Tank Removal: A Homeowner’s Guide in New Jersey

Underground heating oil tanks were once a standard feature in many homes across New Jersey. However, as systems age, they can become a serious environmental and financial liability. Whether you’re planning a property sale, upgrading your heating system, or responding to signs of leakage, understanding the removal process is essential. This guide walks homeowners through everything—from compliance and inspections to cost expectations—so you can approach the project with clarity and confidence.

Why Underground Oil Tanks Are a Concern

Many older homes in New Jersey still have buried oil tanks, often installed decades ago. Over time, these tanks can corrode, leading to leaks that contaminate soil and groundwater. This can trigger expensive remediation requirements and even impact nearby properties.

Beyond environmental risks, an unused or leaking tank can complicate real estate transactions. Buyers often require tank sweeps and certifications before closing, making removal a proactive investment rather than a reactive expense.

Understanding Oil Tank Removal in New Jersey

When it comes to oil tank removal in New Jersey, strict environmental regulations govern the process. The state requires homeowners to follow specific guidelines to ensure safe extraction and proper disposal.

The removal process typically includes obtaining permits, conducting a tank sweep, excavating the tank, and testing surrounding soil. If contamination is detected, remediation steps must follow immediately to meet compliance standards.

Hiring a licensed contractor is not optional—it’s essential. Certified professionals understand local codes and can provide the necessary documentation to prove the job was completed correctly.

Pre-Removal Planning and Tank Inspection

Before beginning the removal process, homeowners must evaluate the condition and location of the tank. This stage helps determine the complexity of the project and identifies any potential environmental risks.

Tank Sweep and Detection

A tank sweep uses specialized equipment to confirm the presence and size of the underground tank. Even if you’re unsure whether a tank exists, this step eliminates guesswork and ensures no hidden liabilities remain.

Soil Testing Before Removal

Soil testing before removal is critical for identifying contamination early. By analyzing soil samples around the tank, contractors can determine whether leaks have occurred and plan remediation strategies accordingly.

Skipping this step can lead to unexpected costs later, especially if contamination is discovered after excavation begins.

Navigating Environmental Regulations for Oil Tanks

New Jersey has some of the strictest environmental laws regarding underground tanks. Homeowners must comply with state and local guidelines to avoid fines and delays.

Permits and Documentation

Before removal begins, permits must be obtained from local authorities. These permits ensure that the project meets safety and environmental standards. Proper documentation is also required after removal, including disposal records and soil test results.

Compliance and Safety Standards

Licensed contractors follow established protocols to prevent spills and protect surrounding areas. This includes using approved equipment, monitoring excavation, and ensuring safe transportation of the tank.

Understanding environmental regulations for oil tanks helps homeowners avoid legal complications and ensures a smooth process from start to finish.

Step-by-Step Oil Tank Removal Process

The removal process involves several carefully coordinated steps, each designed to minimize risk and ensure compliance.

First, contractors excavate the area around the tank using heavy equipment. Once exposed, the tank is cleaned to remove any remaining oil or sludge. This step is crucial for preventing spills during extraction.

Next, the tank is carefully lifted from the ground and transported to an approved disposal facility. After removal, soil samples are collected and tested to confirm whether contamination is present.

If the soil is clean, the excavation site is backfilled and restored. If contamination is detected, additional steps such as soil removal or treatment may be required.

Cost Factors and Budget Planning

The cost of removing an underground oil tank varies depending on several factors. Homeowners should understand these variables to plan their budget effectively.

Oil Tank Removal Cost NJ

The oil tank removal cost NJ homeowners face depends on tank size, depth, accessibility, and whether contamination is present. A straightforward removal is typically less expensive, while projects involving soil remediation can significantly increase costs.

Additional Expenses to Consider

Beyond basic removal, homeowners may need to budget for permits, inspections, and landscaping restoration. It’s also wise to set aside contingency funds in case unexpected issues arise during excavation.

Choosing the Right Contractor

Selecting a qualified contractor is one of the most important decisions in this process. Not all service providers have the expertise or certifications required to handle underground tank removal safely.

Look for contractors with proven experience, proper licensing, and positive customer reviews. They should provide a clear scope of work, detailed estimates, and transparent timelines.

Communication is equally important. A reliable contractor will explain each step, answer your questions, and keep you informed throughout the project.

Long-Term Benefits of Tank Removal

Removing an underground oil tank offers several long-term advantages. It eliminates environmental risks, improves property value, and simplifies future real estate transactions.

Homeowners also gain peace of mind knowing their property is free from hidden hazards. In many cases, removal can even reduce insurance concerns, as some policies may exclude coverage for tank-related damage.

Additionally, transitioning to modern heating systems can improve energy efficiency and reduce overall maintenance costs.

FAQ Section

Q1. How do I know if I have an underground oil tank on my property?
A professional tank sweep inspection can detect buried tanks using specialized equipment. This is the most reliable way to confirm their presence.

Q2. Is removing an underground oil tank mandatory in New Jersey?
While not always mandatory, removal is strongly recommended, especially if the tank is unused or leaking, to avoid environmental and legal risks.

Q3. How long does the removal process take?
Most projects are completed within one to three days, depending on the complexity and whether contamination is found.

Q4. What happens if contamination is discovered?
If soil contamination is detected, remediation steps such as soil removal or treatment will be required to meet environmental standards.

Q5. Can I sell my home with an underground oil tank?
Yes, but it can complicate the sale. Many buyers request removal or certification, making it beneficial to address the issue beforehand.

Summary

Preparing for underground tank removal requires careful planning, environmental awareness, and compliance with state regulations. From early inspection to final soil testing, each step plays a critical role in protecting your property value and avoiding costly penalties. Partnering with experienced professionals like Simple Tank Services ensures safe handling, proper documentation, and peace of mind throughout the process.

Oil Tank Cracks & Leaks: Signs You Shouldn’t Ignore

Introduction

Oil tanks are a critical part of many residential and commercial heating systems, especially in older properties. While they are designed to be durable, they are not immune to wear and tear. Over time, cracks and leaks can develop—often silently—leading to costly repairs, environmental damage, and even health risks.

Recognizing the early warning signs of oil tank issues is essential. Ignoring these signs can escalate minor problems into major liabilities. In this guide, we’ll walk you through the most important indicators that your oil tank may be compromised and what actions you should take.

Understanding Why Oil Tanks Crack and Leak

Oil tanks deteriorate due to several factors. Age is one of the most common reasons—most tanks have a lifespan of 15 to 30 years. Beyond that, corrosion becomes a serious concern.

Common Causes of Oil Tank Damage

-Internal corrosion caused by water accumulation

-External rust from moisture and soil exposure

-Structural stress or improper installation

-Poor maintenance or lack of inspection

Over time, these issues can weaken the tank’s integrity, eventually leading to cracks or leaks.

Key Signs of Oil Tank Cracks & Leaks

Unusual Increase in Heating Bills

If your heating costs suddenly rise without any change in usage, it may indicate oil loss due to a leak. Even a small crack can cause significant oil waste over time.

This is often one of the earliest warning signs and should never be ignored.

Oil Odor Around Your Property

A strong smell of oil inside or outside your home is a clear indication that something is wrong.

Heating Oil Tank Leak Detection

Detecting leaks early can save you from major expenses. If you notice a persistent oil smell:

-Check around the tank and surrounding soil

-Inspect nearby drains or basements

-Look for oil residue

This is where proper heating oil tank leak detection becomes critical in preventing environmental contamination.

3. Visible Rust, Cracks, or Wet Spots

Physical inspection of your tank can reveal a lot. Look for:

-Rust patches or corrosion

-Small cracks or bulges

-Wet or oily spots on the tank surface

These signs suggest structural weakness and potential leakage.

4. Contaminated Soil or Dead Vegetation

Oil Tank Leak Signs

If you notice patches of dead grass or soil discoloration near your tank, it could indicate a leak underground.

Oil contamination can:

-Kill plants and grass

-Pollute groundwater

-Create hazardous living conditions

These oil tank leak signs are especially important for outdoor or buried tanks.

5. Water in the Tank

Water accumulation inside the tank accelerates corrosion. It often enters through condensation or small openings.

Underground Oil Tank Problems

For buried tanks, this issue is more severe. Common underground oil tank problems include:

-Hidden corrosion

-Soil contamination

-Difficult leak detection

Regular inspection is essential to avoid long-term damage.

Risks of Ignoring Oil Tank Leaks

Ignoring oil tank issues can lead to serious consequences:

-Environmental Damage: Oil leaks contaminate soil and groundwater

-Health Hazards: Fumes can affect indoor air quality

-Costly Repairs: Cleanup and remediation can be extremely expensive

-Legal Liabilities: Property owners may face penalties for environmental damage

Addressing problems early is always more cost-effective than dealing with major damage later.

When to Consider Professional Help

If you notice any of the warning signs mentioned above, it’s time to consult professionals.

Residential Oil Tank Inspection

A professional residential oil tank inspection includes:

-Structural integrity assessment

-Leak detection tests

-Soil and environmental checks

Experts use advanced tools to identify hidden issues that are not visible to the naked eye.

In many cases, inspection results may indicate that replacement or removal is the safest option.

Importance of Timely Oil Tank Removal

When a tank is beyond repair, removal becomes necessary. Delaying this step increases risks and costs.

For homeowners dealing with aging or leaking tanks, opting for Oil Tank Removal in New Jersey ensures compliance with local regulations and prevents environmental hazards.

Additionally, professional services ensure:

-Safe removal procedures

-Proper disposal of hazardous materials

-Site cleanup and restoration

If your tank shows multiple signs of failure, investing in Oil Tank Removal in New Jersey is a proactive decision that protects both your property and the environment.

Preventive Measures to Avoid Oil Tank Leaks

Prevention is always better than cure. Here are some best practices:

-Schedule regular inspections

-Keep the tank clean and dry

-Monitor oil levels and usage

-Replace old tanks before failure

-Install leak detection systems

These steps can significantly extend the lifespan of your tank and reduce the risk of unexpected issues.

FAQs

Q1. What are the first signs of an oil tank leak?

The earliest signs include unusual heating bill increases, oil odors, and visible rust or wet spots around the tank.

Q2. How often should I inspect my oil tank?

It is recommended to conduct a professional inspection at least once a year, especially for older tanks.

Q3. Can a small oil tank leak cause major damage?

Yes, even minor leaks can contaminate soil and groundwater, leading to costly cleanup and environmental risks.

Q4. Is it necessary to remove an old oil tank?

If the tank shows signs of corrosion, leaks, or structural damage, removal is often the safest and most cost-effective solution.

Q5. How do professionals detect underground oil tank leaks?

Experts use advanced techniques such as soil testing, pressure testing, and specialized detection equipment.

Summary

Oil tank cracks and leaks are not problems you can afford to ignore. From rising heating bills to environmental contamination, the consequences can be severe if left unaddressed. Early detection, regular inspections, and timely action are key to avoiding costly repairs and health risks.

If you suspect any issue, consulting professionals is the safest approach. Trusted providers like Simple Tank Services offer expert solutions to ensure your property remains safe and compliant. Taking action today can save you from significant expenses and stress in the future.

Soil Remediation Best Practices: Effective Methods for Safe Contaminated Soil Cleanup

Introduction

Soil contamination is a serious issue that can impact property value, environmental health, and public safety. Whether caused by leaking fuel tanks, industrial waste, or chemical spills, contaminated soil must be handled with precision and expertise. Understanding the right approach ensures that cleanup is both effective and compliant with environmental regulations.

In this guide, we’ll walk through the best practices used in modern remediation projects and how professionals safely restore affected sites.

What Is Soil Remediation?

Soil remediation refers to the process of removing pollutants or neutralizing contaminants from soil to make it safe for use again. This process is essential in both residential and commercial settings, especially when contamination threatens groundwater or surrounding ecosystems.

From minor leaks to large-scale industrial pollution, proper remediation protects both human health and the environment.

Common Causes of Soil Contamination

Before diving into solutions, it’s important to understand what causes contamination in the first place:

-Underground storage tank leaks

-Industrial chemical disposal

-Oil and fuel spills

-Agricultural chemicals and pesticides

-Improper waste management

These issues often require contaminated soil cleanup strategies tailored to the severity and type of contamination.

Soil Remediation Best Practices for Effective Cleanup

Site Assessment and Testing

The first and most critical step in any remediation project is a detailed site assessment. Professionals collect soil samples and perform lab analysis to identify:

-Type of contaminants

-Concentration levels

-Depth of contamination

Without proper testing, any remediation effort becomes guesswork and can lead to unnecessary costs.

Choosing the Right Soil Contamination Removal Methods

Different contamination scenarios require different approaches. Some widely used soil contamination removal methods include:

-Excavation and removal

-Bioremediation (using microorganisms)

-Chemical treatment

-Soil vapor extraction

Each method is selected based on site conditions, contamination type, and environmental impact.

Safe Excavation and Disposal

In cases of severe contamination, excavation is often necessary. The contaminated soil is carefully removed and transported to approved disposal facilities.

This step must follow strict safety and environmental guidelines to avoid spreading pollutants.

Environmental Site Restoration

After removing contaminants, the next step is restoring the land. Proper environmental site restoration ensures the soil regains its natural balance and usability.

This may include:

-Adding clean soil

-Replanting vegetation

-Stabilizing the ground

Restoration is crucial for long-term sustainability and land usability.

Monitoring and Compliance

Remediation doesn’t end after cleanup. Ongoing monitoring ensures that contamination does not return and that the site remains safe over time.

Regulatory compliance is also essential, especially in regions with strict environmental laws.

Why Professional Land Remediation Services Matter

Handling contamination without expertise can lead to serious risks, including legal penalties and environmental damage. Professional land remediation services bring:

-Certified expertise

-Advanced equipment

-Regulatory compliance

-Cost-effective solutions

Working with experienced teams ensures the job is done correctly the first time.

Soil Remediation in New Jersey: What Makes It Unique

Environmental regulations vary by region, and Soil Remediation in New Jersey follows some of the most stringent guidelines in the country. Projects must comply with state environmental standards, making professional expertise even more critical.

From residential properties to commercial sites, ensuring proper remediation not only protects the environment but also helps property owners avoid future liabilities.

Challenges in Soil Remediation Projects

Even with the best practices, remediation projects can face challenges such as:

-Hidden contamination pockets

-Weather-related delays

-High disposal costs

-Regulatory approvals

Addressing these challenges requires proper planning and experienced execution.

Benefits of Proper Soil Remediation

Investing in proper remediation offers several advantages:

-Improved property value

-Safer environment for people and wildlife

-Compliance with environmental regulations

-Prevention of future contamination risks

A well-executed remediation plan is a long-term investment in land quality.

Final Thoughts

Soil remediation is a complex but necessary process for maintaining environmental safety and property usability. With the right approach and professional guidance, even heavily contaminated sites can be restored effectively.

Whether it’s a small residential issue or a large industrial cleanup, following best practices ensures optimal outcomes.

FAQs

Q1. What is soil remediation and why is it important?

Soil remediation is the process of removing or neutralizing contaminants in soil to make it safe for use and protect environmental health.

Q2. How long does a soil remediation project take?

The timeline depends on contamination levels, site size, and the method used. It can range from a few days to several months.

Q3. What are the most common soil contamination removal methods?

Common methods include excavation, bioremediation, chemical treatment, and soil vapor extraction.

Q4. Is soil remediation expensive?

Costs vary depending on the severity of contamination and the chosen method, but professional services help minimize long-term expenses.

Q5. Do I need professional land remediation services?

Yes, professionals ensure safe, compliant, and effective cleanup while reducing risks and ensuring proper environmental restoration.

Summary

Cleaning contaminated soil is not just about removing pollutants—it’s about restoring safety, value, and environmental balance. By following proven best practices such as testing, selecting the right methods, and ensuring proper restoration, property owners can achieve long-term results.

If you’re dealing with contamination, working with experts like Simple Tank Services ensures that the process is handled efficiently, safely, and in full compliance with regulations—giving you peace of mind and a clean, usable site.

Why Soil Testing After Oil Storage Tank Removal is Necessary

Removing an underground or above-ground oil storage tank is only the first step in protecting your property. What many property owners overlook is what lies beneath the surface—potential contamination that can lead to costly repairs, environmental hazards, and legal complications. This is where professional soil testing becomes critical.

In this blog, we’ll break down why soil testing is essential after tank removal, what risks you may face without it, and how it helps safeguard your property investment.

Understanding the Risks After Oil Tank Removal

When an oil tank is removed, it’s not uncommon to discover leaks that may have gone unnoticed for years. Heating oil and petroleum products can seep into the surrounding soil, causing contamination that spreads over time.

Even a small leak can lead to serious consequences, including:

-Soil contamination affecting plant life

-Groundwater pollution

-Structural risks to nearby foundations

-Expensive environmental cleanup requirements

Without proper testing, these issues may remain hidden until they become major liabilities.

What Is Soil Testing and Why It Matters

Soil testing is a detailed analysis performed to detect contamination levels in the ground. After oil tank removal, this process identifies whether petroleum hydrocarbons or other harmful substances are present.

Oil Tank Removal Soil Inspection: A Crucial First Step

An oil tank removal soil inspection helps determine if contamination exists immediately after tank extraction. Certified professionals collect soil samples from multiple depths and locations to ensure accurate results.

This process helps:

-Confirm whether your property meets environmental safety standards

-Provide documentation for real estate transactions

-Avoid future legal or financial complications

Why Soil Testing Is Non-Negotiable

Skipping soil testing might seem like a way to save money upfront, but it often leads to significantly higher costs later. Here’s why it’s absolutely necessary:

1. Detect Hidden Contamination Early

Oil leaks don’t always show visible signs. Testing allows you to detect issues before they escalate into major environmental concerns.

2. Meet Regulatory Requirements

Local and state regulations often require testing after tank removal. In places like New Jersey, environmental compliance is taken seriously, making soil testing in New Jersey a critical step for homeowners and businesses.

3. Protect Property Value

If you plan to sell your property, buyers and lenders will likely request proof that the land is free from contamination. A clean soil test report increases buyer confidence and speeds up the closing process.

Environmental Soil Testing Services: What to Expect

Professional environmental soil testing services follow a structured process to ensure accurate and reliable results.

Step-by-Step Testing Process

-Site Assessment – Evaluate the tank location and surrounding area

-Sample Collection – Gather soil samples from multiple depths

-Laboratory Analysis – Test for petroleum hydrocarbons and contaminants

-Reporting – Provide a detailed report with findings and recommendations

This comprehensive approach ensures no contamination goes undetected.

Signs You May Need Soil Testing Immediately

Even if your tank removal seemed smooth, certain warning signs indicate the need for immediate testing:

-Strong oil or fuel odors in the soil

-Dark or stained ground near the tank site

-Dead vegetation in the surrounding area

-Historical records of tank leaks

If any of these signs are present, delaying testing can worsen the situation.

Soil Contamination Testing After Tank Removal

Conducting soil contamination testing after tank removal is essential to determine the extent of environmental impact. This testing helps identify whether remediation is required and how severe the contamination is.

Why This Matters for Property Owners

-Prevents contamination from spreading

-Reduces long-term cleanup costs

-Ensures compliance with environmental guidelines

-Protects nearby water sources

Ignoring contamination can result in penalties and expensive remediation projects down the line.

The Role of Certified Soil Testing Companies

Choosing the right professionals makes a significant difference in the accuracy and reliability of results. Experienced teams specializing in certified soil testing companies NJ understand local regulations and testing protocols.

What to Look For:

-State-certified technicians

-Advanced testing equipment

-Transparent reporting

-Experience with oil tank removal projects

Working with certified experts ensures your testing meets all legal and environmental standards.

How Soil Testing Helps Avoid Costly Remediation

One of the biggest advantages of early testing is cost control. Identifying contamination early allows for targeted remediation instead of large-scale excavation.

Benefits of Early Detection:

-Lower cleanup costs

-Faster resolution

-Minimal disruption to property

-Better planning for repairs

In many cases, early intervention can save thousands of dollars.

Real Estate Impact: Why Buyers Demand Soil Testing

If you’re planning to sell your property, soil testing is not optional—it’s expected. Buyers, lenders, and insurers often require documentation proving the land is free from contamination.

In competitive markets, especially where soil testing in New Jersey is commonly required, having a clean report can significantly improve your chances of closing a deal quickly.

Common Misconceptions About Soil Testing

“If the tank is removed, the job is done”

Not true. Removal does not guarantee that the surrounding soil is clean.

“No smell means no contamination”

Contaminants can exist without any noticeable odor.

“Testing is too expensive”

Compared to remediation costs, testing is a small investment.

FAQs

Q1. Why is soil testing required after oil tank removal?

Soil testing helps detect contamination from oil leaks that may not be visible, ensuring your property is safe and compliant with regulations.

Q2. How long does soil testing take?

The process typically takes a few days, including sample collection and laboratory analysis.

Q3. Is soil testing mandatory in New Jersey?

In many cases, yes. Regulations often require testing to confirm environmental safety, making it an important step after tank removal.

Q4. What happens if contamination is found?

If contamination is detected, a remediation plan is developed to clean and restore the affected soil.

Q5. Can I sell my property without soil testing?

It’s possible, but highly unlikely. Most buyers and lenders will require proof that the soil is contamination-free.

Summary

Soil testing after oil storage tank removal is not just a precaution—it’s a necessity. It protects your property, ensures environmental safety, and prevents unexpected financial burdens. Whether you’re a homeowner, investor, or preparing to sell, taking this step is critical for long-term peace of mind.

For reliable and professional assistance, Simple Tank Services offers expert solutions to ensure your property is thoroughly inspected and compliant with environmental standards. Taking action today can save you from major complications tomorrow.


Simple Tank Groundwater Cleanup Methods: From Natural Recovery to Advanced Solutions

Groundwater contamination is a serious environmental concern, especially in residential and commercial properties where underground storage tanks have been used for years. Whether it’s heating oil tanks or fuel storage systems, even a small leak can lead to widespread damage beneath the surface.

Understanding the right cleanup methods—from natural recovery to advanced remediation technologies—can help property owners take the right action at the right time.

Understanding Groundwater Contamination in New Jersey

In regions like Groundwater Contamination in New Jersey, aging underground storage tanks and environmental factors often contribute to subsurface pollution. When petroleum products seep into the soil, they eventually reach groundwater, posing risks to drinking water supplies and surrounding ecosystems.

This issue requires a structured cleanup approach that ensures not only soil remediation but also groundwater restoration.

Causes of Tank-Related Groundwater Contamination

Several factors contribute to groundwater contamination from storage tanks:

-Corrosion of old steel tanks

-Improper installation or lack of maintenance

-Overfilling or accidental spills

-Cracks or leaks in underground piping

Once contamination begins, it spreads silently underground, making early detection crucial.

Natural Recovery Methods (Monitored Natural Attenuation)

One of the simplest and most cost-effective cleanup approaches is natural recovery, also known as monitored natural attenuation.

How It Works

This method relies on natural biological, chemical, and physical processes to break down contaminants over time.

Benefits

-Cost-effective solution

-Minimal site disturbance

-Environmentally friendly

Limitations

-Takes longer to achieve results

-Requires continuous monitoring

Natural recovery is ideal for sites where contamination levels are low and not actively spreading.

Soil Remediation Techniques for Effective Cleanup

Soil Remediation Techniques for Effective Cleanup

Soil remediation plays a critical role in preventing contaminants from reaching groundwater.

Common Methods Include:

-Excavation and removal of contaminated soil

-Soil vapor extraction (SVE)

-Bioremediation using microorganisms

By addressing contaminated soil early, property owners can significantly reduce long-term groundwater damage.

Advanced Groundwater Remediation Solutions

Advanced Groundwater Remediation Solutions

When contamination levels are severe, advanced remediation methods are required.

Popular Techniques:

-Pump and Treat Systems: Contaminated water is extracted, treated, and reintroduced

-Air Sparging: Injecting air to remove volatile contaminants

-Chemical Oxidation: Breaking down pollutants using chemical agents

These methods are highly effective but require professional expertise and monitoring.

Tank Removal and Source Elimination

The most important step in any cleanup process is removing the source of contamination.

Key Steps Include:

-Safe tank removal

-Disposal of contaminated materials

-Site assessment and testing

Without eliminating the source, contamination will continue regardless of remediation efforts.

The Importance of Groundwater Testing and Monitoring

Groundwater Testing and Monitoring

Regular groundwater testing ensures that remediation efforts are working effectively.

Monitoring Includes:

-Installing observation wells

-Periodic water sampling

-Laboratory analysis

This data helps determine whether further action is needed or if the site is safe.

Choosing the Right Cleanup Method

The right cleanup method depends on several factors:

-Level and spread of contamination

-Soil type and groundwater depth

-Property usage (residential or commercial)

-Regulatory requirements

For example, in Groundwater Contamination in New Jersey, strict environmental regulations often require a combination of remediation methods to ensure complete cleanup.

Preventing Future Groundwater Contamination

Prevention is always better than remediation. Property owners should:

-Conduct regular tank inspections

-Replace old tanks with modern systems

-Install leak detection systems

-Maintain proper documentation

Taking these steps can help avoid costly cleanup processes in the future.

Role of Professionals in Cleanup Projects

Groundwater cleanup is not a DIY task. Environmental professionals use advanced tools, regulatory knowledge, and scientific methods to ensure effective remediation.

Hiring experienced experts ensures:

-Compliance with environmental laws

-Accurate contamination assessment

-Long-term site safety

FAQs

Q1. What causes groundwater contamination from tanks?
Leaks, corrosion, and improper maintenance of underground storage tanks are the most common causes.

Q2. How long does groundwater cleanup take?
It depends on contamination severity. Natural methods may take years, while advanced solutions can speed up the process.

Q3. Is groundwater contamination dangerous?
Yes, it can affect drinking water quality and harm human health and the environment.

Q4. Can contaminated groundwater be fully cleaned?
With proper remediation techniques and monitoring, groundwater can often be restored to safe levels.

Q5. Do I need professional help for tank cleanup?
Yes, professional services ensure safe removal, accurate testing, and compliance with regulations.

Summary

Groundwater contamination from storage tanks can pose serious risks if not addressed promptly. From natural recovery methods to advanced remediation technologies, each approach plays a vital role depending on the severity of contamination. Early detection, proper tank removal, and continuous monitoring are key to successful cleanup. With the right strategy and professional support, property owners can restore environmental safety and protect valuable water resources. At every stage of the process, choosing reliable experts like Simple Tank Services. ensures efficient and compliant groundwater remediation.

Why Hiring Experts for Soil Testing Can Protect Your Investment

Investing in land, whether for residential, commercial, or industrial purposes, is a significant financial decision. However, one critical step that many property owners overlook is professional soil testing. The condition of the soil directly impacts construction stability, environmental safety, and long-term property value. Without accurate testing, hidden issues beneath the surface can lead to costly repairs, regulatory complications, and even structural failures.

Hiring experts ensures that soil analysis is conducted with precision, using advanced techniques and industry-standard procedures. This approach not only safeguards your investment but also provides clarity and confidence before moving forward with any development project.

Understanding the Importance of Soil Testing

Soil testing is not just about analyzing dirt—it is a scientific process that evaluates soil composition, contamination levels, moisture content, and load-bearing capacity. These factors determine whether the land is suitable for construction or requires remediation.

Professional services like Soil Testing in New Jersey help identify potential risks such as underground contamination, unstable soil layers, or poor drainage conditions. Detecting these issues early allows property owners to take corrective measures before construction begins, preventing expensive setbacks later.

How Expert Soil Testing Prevents Financial Loss

Accurate Site Assessment

One of the main advantages of hiring professionals is their ability to perform a thorough and accurate site assessment. Experts use specialized equipment to analyze soil layers and detect inconsistencies that may not be visible to the untrained eye.

By leveraging geotechnical soil testing services, professionals can determine whether the soil can support heavy structures or if additional reinforcement is required. This ensures that your project starts on a solid foundation.

Early Detection of Contamination

Contaminated soil can pose serious health and environmental risks. Issues such as oil spills, chemical leaks, or industrial waste can remain hidden underground for years.

Through soil contamination testing, experts can identify hazardous substances and recommend effective remediation strategies. Addressing contamination early not only protects the environment but also prevents legal liabilities and project delays.

Compliance with Environmental Regulations

Modern construction projects must comply with strict environmental regulations. Failing to meet these standards can result in penalties, project shutdowns, or legal complications.

Professional testing ensures adherence to local and federal guidelines, including environmental soil testing requirements. Experts provide detailed reports that can be used for permits, approvals, and documentation, making the process smoother and more efficient.

The Role of Experts in Construction Success

Detailed Soil Analysis Reports

Experts provide comprehensive reports that include soil classification, load-bearing capacity, and contamination levels. These reports serve as a blueprint for engineers and contractors, helping them make informed decisions.

Customized Recommendations

Every site is different, and experts tailor their recommendations based on specific soil conditions. Whether it involves soil stabilization, drainage improvement, or excavation, professional guidance ensures optimal results.

Why DIY Soil Testing Is Risky

While DIY kits may seem cost-effective, they lack the accuracy and depth required for construction projects. These kits often provide limited information and fail to detect deeper issues.

Professional soil analysis for construction involves advanced tools, laboratory testing, and expert interpretation. Relying on incomplete data can lead to incorrect decisions, putting your entire investment at risk.

Long-Term Benefits of Professional Soil Testing

Increased Property Value

Properties with verified soil quality and environmental safety are more attractive to buyers and investors. Professional testing adds credibility and enhances market value.

Reduced Maintenance Costs

Identifying and addressing soil issues early reduces the likelihood of future repairs. This leads to lower maintenance costs and improved structural durability.

Improved Safety

Stable and contamination-free soil ensures the safety of occupants and surrounding environments. This is especially important for residential and commercial developments.

When Should You Conduct Soil Testing?

-Before purchasing land

-Prior to construction or development

-After environmental incidents like spills

-During property redevelopment projects

Conducting soil testing at the right time helps avoid unexpected challenges and ensures a smooth project timeline.

Choosing the Right Soil Testing Experts

When selecting a soil testing company, consider the following factors:

-Experience and industry expertise

-Use of advanced equipment and techniques

-Compliance with environmental standards

-Detailed reporting and consultation services

Working with professionals who specialize in Soil Testing in New Jersey ensures that your project meets all safety and regulatory requirements.

Common Soil Issues Identified by Experts

-Poor drainage and water retention

-Soil contamination from chemicals or oil

-Weak load-bearing capacity

-High moisture content

-Uneven soil composition

Addressing these issues early helps prevent structural damage and costly repairs.

The Cost vs. Value of Professional Soil Testing

Many property owners hesitate to invest in soil testing due to upfront costs. However, the long-term benefits far outweigh the initial expense.

Professional testing helps:

-Avoid construction delays

-Prevent structural failures

-Ensure regulatory compliance

-Protect environmental health

In essence, it is a small investment that safeguards a much larger one.

FAQs

Q1. Why is soil testing important before construction?

Soil testing helps determine whether the land is stable and safe for construction, preventing structural issues and costly repairs.

Q2. How often should soil testing be done?

It depends on the project, but testing is recommended before construction, after environmental incidents, and during redevelopment.

Q3. What does soil contamination testing detect?

It identifies harmful substances like oil, chemicals, and industrial waste that may pose environmental or health risks.

Q4. Can soil testing increase property value?

Yes, verified soil quality and safety make properties more attractive to buyers and investors.

Q5. How long does professional soil testing take?

The process can take a few days to a couple of weeks, depending on the complexity of the site and required analysis.

Summary

Hiring experts for soil testing is a crucial step in protecting your investment. From identifying contamination to ensuring structural stability, professional testing provides the insights needed for successful project execution. By working with experienced specialists, you can minimize risks, reduce costs, and ensure compliance with environmental regulations. Incorporating reliable services like Soil Testing in New Jersey, Simple Tank Services, into your project planning ensures long-term safety, efficiency, and peace of mind.

Top Factors That Impact Oil Tank Removal Approval and Inspection Results

Removing an underground or above-ground oil tank is not just a simple excavation task—it involves strict regulatory compliance, environmental safety checks, and detailed inspection procedures. Homeowners and property buyers often underestimate how many variables can influence approval and inspection outcomes. Understanding these factors helps avoid delays, penalties, and costly remediation.

If you’re planning Oil Tank Removal in New Jersey, knowing what inspectors evaluate and what authorities require can significantly improve your chances of a smooth approval process.

Why Oil Tank Removal Approval Matters

Before any tank removal project begins, proper permits and approvals must be secured. Local municipalities and environmental agencies enforce strict guidelines to prevent soil contamination and groundwater pollution.

Failure to meet approval standards can result in:

-Project delays

-Additional environmental testing

-Increased remediation costs

-Legal compliance issues

This makes preparation and compliance critical from the start.

Tank Condition and Structural Integrity

One of the first factors inspectors assess is the condition of the tank. Older tanks, especially those made of steel, are more prone to corrosion and leakage.

If a tank shows signs of:

-Rust or deterioration

-Oil seepage

-Structural weakness

It may trigger additional environmental inspections. Damaged tanks often require soil testing, which can delay approval timelines.

Soil Contamination Levels

Environmental Compliance for Oil Tank Removal

Soil testing plays a central role in determining whether removal can proceed smoothly. Inspectors check for petroleum contamination around the tank area.

If contamination is detected:

-Soil remediation may be required

-Additional permits may be needed

-Approval timelines can extend significantly

Clean soil conditions, on the other hand, lead to faster inspection clearance and reduced costs.

Proper Documentation and Permits

Incomplete or inaccurate documentation is one of the most common reasons for approval delays.

Required documents typically include:

-Permit applications

-Site plans

-Tank registration details

-Environmental reports

Working with professionals ensures all paperwork is accurate and submitted correctly, helping streamline the approval process for oil tank removal in New Jersey.

Compliance with Local Regulations

Underground Oil Tank Inspection Requirements

Each municipality in New Jersey may have slightly different requirements. However, common inspection standards include:

-Safe excavation practices

-Proper tank cleaning before removal

-Certified disposal methods

Inspectors verify that all procedures align with state and local environmental laws. Non-compliance can lead to immediate project shutdowns.

Contractor Experience and Certification

Hiring a qualified and licensed contractor significantly impacts approval success.

Experienced contractors:

-Understand regulatory requirements

-Follow proper safety protocols

-Handle documentation efficiently

This reduces the risk of inspection failures and ensures smoother project execution.

Tank Location and Accessibility

The physical location of the oil tank also affects inspection results.

Challenges may include:

-Tanks located near building foundations

-Limited excavation space

-Proximity to utility lines

Difficult access can complicate removal and may require additional safety measures, which inspectors will closely evaluate.

 Proper Tank Cleaning and Disposal

Oil Tank Removal Permit Process NJ

Before removal, tanks must be properly cleaned to eliminate residual oil and vapors. Inspectors check whether:

-The tank has been safely emptied

-Hazardous materials are handled correctly

-Disposal follows approved environmental guidelines

Improper cleaning or disposal can result in failed inspections and legal consequences.

Groundwater Protection Measures

If the tank is located in an area with high groundwater levels, inspectors will pay extra attention to contamination risks.

Preventive steps include:

-Installing barriers

-Monitoring groundwater quality

-Conducting additional environmental assessments

These measures help ensure environmental safety and compliance.

 Final Inspection and Closure Reports

Residential Oil Tank Removal Guidelines

After the tank is removed, a final inspection is conducted. This includes:

-Verifying complete tank removal

-Confirming soil condition

-Reviewing documentation

A closure report is then issued, which is essential for property transactions and future development approvals.

 Impact on Property Value and Transactions

Oil tank removal approvals directly influence real estate transactions. Buyers often require proof that:

-The tank has been safely removed

-No contamination exists

-All inspections are passed

A failed inspection can delay or even cancel property sales.

Common Mistakes That Delay Approval

Avoid these common errors:

-Skipping soil testing

-Hiring unlicensed contractors

-Submitting incomplete permits

-Ignoring local regulations

Addressing these issues early ensures a smoother inspection process.

FAQs

Q1. How long does oil tank removal approval take in New Jersey?

Approval timelines vary but typically range from a few days to several weeks, depending on permits and environmental conditions.

Q2. Is soil testing mandatory for oil tank removal?

Yes, in most cases soil testing is required to check for contamination and ensure environmental compliance.

Q3. What happens if contamination is found during inspection?

If contamination is detected, remediation procedures must be completed before final approval is granted.

Q4. Can I remove an oil tank without a permit?

No, permits are mandatory. Unauthorized removal can lead to penalties and legal issues.

Q5. Does oil tank removal increase property value?

Yes, removing a tank and obtaining proper certification improves property value and buyer confidence.

Summary

Oil tank removal approval depends on multiple technical, environmental, and regulatory factors. From tank condition and soil quality to documentation and contractor expertise, each element plays a critical role in determining inspection outcomes. Proper planning, compliance, and professional execution can significantly reduce delays and risks. By understanding these key factors, property owners can ensure a successful and stress-free removal process with Simple Tank Services.


Signs of a Leaking Underground Oil Tank: How to Identify Problems Early

Underground oil tanks are commonly used for heating systems in older homes, especially across colder regions. While they serve an important purpose, these tanks can become a hidden liability over time. A leak often starts small but can quickly escalate into environmental hazards, costly repairs, and legal complications if not addressed early.

Understanding the warning signs of a leaking underground oil tank helps property owners act before the situation worsens. Early detection not only protects your property but also reduces cleanup costs and ensures compliance with environmental regulations.

Why Early Detection of Underground Oil Tank Leaks Matters

An underground oil tank leak is not always visible at first, which makes it particularly dangerous. Oil can seep into the soil, contaminate groundwater, and spread beyond your property lines. This can lead to serious environmental damage and expensive remediation processes.

Additionally, property value can drop significantly if contamination is detected. In many cases, homeowners are required to handle cleanup before selling or refinancing their property. That’s why early detection is critical—not just for safety, but also for financial protection.

Common Signs of a Leaking Underground Oil Tank

Unexplained Increase in Oil Consumption

If your heating system suddenly starts using more oil than usual, it could indicate a leak. Even a small crack in the tank can result in a gradual loss of fuel over time.

Strong Oil Odor Around Property

A noticeable oil smell inside your home or near your yard is often one of the first warning signs. This odor may become stronger in warmer weather or after rainfall.

Soil or Grass Discoloration

Leaking oil can affect the surrounding soil and vegetation. You may notice patches of dead grass, oily residue, or darkened soil near the tank location.

Presence of Oil Sheen in Water

If you see a rainbow-like sheen in nearby puddles or water sources, it may indicate oil contamination. This is a serious sign that requires immediate attention.

Heating Oil Tank Leak Warning Signs in Older Systems

Older tanks are more vulnerable to corrosion and structural failure. Recognizing heating oil tank leak warning signs early can help prevent extensive damage.

Corrosion and Rust Formation

Over time, metal tanks begin to corrode due to moisture exposure. Rust weakens the tank walls, increasing the likelihood of leaks.

Wet Spots or Oil Stains Near Tank

If you notice damp areas or oil stains near where the tank is buried, it’s a clear indication that oil may be escaping.

Malfunctioning Heating System

Air entering the fuel line due to a leak can cause inconsistent heating performance or system shutdowns.

Environmental Impact of Underground Oil Tank Leaks

Leaks from underground tanks don’t just affect your property—they can have broader environmental consequences. Oil contamination can seep into groundwater, affecting drinking water supplies and nearby ecosystems.

In many areas, environmental agencies enforce strict regulations regarding contamination cleanup. Ignoring the issue can result in penalties, legal action, and mandatory remediation costs. This makes addressing leaks promptly a necessity rather than an option.

When to Consider Residential Oil Tank Replacement Signs

Sometimes, repairing a tank is not enough. Recognizing residential oil tank replacement signs helps you decide when it’s time for a complete upgrade.

Aging Tank System

Most underground tanks have a lifespan of 15–25 years. If your tank is older, replacement is often the safer and more cost-effective option.

Frequent Repairs

If you find yourself repeatedly fixing issues, it may be more practical to replace the tank entirely.

Visible Structural Damage

Cracks, dents, or significant corrosion are clear indicators that the tank is no longer reliable.

Soil Contamination from Oil Tank: What to Look For

One of the most serious consequences of a leak is soil contamination from oil tank systems. This issue can spread quickly and become expensive to resolve.

Persistent Fuel Smell in Soil

Even after cleaning, a lingering oil smell indicates deeper contamination.

Poor Plant Growth

Oil-contaminated soil loses its ability to support healthy vegetation, leading to patchy or dying plants.

Changes in Soil Texture

Contaminated soil may appear greasy or unusually compacted due to oil saturation.

How to Check Underground Oil Tank Leak Early

Taking proactive steps can help identify issues before they escalate. Knowing how to check underground oil tank leak problems early can save you thousands in repair costs.

Schedule Regular Inspections

Professional inspections can detect leaks that are not visible to the naked eye. Experts use specialized equipment to assess tank integrity.

Monitor Fuel Levels

Keep track of your oil usage. Unexpected drops may indicate a hidden leak.

Install Leak Detection Systems

Modern systems can alert you to leaks in real time, allowing for immediate action.

What to Do If You Suspect a Leak

If you notice any of the signs mentioned above, it’s important to act quickly. Delaying action can worsen the damage and increase costs.

Start by contacting a professional service provider to inspect the tank. If a leak is confirmed, you may need to consider oil tank removal in New Jersey to prevent further contamination and comply with local regulations. In many cases, early intervention makes the process simpler and less expensive.

Choosing the Right Solution for Long-Term Safety

Addressing a leaking underground oil tank requires a strategic approach. Depending on the severity, you may need repairs, replacement, or complete removal.

Homeowners often explore oil tank removal in New Jersey as a permanent solution to eliminate risks and improve property safety. This option not only prevents future leaks but also increases property value and ensures environmental compliance.

FAQs

Q1. How do I know if my underground oil tank is leaking?
Common signs include strong oil odors, increased fuel usage, dead vegetation, and oil stains in soil or water.

Q2. Is a leaking oil tank dangerous?
Yes, it can contaminate soil and groundwater, pose health risks, and lead to expensive cleanup requirements.

Q3. How often should underground oil tanks be inspected?
It’s recommended to have professional inspections every 1–2 years, especially for older tanks.

Q4. Can a leaking oil tank be repaired?
Minor issues may be repaired, but severe damage often requires replacement or removal.

Q5. What is the best solution for old underground oil tanks?
In many cases, complete removal is the safest and most cost-effective long-term solution.

Summary

Detecting a leaking underground oil tank early can save you from costly repairs, environmental damage, and legal issues. By understanding the warning signs—such as unusual oil usage, odors, soil discoloration, and system malfunctions—you can take timely action to protect your property.

Regular inspections, monitoring fuel levels, and addressing issues promptly are key steps in preventing serious problems. Whether you need repairs or complete oil tank removal in New Jersey, taking action early ensures long-term safety and peace of mind. With expert support from professionals like Simple Tank Services., homeowners can confidently manage oil tank concerns and maintain a safe, compliant property.

Soil Testing vs. Tank Testing: Which Method Is More Reliable for Underground Oil Tanks?

Underground oil tanks have been used for decades to store heating oil for homes and businesses. However, as these tanks age, the risk of corrosion, leaks, and environmental contamination increases significantly. Because of these risks, property owners and buyers often need reliable inspection methods to determine whether an underground tank is leaking.

Two common methods are soil testing and tank testing. While both are used during environmental inspections, they differ greatly in accuracy, reliability, and the level of assurance they provide.

Understanding the difference between these two approaches can help property owners make better decisions when evaluating underground oil tanks.

Understanding Soil Testing for Underground Oil Tanks

Soil testing is a method used to detect petroleum contamination in the soil surrounding an underground storage tank. This process involves collecting soil samples near the tank and analyzing them in a laboratory for signs of heating oil or petroleum products.

In many cases, environmental professionals rely on Soil Testing in New Jersey when they want a more accurate assessment of potential leakage. The presence of petroleum compounds in the surrounding soil often indicates that the tank has leaked at some point.

Unlike indirect testing methods, soil sampling directly evaluates the environment around the tank. If contamination is detected, property owners can take immediate action before the issue becomes more severe.

Because underground oil tanks can corrode from the inside out, a tank might pass pressure testing while still having small leaks that slowly contaminate the surrounding soil. Soil testing helps identify those hidden issues that other methods might miss.

What Is Tank Testing and How Does It Work?

Underground Oil Tank Testing Methods

Tank testing generally involves pressure testing or electronic monitoring systems to determine whether the tank is currently holding pressure. The idea behind this process is simple: if the tank maintains pressure, it is assumed to be structurally sound.

However, the reliability of these underground oil tank testing methods has been debated within the environmental industry. Tanks may pass pressure tests even if corrosion has already occurred, especially if leaks are extremely small or intermittent.

Pressure testing also evaluates the tank itself rather than the surrounding environment. This means contamination could already exist in the soil even if the tank appears to be intact during testing.

Because of these limitations, many environmental professionals consider tank testing to be a preliminary screening tool rather than a definitive confirmation of safety.

Why Soil Sampling Provides More Reliable Results

Environmental Soil Contamination Testing

One of the biggest advantages of soil testing is that it directly evaluates whether petroleum contamination is present in the environment. Environmental soil contamination testing allows inspectors to analyze soil samples for hydrocarbons, providing clear evidence of leakage if contamination exists.

If petroleum compounds are detected, it confirms that a leak has occurred at some point. This level of certainty is something tank pressure tests often cannot provide.

In many real estate transactions, buyers request Soil Testing in New Jersey because it offers greater peace of mind compared to tank testing alone. A laboratory analysis of soil samples gives a more complete picture of environmental risk.

Additionally, soil testing can identify historical leaks that may no longer be active but still require remediation. Detecting these issues early helps prevent expensive environmental cleanup problems later.

The Risks of Relying Only on Tank Testing

Heating Oil Tank Inspection

A typical heating oil tank inspection may involve visual evaluation, pressure testing, and electronic leak detection. While these inspections can provide useful information, they may not reveal past leaks that already contaminated the soil.

For example, if a tank leaked years ago but corrosion sealed the opening afterward, the tank could still pass a pressure test today. However, contamination may already exist beneath the ground.

This is why many environmental consultants recommend soil sampling in addition to tank testing. The goal is to evaluate both the structural integrity of the tank and the condition of the surrounding environment.

By combining multiple inspection approaches, property owners can reduce uncertainty and better understand potential environmental risks.

When Soil Testing Is the Preferred Method

Soil testing is often recommended in situations such as:

-Real estate transactions involving older homes

-Properties with undocumented underground tanks

-Sites where tank age and maintenance history are unknown

-Areas with visible signs of oil leakage or staining

Because underground tanks installed decades ago were often made from unprotected steel, corrosion is common. As these tanks deteriorate, even small leaks can lead to significant contamination over time.

In these cases, petroleum contamination soil analysis becomes essential for identifying whether environmental damage has already occurred.

Laboratory testing provides measurable results, allowing environmental professionals to determine the level of contamination and recommend the appropriate course of action.

Which Method Is Ultimately More Reliable?

When comparing the two methods, soil testing is generally considered more reliable for detecting environmental contamination.

Tank testing evaluates whether the tank currently holds pressure, but it cannot confirm whether leaks have occurred in the past. Soil testing, on the other hand, directly examines the environment where contamination would appear.

Because of this, many environmental experts recommend using soil testing as the primary method when investigating underground oil tanks.

Property owners should also remember that environmental regulations and insurance requirements may vary by state. Choosing the right inspection method can help prevent costly surprises and ensure compliance with environmental guidelines.

FAQs

Q1. What is the main difference between soil testing and tank testing?

Soil testing analyzes the surrounding soil for petroleum contamination, while tank testing evaluates whether the tank can hold pressure without leaking.

Q2. Why is soil testing considered more reliable?

Soil testing directly detects contamination in the environment, making it more accurate for identifying both current and past leaks.

Q3. When should underground oil tanks be tested?

Testing is recommended during property sales, when tanks are old, or when there is uncertainty about the tank’s condition.

Q4. Can a tank pass testing even if it has leaked before?

Yes. A tank may pass pressure testing even if a leak occurred previously and contamination already exists in the soil.

Q5. Who should perform soil testing for underground tanks?

Licensed environmental professionals or certified testing companies should conduct soil sampling and laboratory analysis.

Summary

When evaluating underground oil tanks, accuracy is critical. Soil testing provides direct evidence of contamination, while tank testing focuses primarily on structural integrity. For property owners seeking a reliable assessment, soil testing often offers the clearest answers.

By identifying contamination early, property owners can protect their investments, avoid environmental liabilities, and ensure safer property transactions. Industry experts, including insights highlighted by Simple Tank Services , often emphasize that thorough environmental evaluation is the key to reducing long-term risks associated with aging underground oil tanks.

What Homeowners Should Know About Groundwater Contamination in New Jersey

Groundwater is one of the most important natural resources for homeowners and communities. It supplies drinking water, supports ecosystems, and plays a major role in maintaining environmental balance. However, pollution from underground sources, aging infrastructure, and leaking tanks can affect water quality over time.

For many homeowners, understanding the risks associated with Groundwater Contamination in New Jersey is essential. The state has a long history of residential heating oil tanks and industrial activity, both of which can contribute to groundwater issues if not properly managed. Knowing the causes, warning signs, and prevention strategies can help protect both property value and environmental safety.

Understanding Groundwater and Why It Matters

Groundwater is water stored beneath the earth’s surface in soil and rock layers called aquifers. Many homes rely on groundwater sources for drinking water, irrigation, and household use. When contaminants enter the soil, they can eventually reach these aquifers.

Once pollution reaches groundwater, it can spread slowly through the soil and remain for years if not properly addressed. This makes early detection and prevention extremely important for homeowners.

Contamination often begins with small issues such as underground oil tank leaks, chemical spills, or improper disposal of hazardous materials. Over time, these pollutants seep into the soil and move toward groundwater reserves.

Common Causes of Groundwater Issues in Residential Areas

Underground Oil Tank Leaks

Many homes built decades ago used heating oil stored in underground tanks. While these tanks were once common, older systems can corrode and eventually leak into surrounding soil.

When a leak occurs, heating oil can travel through the soil and eventually affect nearby water sources. This is one of the most common environmental concerns for homeowners dealing with older heating systems.

Improper Waste Disposal

Certain household chemicals, cleaning agents, and oils can also contribute to groundwater pollution when they are disposed of incorrectly. Over time, these substances accumulate in soil layers and move deeper into the ground.

Construction and Land Development

Excavation and land disturbance can expose contaminated soil or release pollutants trapped underground. This can accelerate the spread of pollutants into water sources if environmental safety procedures are not followed.

Signs That May Indicate Environmental Risks for Homeowners

Detecting groundwater issues early can prevent larger environmental and financial problems later. Homeowners should watch for warning signs that may indicate soil or groundwater concerns.

Some common indicators include:

-Strong petroleum or chemical odors around the property

-Oil stains or discolored soil near tank locations

-Changes in water taste or smell

-Unexpected vegetation damage in certain areas of the yard

-Discovery of an abandoned oil tank during property inspections

These warning signs often signal potential environmental risks for homeowners that should be investigated by professionals.

The Importance of Soil Testing for Oil Tanks

When an underground heating tank is suspected of leaking, professional soil testing for oil tanks is one of the most reliable ways to determine whether contamination has occurred.

This testing process involves collecting soil samples from areas around the tank and analyzing them for petroleum compounds or other pollutants. The results help determine whether contamination is present and what steps are needed to resolve the issue.

Accurate testing is especially important during property sales or renovations, as environmental concerns can affect permits, insurance coverage, and property value.

Many homeowners concerned about Groundwater Contamination in New Jersey choose professional testing to confirm whether their property is environmentally safe.

Why Oil Tank Removal in New Jersey Is Often Recommended

Older underground tanks pose a long-term risk even if they have not yet leaked. Over time, corrosion weakens metal tanks and increases the chance of failure.

Because of this, oil tank removal in New Jersey has become a common solution for homeowners looking to eliminate potential environmental risks.

Removing an outdated tank provides several benefits:

-Reduces the chance of soil contamination

-Improves property resale value

-Prevents costly environmental cleanup in the future

-Helps ensure compliance with local regulations

Professional removal services safely extract the tank and evaluate the surrounding soil to confirm whether contamination exists.

Steps Homeowners Can Take to Protect Their Property

Preventing groundwater problems is far easier and less expensive than dealing with environmental cleanup later. Homeowners can take several proactive steps to protect their property.

Schedule Regular Inspections
If a property has an underground tank or previously had one, routine inspections help identify potential issues before they become serious problems.

Test Soil When Buying a Property
Environmental testing during real estate transactions helps ensure buyers are aware of any potential risks before completing the purchase.

Dispose of Chemicals Safely
Proper disposal of oils, fuels, and household chemicals prevents pollutants from entering the soil.

Work with Licensed Environmental Professionals
Environmental specialists can evaluate risk levels and recommend solutions that meet state regulations.

Why Professional Services Are Important

Environmental concerns related to tanks and soil contamination require specialized expertise and equipment. Attempting to handle the issue without professional assistance can lead to inaccurate results or incomplete cleanup.

Experienced environmental professionals understand state regulations, testing procedures, and proper removal methods. Their services help homeowners address issues efficiently while ensuring environmental safety.

Frequently Asked Questions

Q1. What causes groundwater contamination near residential homes?

Common causes include leaking underground oil tanks, improper chemical disposal, industrial pollutants, and aging infrastructure that allows contaminants to seep into soil.

Q2. How do homeowners know if their property may be contaminated?

Warning signs may include petroleum odors, unusual soil discoloration, or discovery of old underground tanks during inspections.

Q3. Is soil testing necessary before removing an underground oil tank?

Yes. Soil testing helps determine whether contamination has occurred and identifies the extent of the problem before removal or remediation begins.

Q4. Can groundwater contamination affect property value?

Yes. Environmental contamination can reduce property value and complicate real estate transactions if it is not properly addressed.

Q5. What is the safest way to handle an old underground oil tank?

The safest approach is professional inspection, environmental testing, and certified tank removal to ensure the property meets environmental safety standards.

Summary

Groundwater protection is an important responsibility for homeowners, especially in regions with older infrastructure and underground heating systems. Understanding the causes and warning signs of contamination allows property owners to act early and prevent long-term environmental damage.

Professional inspections, soil testing, and safe tank removal all play a key role in protecting both property and local water sources. Companies like Simple Tank Services help homeowners identify risks, perform environmental testing, and ensure safe tank removal when necessary. Taking proactive steps today can prevent costly environmental problems and help maintain safe groundwater for future generations.

How Professionals Safely Remove Residential Underground Oil Tanks in New Jersey

Underground oil tanks were commonly installed in residential properties decades ago to store heating oil. While these tanks once served as a reliable energy source, many have now reached the end of their lifespan. Old tanks can corrode, leak, and contaminate surrounding soil, creating environmental risks and potential property value issues.

Because of these risks, property owners increasingly rely on professional services for residential oil tank removal. Licensed experts follow strict safety procedures, environmental regulations, and specialized removal techniques to ensure the process is completed properly.

In this guide, we will explain how professionals safely remove underground oil tanks from residential properties, what steps are involved, and why hiring experienced contractors is essential.

Why Removing Old Underground Oil Tanks Is Important

Many underground heating oil tanks installed in the 1950s–1980s were made of steel. Over time, steel tanks naturally corrode when exposed to soil moisture and environmental conditions. Once corrosion begins, small cracks can develop and allow oil to leak into surrounding soil.

These leaks can lead to several problems for homeowners:

-Soil contamination around the tank area

-Environmental hazards that require remediation

-Reduced property value during home sales

-Legal and regulatory concerns in some areas

For these reasons, homeowners often schedule Oil Tank Removal in New Jersey when upgrading heating systems, preparing a property for sale, or addressing aging infrastructure.

Professional removal ensures the tank is extracted safely while preventing further environmental impact.

Initial Property Inspection Before Residential Oil Tank Removal

Before any work begins, experienced technicians conduct a detailed inspection of the property. This evaluation helps determine the tank’s exact location, size, and condition.

During the inspection phase, professionals typically:

-Use tank locating equipment or historical property records

-Identify potential soil contamination risks

-Review environmental guidelines and permits

-Evaluate accessibility for excavation equipment

This preparation stage is critical because it helps contractors design a safe and efficient underground oil tank removal process. Proper planning minimizes unexpected complications during excavation.

In many cases, contractors also review local environmental regulations to ensure every step meets compliance standards.

The Underground Oil Tank Removal Process

Removing a buried heating oil tank requires specialized procedures to ensure safety and environmental protection. The underground oil tank removal process typically follows a structured sequence.

1. Site Preparation

The removal area is marked and secured to prevent accidental damage to nearby utilities or landscaping. Contractors also prepare safety barriers and protective equipment.

2. Tank Pumping and Cleaning

Before excavation begins, any remaining oil or sludge inside the tank must be safely removed. Professionals use pumping equipment to extract fuel and dispose of it according to environmental guidelines.

Cleaning the tank helps reduce fire hazards and contamination risks during removal.

3. Excavation Around the Tank

Heavy equipment or manual excavation is used to carefully expose the underground tank. Contractors dig around the tank while protecting nearby structures, foundations, and utility lines.

4. Tank Removal

Once the tank is fully exposed, lifting equipment is used to remove it from the ground. The tank is then transported to an approved recycling or disposal facility.

5. Soil Testing

After removal, soil samples are collected and tested to ensure no oil contamination remains. If contamination is detected, remediation procedures may be required.

This structured approach ensures safety while minimizing environmental impact.

Environmental Protection and Soil Safety

Environmental protection is one of the most important parts of oil tank removal. Even small leaks can create long-term contamination issues if not addressed quickly.

Professional oil tank removal contractors follow strict environmental guidelines to protect surrounding soil and groundwater.

Key safety measures include:

-Using containment systems during removal

-Preventing fuel spills during pumping

-Conducting soil testing after excavation

-Properly disposing of tanks and fuel residue

These precautions ensure that properties remain environmentally safe after the tank removal process.

Understanding the Underground Oil Tank Removal Cost

Homeowners often ask about the underground oil tank removal cost before scheduling the service. While prices vary depending on property conditions, several factors influence the overall cost.

Common factors include:

-Tank size and capacity

-Depth of the underground tank

-Accessibility for excavation equipment

-Soil contamination or remediation needs

-Local disposal and recycling fees

In many cases, residential tank removal projects follow a fixed pricing structure that includes excavation, tank removal, soil testing, and disposal.

Working with experienced contractors helps ensure homeowners receive accurate estimates and avoid unexpected costs during the project.

Choosing Reliable Oil Tank Removal Contractors

Selecting the right professionals is critical when removing underground heating oil tanks. Experienced oil tank removal contractors understand environmental regulations, safety procedures, and excavation techniques required for residential properties.

When choosing a contractor, homeowners should look for:

-Proper licensing and insurance

-Experience with residential oil tank removal projects

-Knowledge of environmental regulations

-Clear project estimates and timelines

Qualified professionals ensure that the removal process is completed safely while protecting both the property and the surrounding environment.

When Should Homeowners Consider Oil Tank Removal?

There are several situations where removing an underground oil tank becomes necessary.

Common reasons include:

-The tank is over 30–40 years old

-The property is being prepared for sale

-A heating system upgrade is planned

-Signs of leakage or corrosion are present

Many homeowners schedule Oil Tank Removal in New Jersey during property upgrades or real estate transactions to prevent future environmental liabilities.

Removing aging tanks early can prevent larger and more expensive problems later.

Benefits of Professional Residential Oil Tank Removal

Hiring professionals offers several important advantages compared to attempting removal without expertise.

Environmental Compliance

Professionals understand environmental regulations and ensure all procedures meet state guidelines.

Property Value Protection

Removing outdated tanks can increase buyer confidence during property sales.

Safety and Risk Reduction

Experts use proper equipment and procedures to avoid accidents or environmental hazards.

Efficient Project Completion

Experienced crews complete the work quickly while minimizing disruption to the property.

These benefits make professional services the safest option for handling underground oil tanks.

Summary

Removing aging underground oil tanks is an important step for protecting residential properties, the environment, and property value. The process requires careful planning, proper equipment, and strict safety procedures.

From inspection and excavation to soil testing and disposal, trained professionals manage each stage of the project to ensure environmental protection and regulatory compliance.

For homeowners dealing with older heating oil systems, scheduling Oil Tank Removal in New Jersey helps prevent leaks, eliminate environmental risks, and maintain a safe property.

Working with experienced contractors ensures the tank removal process is handled efficiently and responsibly.

Why Soil Investigation Matters After Underground Oil Tank Removal in New Jersey

Removing an underground oil tank from a residential property is an important step in protecting both the environment and the safety of the property. Many homes built decades ago used underground tanks to store heating oil, but over time these tanks can deteriorate, leak, and contaminate the surrounding soil.

While the removal of the tank itself is a critical task, the work does not end there. After the tank is removed, professionals often perform soil testing to determine whether any petroleum products leaked into the ground. This step helps property owners understand the condition of their property and ensures that any contamination is identified and addressed quickly.

A proper Soil Investigation in New Jersey helps homeowners confirm whether the soil is safe or if additional remediation is needed. Without this investigation, hidden contamination could remain undetected and create problems in the future.

In this guide, we will explain why soil investigation is essential after underground tank removal, how the process works, and how it protects both property owners and the environment.

Understanding the Underground Oil Tank Removal Process

Before discussing soil testing, it is helpful to understand the underground oil tank removal process. Many older homes still have buried heating oil tanks that were installed decades ago. Over time, corrosion can weaken the metal and cause leaks.

During the removal process, professionals typically:

-Locate and expose the buried tank

-Pump out any remaining oil or sludge

-Carefully remove the tank from the ground

-Inspect the tank for signs of corrosion or leaks

-Collect soil samples from the excavation area

This process allows technicians to determine whether oil has leaked into the surrounding soil. If contamination is suspected, further testing will be required to evaluate the extent of the issue.

Even if the tank appears intact, soil testing is still recommended because small leaks can occur over time without obvious signs.

Why Soil Testing Is Important After Tank Removal

Identifying Hidden Soil Contamination

One of the biggest concerns with underground tanks is the possibility of slow leaks that go unnoticed for years. Oil can seep into the surrounding soil and spread beyond the immediate area of the tank.

Through environmental soil testing, technicians analyze soil samples to detect petroleum hydrocarbons and other contaminants. This testing provides a clear picture of whether contamination exists and how far it may have spread.

Early detection allows for faster remediation and prevents contamination from affecting groundwater or nearby properties.

Protecting Property Value

Undetected soil contamination can significantly impact the value of a property. When buyers discover that a property once had an underground tank, they often request proof that the site is safe.

A documented Soil Investigation in New Jersey provides reassurance that the property has been properly inspected after tank removal. This documentation can help property owners avoid delays or complications when selling their home.

In many cases, having professional reports available makes the real estate transaction smoother and more transparent.

Environmental Protection and Safety

Oil leaks do more than damage property. They can also affect nearby ecosystems and water sources.

If petroleum products enter the soil, they may eventually reach groundwater or drainage systems. This can harm plants, wildlife, and even drinking water supplies.

A soil contamination inspection helps determine whether the soil surrounding the removed tank has been affected. If contamination is found, remediation professionals can remove or treat the affected soil before the issue spreads further.

This step protects not only the property owner but also the surrounding community.

Compliance With Local Environmental Regulations

In many areas, environmental regulations require proper documentation after underground tank removal. These regulations are designed to ensure that contaminated soil does not remain untreated.

Local authorities may require soil sampling reports or environmental documentation before closing permits or approving property sales.

By conducting a soil investigation after the tank removal, property owners can demonstrate compliance with environmental standards and avoid potential legal or financial complications.

Working with experienced professionals ensures that the process follows proper environmental guidelines and reporting procedures.

How Soil Investigation Is Conducted

A soil investigation is a systematic process carried out by environmental professionals. The goal is to evaluate soil conditions around the former tank location.

The typical process includes:

Site Assessment

Technicians examine the excavation area and surrounding ground to identify possible contamination zones.

Soil Sampling

Samples are collected from different depths and locations around the tank pit.

Laboratory Testing

The soil samples are sent to certified laboratories where they are tested for petroleum hydrocarbons and other contaminants.

Results and Evaluation

The results determine whether contamination exists and whether remediation is necessary.

This detailed analysis helps property owners understand the true condition of the soil beneath their property.

The Role of Soil Investigation in Residential Oil Tank Removal

When performing residential oil tank removal, professionals often combine tank extraction with soil analysis. This integrated approach ensures that any environmental concerns are addressed immediately.

If contamination is discovered, remediation specialists may remove contaminated soil, treat the affected area, or recommend further environmental monitoring.

By addressing these issues early, homeowners can prevent more expensive environmental problems in the future.

Additionally, documenting soil conditions after tank removal helps maintain transparency for future property transactions.

Preventing Future Environmental Problems

A proper soil investigation does more than confirm the presence of contamination. It also helps prevent future environmental issues.

If contamination is identified early, remediation can stop pollutants from spreading deeper into the soil or reaching groundwater systems.

This proactive approach protects both property owners and nearby communities from long-term environmental damage.

Professional environmental services play a critical role in maintaining safe residential and commercial properties.

FAQs

Q1. Why is soil testing necessary after underground oil tank removal?

Soil testing helps determine whether oil leaked from the tank and contaminated the surrounding soil.

Q2. How long does soil investigation take?

Most soil testing processes take a few days to complete, including laboratory analysis of soil samples.

Q3. Can oil tank leaks affect groundwater?

Yes, if contamination spreads through the soil, it can potentially reach groundwater sources.

Q4. Is soil investigation required before selling a property?

Many buyers and lenders request soil testing documentation to confirm the property is free from contamination.

Q5. What happens if contaminated soil is found?

Environmental professionals may remove the contaminated soil or apply remediation techniques to clean the affected area.

Summary

Removing an underground oil tank is only part of the process of protecting a property. After the tank is removed, soil testing helps determine whether any contamination has occurred and whether remediation is necessary.

A thorough soil investigation provides important environmental information, protects property value, and ensures compliance with environmental regulations. Property owners who take this step can move forward with confidence knowing that their land is safe.

Professional services such as Simple Tank Services help property owners complete the tank removal and soil testing process efficiently and responsibly, ensuring that both safety and environmental standards are met.

How Soil Remediation Helps Protect Groundwater from Contamination

Groundwater is one of the most important natural resources on our planet. It provides drinking water for millions of people, supports agriculture, and maintains ecosystems. However, when soil becomes contaminated by hazardous substances such as petroleum products, industrial waste, or chemicals, those pollutants can eventually seep into groundwater supplies. Once groundwater becomes contaminated, it is extremely difficult and expensive to restore.

This is why soil remediation plays a vital role in environmental protection. By identifying, removing, or neutralizing pollutants in the soil, remediation efforts help prevent contamination from spreading into underground water sources. Effective remediation strategies not only restore land quality but also ensure long-term environmental safety for communities and businesses.

Understanding Soil Remediation and Why It Matters

Soil remediation refers to the process of cleaning up contaminated soil so that it becomes safe for the environment and human use again. Pollution can enter the soil through leaking storage tanks, chemical spills, industrial operations, or improper waste disposal. Over time, these contaminants move through the soil layers and can reach groundwater aquifers.

Professional environmental teams use advanced testing and treatment techniques to detect pollutants and determine the most effective cleanup strategy. In many regions, including areas that require Soil remediation in New Jersey, environmental regulations ensure that contaminated land is treated properly before redevelopment or construction begins.

The goal of remediation is not just removing pollutants but also restoring soil health and preventing contamination from migrating further into the ecosystem.

How Contaminants Travel from Soil to Groundwater

Groundwater contamination often begins with pollutants entering the soil surface. Rainfall, irrigation, or natural soil permeability can carry these contaminants deeper into the ground.

Several factors influence how quickly pollutants move through soil:

-Soil composition and permeability

-The type of contaminant present

-Rainfall and groundwater movement

-Depth of the water table

When harmful substances penetrate soil layers, they can dissolve in water and migrate into underground aquifers. This process threatens drinking water systems, agricultural irrigation, and natural habitats.

By addressing contamination at the soil level, remediation prevents pollutants from reaching groundwater in the first place.

Key Methods Used in Soil Remediation

Environmental professionals use a variety of remediation techniques depending on the type and severity of contamination. These methods focus on removing pollutants, stabilizing them, or breaking them down into harmless compounds.

Excavation and Removal

This method involves physically removing contaminated soil and transporting it to approved disposal facilities. It is often used when pollution levels are high or localized.

Bioremediation

Bioremediation uses naturally occurring microorganisms to break down contaminants such as petroleum products and organic chemicals. This environmentally friendly approach reduces pollution without causing additional environmental harm.

Chemical Treatment

Chemical agents can neutralize or transform contaminants into less harmful substances. This approach is commonly used in industrial pollution cases.

Soil Vapor Extraction

This technique removes volatile contaminants from the soil by applying a vacuum system that extracts polluted vapors from underground.

Each of these techniques contributes to effective groundwater contamination prevention by stopping pollutants before they reach aquifers.

The Role of Environmental Site Cleanup in Protecting Water Sources

One of the most important steps in addressing contaminated land is conducting a thorough environmental site cleanup. This process begins with environmental assessments that identify the source and extent of pollution.

Environmental experts analyze soil samples, groundwater data, and historical site activities to determine contamination risks. Once the assessment is complete, a remediation plan is developed to remove pollutants and restore the land.

Environmental cleanup not only protects groundwater but also allows properties to be safely redeveloped for residential, commercial, or industrial use.

Why Soil Contamination Treatment Is Essential for Communities

When land becomes polluted, the consequences extend far beyond the immediate area. Contaminants can spread underground and affect nearby wells, streams, and ecosystems.

Proper soil contamination treatment ensures that pollutants are removed before they cause long-term environmental damage. This is especially important for communities that rely heavily on groundwater for drinking water supplies.

Effective treatment also helps property owners meet environmental regulations and avoid legal or financial liabilities associated with contaminated land.

Long-Term Benefits of Groundwater Protection

Protecting groundwater through soil remediation offers several important benefits:

Improved Public Health

Contaminated groundwater can expose communities to harmful chemicals and toxins. Removing pollution from soil reduces this risk and protects public health.

Environmental Sustainability

Healthy soil supports plant life, wildlife habitats, and natural ecosystems. Remediation helps restore ecological balance.

Safe Property Development

Remediated land can be safely used for construction, agriculture, or commercial projects without environmental concerns.

Regulatory Compliance

Environmental laws require proper cleanup of contaminated land. Remediation ensures compliance and avoids penalties.

In regions where environmental protection standards are strict, including areas requiring Soil remediation in New Jersey, professional remediation services help property owners meet regulatory requirements while protecting natural resources.

The Importance of Professional Remediation Services

Soil remediation requires technical expertise, specialized equipment, and knowledge of environmental regulations. Professional remediation companies conduct detailed site assessments, select the appropriate treatment method, and ensure that contamination is fully addressed.

Experts also monitor groundwater conditions after remediation to confirm that pollutants are no longer spreading underground.

Without professional intervention, contaminated soil can continue to pose environmental risks for years. Proper remediation ensures that land is restored safely and responsibly.

FAQ

Q1. What is soil remediation?

Soil remediation is the process of removing or neutralizing contaminants in soil to restore it to a safe and usable condition.

Q2. Why is groundwater protection important?

Groundwater supplies drinking water, supports agriculture, and sustains ecosystems. Protecting it from contamination is essential for public health.

Q3. What causes soil contamination?

Common causes include leaking fuel tanks, chemical spills, industrial waste, and improper disposal of hazardous materials.

Q4. How long does soil remediation take?

The timeline varies depending on contamination levels, site size, and the remediation method used. Some projects take weeks while others may require months.

Q5. Can contaminated soil affect nearby water wells?

Yes. If pollutants seep through the soil into groundwater aquifers, nearby wells and water supplies can become contaminated.

Summary

Protecting groundwater is essential for public health, agriculture, and environmental sustainability. When soil becomes contaminated, pollutants can slowly migrate underground and threaten water supplies. Soil remediation plays a critical role in preventing this process by removing or neutralizing harmful substances before they spread.

Through effective environmental cleanup strategies such as excavation, bioremediation, and chemical treatment, contaminated land can be restored to a safe condition. Professional remediation services ensure that environmental regulations are met and groundwater resources remain protected for future generations.

For property owners and businesses dealing with contamination concerns, working with experienced providers like Simple Tank Services ensures that remediation is handled efficiently and responsibly while protecting both soil and groundwater quality.