Is Oil Tank Removal Required in NJ: The 2026 Guide

Are you a New Jersey homeowner wondering, is oil tank removal required in nj before 2026? You are not alone. Thousands of residents face this important decision as regulations and environmental concerns grow.

This guide is designed to answer your questions about oil tank removal requirements, current and upcoming laws, and what steps you should consider before 2026 arrives. We will explore the latest regulations, highlight environmental and financial risks, explain the removal process, discuss costs, and share expert advice.

Read on to get the facts you need to make a confident, compliant, and informed decision for your property.

Understanding Oil Tank Regulations in New Jersey

New Jersey homeowners face complex rules about oil tank removal and closure. To make informed decisions, it is essential to understand the history, current regulations, upcoming changes, and common misconceptions.

History of Oil Tank Use in NJ

Underground storage tanks (USTs) became popular in New Jersey homes beginning in the mid-20th century. They provided an efficient way to store heating oil safely out of sight. Over time, concerns about leaks and environmental hazards led many homeowners to transition away from oil heat. Despite this shift, by 2020, estimates showed over 100,000 USTs remained in residential properties across the state.

Current State Laws and Local Ordinances

New Jersey Department of Environmental Protection (NJDEP) regulations require the removal or proper closure of abandoned oil tanks. Homeowners must comply with both state and municipal rules. Some towns enforce stricter standards, such as demanding removal before a property can be sold. For anyone asking, is oil tank removal required in nj, the answer depends on your specific situation and location. For a detailed breakdown of these legal requirements, review the Oil tank removal laws in NJ. Staying informed about local ordinances is crucial to avoid surprises during real estate transactions.

Changes Coming in 2026

By 2026, NJDEP is expected to update regulations that will impact oil tank owners. Anticipated changes include more rigorous inspections and stricter enforcement. Legislative proposals from 2023 and 2024 point to possible increases in fines and mandatory timelines for compliance. If you are still wondering, is oil tank removal required in nj after 2026, pay close attention to these evolving standards. Homeowners should prepare for new rules that may affect property value and legal responsibilities.

Is Oil Tank Removal Legally Required?

A common question is, is oil tank removal required in nj for every homeowner? The law does not universally mandate removal, but abandoned or leaking tanks must be removed or properly closed. Disclosure of a tank’s presence is required during real estate transactions. Failing to comply can result in penalties, with fines exceeding $10,000 in some cases. It is wise to address tanks proactively to avoid legal complications.

Environmental and Health Concerns

Oil tank leaks pose serious risks to soil and groundwater. New Jersey ranks among the top states for incidents related to UST contamination. Over 14,000 leaks have been confirmed since 1988. For those concerned about the environment and personal liability, asking is oil tank removal required in nj is about more than just legal compliance. Leaks can threaten drinking water and the health of families and neighbors.

Common Misconceptions

Many believe that if a tank is not leaking, it can be ignored. This is a misconception. Not all tanks must be removed, but leaving them unattended can lead to costly environmental and legal consequences. Out of sight does not mean out of risk.

Environmental and Financial Risks of Leaving Oil Tanks in Place

Leaving an underground oil tank on your property can expose you to significant environmental and financial hazards. Many homeowners ask, is oil tank removal required in nj to protect their property and investment? Understanding the full scope of risks is essential before making a decision.

Soil and Groundwater Contamination

Leaking oil tanks are a leading source of soil and groundwater pollution in New Jersey. Even a small leak can release hazardous substances that seep into the earth, potentially contaminating drinking water supplies. The NJ Department of Environmental Protection (NJDEP) reports that over 60 percent of underground storage tank removals reveal some level of contamination.

If you are wondering, is oil tank removal required in nj to prevent environmental damage, consider that the long-term effects of leaks can linger for decades. Contaminated soil often requires extensive remediation, which can disrupt your property and affect your local community.

Liability and Legal Issues

Homeowners are legally responsible for any damages caused by leaking tanks. This includes the cost of cleaning up contaminated soil and water, which can quickly escalate. Lawsuits from neighbors or municipalities are not uncommon if a leak spreads beyond your property.

For a deeper understanding of how these risks can impact your finances and legal standing, review this resource on the financial risks of leaking oil tanks. If you are still asking, is oil tank removal required in nj to avoid liability, know that addressing tanks proactively is often the best way to limit exposure.

Impact on Property Value and Sales

An undisclosed or unaddressed oil tank can delay or even halt a real estate transaction. Most lenders and buyers will require proof of removal and soil testing before closing a deal. In some cases, property values drop significantly due to the perceived risk of contamination.

When buyers ask, is oil tank removal required in nj for a clean title, the answer is often yes if the tank is abandoned or leaking. Proper documentation and removal can protect your investment and ensure a smoother sale.

Cleanup and Remediation Costs

Remediation expenses after a leak can range from $10,000 to over $100,000. The median cost for cleanup in New Jersey is around $20,000, but complex cases can exceed that amount. The NJ Petroleum Underground Storage Tank Remediation, Upgrade, and Closure Fund (UST Fund) may provide some financial assistance, but the process can be lengthy and funding is limited.

If you are weighing whether is oil tank removal required in nj to avoid unexpected expenses, remember that early action typically results in lower costs and fewer surprises down the line.

Insurance Limitations

Most standard homeowner insurance policies do not cover oil tank leaks or related damage. Specialized coverage is rare and can be expensive. This leaves many homeowners exposed to out-of-pocket costs for cleanup and legal fees.

It is important to verify your policy details and consider the risks before deciding to leave a tank in place.

Real-Life Examples and Statistics

Consider the case of a Bergen County homeowner who faced a $75,000 cleanup bill after a previously undisclosed tank leaked. According to NJDEP data, more than 1,000 new residential tank leaks are reported in the state each year.

These statistics highlight why so many residents ask, is oil tank removal required in nj to avoid such costly scenarios. Ignoring the issue can have lasting financial and legal consequences.

Long-Term Community Impact

Oil tank leaks do not just affect individual properties. Persistent contamination can impact entire neighborhoods, leading to shared environmental problems and increased municipal expenses for cleanup.

By addressing oil tanks proactively, homeowners help protect their families, neighbors, and the broader community.

The Oil Tank Removal Process: Step-by-Step

Removing an oil tank in New Jersey is a regulated, multi-step process that demands careful attention to detail. Understanding each phase is essential for homeowners asking, is oil tank removal required in nj, and for ensuring compliance with state and local requirements.

Step 1: Initial Assessment and Locating the Tank

The first step involves a professional assessment to confirm the presence and exact location of the oil tank. Specialists typically use ground-penetrating radar, property records, and visual inspection.

Accurate tank location is crucial. It prevents unnecessary property disturbance and helps determine the safest removal strategy. If you are wondering, is oil tank removal required in nj for your property, a thorough initial assessment will help clarify your legal responsibilities and next steps.

Step 2: Obtaining Permits and Notifications

Before any work begins, necessary permits must be secured from your municipality. Most towns require an excavation permit, and some may need additional documentation.

For regulated tanks, notification to the New Jersey Department of Environmental Protection (NJDEP) is mandatory. Homeowners should check with local officials to ensure every permit requirement is met, as requirements can vary by location.

Step 3: Safe Tank Extraction

With permits in hand, licensed contractors carefully excavate the area around the tank. For aboveground tanks, removal is often straightforward. Underground tanks require specialized equipment and strict adherence to safety protocols.

Environmental precautions are critical to prevent accidental spills. If you want more detail on how is oil tank removal required in nj is addressed during this step, review the Underground oil tank removal process for an in-depth walkthrough of safe extraction procedures.

Step 4: Soil Testing and Analysis

After the tank is removed, certified technicians collect soil samples from around the excavation site. These samples are sent to a laboratory to check for petroleum contamination.

Lab results typically arrive within 3 to 5 days. If you are asking, is oil tank removal required in nj because of environmental risks, soil testing provides the definitive answer about potential hazards and next actions.

Step 5: Remediation (If Needed)

If contamination is detected, remediation becomes necessary. This involves removing and properly disposing of polluted soil, sometimes in several stages.

NJDEP oversees the cleanup process and requires detailed documentation. Homeowners must retain all records, as these will be needed for future property transactions or compliance checks.

Step 6: Final Documentation and Certification

The final step includes assembling closure reports and requesting a “No Further Action” letter from the NJDEP. This documentation proves the site is safe and compliant.

For those still questioning, is oil tank removal required in nj for their home, having this certification is vital for real estate sales, legal protection, and peace of mind. Always keep copies of every report and letter for your records.

Costs, Timelines, and Choosing a Qualified Contractor

Understanding the costs, timelines, and how to select the right professional is critical if you are asking, is oil tank removal required in nj. Navigating these factors ensures you make informed decisions and avoid unnecessary delays or expenses. Let us break down each aspect so you know what to expect.

Typical Costs for Removal and Remediation

Oil tank removal typically costs between $1,200 and $2,500 for a standard underground tank in New Jersey. If contamination is discovered, remediation expenses can rise dramatically, with median costs hovering around $20,000 but sometimes exceeding $100,000 for severe cases. According to the NJDEP Bulletin on Oil Tank Closure, following proper closure procedures is essential to minimize risks of additional expenses and legal complications.

A summary of average costs:

Service

Typical Cost Range

Tank Removal

$1,200 – $2,500

Soil Testing

$300 – $1,000

Remediation (if needed)

$10,000 – $100,000+

Planning for these costs can help you avoid surprises if you determine is oil tank removal required in nj for your property.

Timeline for Oil Tank Projects

The timeline for oil tank removal projects is usually brief for straightforward cases. Standard removal takes one to three days, depending on tank accessibility and weather. If contamination is found, remediation and required paperwork can extend the process by one to four additional weeks. NJ regulations require proper documentation and reporting, which also factors into the overall schedule.

Homeowners should factor in possible delays due to permit approvals or unexpected findings. This makes early action crucial if you are considering whether is oil tank removal required in nj before 2026 regulatory changes.

How to Select a Licensed Contractor

Choosing a qualified contractor is vital for compliance and peace of mind. In New Jersey, contractors must be licensed by the NJDEP, ensuring they follow all safety and environmental standards. Always request a fixed-price proposal with detailed terms, and verify the contractor’s licensing and insurance.

Look for companies experienced in residential tank removals and familiar with local ordinances. Asking about their process, equipment, and warranty coverage helps you assess if they are the right fit. If you are still asking, is oil tank removal required in nj, a licensed expert can provide specific guidance for your situation.

Red Flags and Common Pitfalls

Some pitfalls can lead to costly mistakes. Watch for contractors who offer vague pricing or refuse to provide proof of insurance and licensing. Bait-and-switch tactics, where initial quotes balloon due to hidden fees, are unfortunately common.

An example: a homeowner was overcharged after a contractor failed to disclose additional soil disposal fees. Avoiding such situations requires diligence. Always check references and reviews before making a decision.

Questions to Ask Before Hiring

Before signing a contract, ask these questions:

  • How many oil tank removals have you completed in NJ?

  • Can you provide references from recent clients?

  • Do you guarantee your work and remediation results?

  • What type of liability insurance do you carry?

  • Will you handle all permits and NJDEP notifications?

These questions help you determine if the contractor is capable and trustworthy, especially if you are still evaluating, is oil tank removal required in nj for your home.

Simple Tank Services: Fixed-Price Oil Tank Removal in NJ

Simple Tank Services stands out for its transparent, fixed-price contracts and commitment to customer satisfaction. As an employee-owned company, they specialize in residential oil tank removal, soil testing, and full remediation services, assuming liability for cleanup costs.

Is Oil Tank Removal Required in NJ: The 2026 Guide - Simple Tank Services: Fixed-Price Oil Tank Removal in NJ

Their licensed technicians use state-of-the-art equipment and guarantee results. The company also provides educational resources to help you understand soil testing after tank removal, which is a key step in ensuring your property complies with NJ regulations. Their outstanding customer service and clear communication make them a trusted choice for New Jersey homeowners.

Preparing for 2026: What Homeowners Need to Know

Are you preparing for the upcoming changes in New Jersey oil tank regulations? As 2026 approaches, many residents are asking, is oil tank removal required in nj, especially with evolving state policies on the horizon. Understanding what to expect and how to act now can save time, money, and stress.

Anticipated Regulatory Changes and Deadlines

New Jersey is expected to tighten oil tank rules by 2026. Lawmakers and the NJDEP are considering policies that could mandate removal or secure closure of all abandoned tanks. If you are wondering, is oil tank removal required in nj, it is wise to stay updated as regulations may soon require action for compliance.

Some towns may set even earlier deadlines, so check with your local municipality. Missing these deadlines could result in fines or complications if you plan to sell your property.

Proactive Steps for Compliance

The best way to avoid last-minute problems is to act now. Schedule a professional inspection and assessment of your property’s oil tank. Keep thorough records of any tank removal, closure, or status updates, as these will be essential for future transactions.

Taking early action helps ensure you are ready for new requirements and demonstrates responsible homeownership to potential buyers.

Financial Planning and Assistance Programs

Many homeowners worry about the costs involved. If you are searching for answers to is oil tank removal required in nj, it is important to explore available assistance. The NJ Petroleum Underground Storage Tank Remediation, Upgrade, and Closure Fund (UST Fund) may provide partial financial help. Additionally, the NJDEP Unregulated Heating Oil Tank Program streamlines the approval process for residential tank cleanups.

Review local grants or low-interest loans that may be available. Budget for possible out-of-pocket expenses, as not all costs are covered by assistance programs.

Assistance Option

Description

NJ UST Fund

Partial reimbursement for removal/remediation

Local Grants

Town-specific financial support

NJDEP UHOT Program

Streamlined cleanup approval

Real Estate Implications

Oil tank status can significantly affect property sales. Sellers are legally required to disclose if a tank is present or has been removed. Buyers and lenders increasingly expect documentation showing the property is free of oil tank risks.

Delays or failed sales are common if these records are missing or incomplete. Proactive removal and documentation can make your home more marketable.

Environmental Responsibility and Peace of Mind

Choosing to address your oil tank is not just about compliance, it is also about safety. Many residents ask, is oil tank removal required in nj, because they want to protect their families and neighborhoods. Removing or closing tanks properly reduces the risk of leaks, soil contamination, and costly future cleanups.

By acting now, you gain peace of mind and help ensure a safer environment for your community.

Expert Recommendations for 2026 and Beyond

Consult with NJDEP-certified contractors and stay connected with state and local updates. Experts recommend regular tank assessments and documentation, even if your tank is not currently leaking.

Stay informed about legislative changes and participate in community meetings or forums to understand how new laws could impact your property.

Case Studies: Homeowner Experiences

Some homeowners who acted early had smooth, affordable removals and quick property sales. Others who waited faced unexpected costs or legal issues. Learning from these experiences can help you avoid common pitfalls as 2026 approaches and regulations change.

By understanding the process and requirements, you can make the right choices for your property and financial health.

As we’ve explored, understanding New Jersey’s evolving oil tank regulations and planning ahead for 2026 can help you avoid unexpected costs, protect your property value, and ensure peace of mind for your family. If you want expert support from a team that prioritizes transparency and fixed pricing, we’re here to help you navigate every step of the oil tank removal process. You deserve a solution that’s reliable, straightforward, and fully compliant with state requirements. Ready to take the next step or have questions about your specific situation? Reach out to us today—just Contact Us to get started.

NJ Oil Tank Removal Guide: What Homeowners Need to Know 2026

Many New Jersey homeowners are shocked to discover that an old oil tank buried on their property can cause legal, financial, and environmental problems. If you are wondering what steps to take, this guide is here to clarify the complex world of nj oil tank removal in 2026.

You will learn why removing these tanks matters, how the process works, and what regulations and permits are required. We will also break down costs, explain available rebates, and help you choose a qualified contractor.

Protect your investment, ensure compliance, and gain peace of mind by following our step-by-step advice throughout this guide.

Why Oil Tank Removal Matters in New Jersey

Many New Jersey homeowners are unaware that an old oil tank can threaten not only their property, but also their financial security and legal standing. Understanding the importance of nj oil tank removal is the first step toward protecting your investment and your community.

The Risks of Abandoned or Aging Oil Tanks

An unused or aging oil tank on your property can quickly become a liability. These tanks can corrode over time, leading to leaks that contaminate soil and groundwater. Cleanup costs can easily reach six figures if a leak goes undetected.

Selling a home with an old tank is challenging, as lenders and buyers may require nj oil tank removal before closing. Failing to act can result in legal action, especially if contamination spreads beyond your property. Health hazards, including exposure to oil vapors or polluted water, are serious concerns for families.

Insurance companies often deny coverage for properties with old tanks, leaving homeowners exposed. State and local authorities can issue significant fines for non-compliance. For more on these hazards, review the dangers of leaving underground oil tanks to see real-world consequences faced by NJ residents.

Environmental and Community Impact

The environmental effects of neglected oil tanks reach far beyond your backyard. In New Jersey, over 100,000 residential oil tanks are estimated to remain, many of them unregistered. A single leaking tank can pollute not only your soil but also neighboring properties and local water supplies.

The NJDEP reports thousands of contamination cases each year, often resulting in costly, large-scale cleanups. When leaks occur, they can depress property values throughout a neighborhood, making real estate transactions more difficult for everyone.

Communities sometimes bear the burden when multiple tanks fail in the same area, resulting in public funds being used for remediation. By prioritizing nj oil tank removal, homeowners contribute to a healthier environment and help preserve community property values.

Legal and Financial Implications

New Jersey law requires homeowners to disclose any buried tanks during real estate transactions. Skipping nj oil tank removal or proper closure can result in lawsuits or regulatory enforcement, even if a leak happened before you owned the property.

Financial assistance programs are available, but eligibility can be strict and funding is not always guaranteed. Lenders may refuse mortgages or refinancing if an active or undocumented tank is present. One homeowner in NJ was denied a refinancing opportunity due to an undisclosed underground tank, highlighting the importance of transparency.

The NJDEP can also issue fines or mandate expensive remediation for non-compliance. In some cases, remediation costs are tax-deductible, but only with thorough documentation. Proactive action on nj oil tank removal helps avoid these legal and financial pitfalls, ensuring peace of mind and smoother property transactions.

Understanding NJ Oil Tank Removal Regulations and Permits

Navigating nj oil tank removal means understanding a complex web of state and local rules. New Jersey’s Department of Environmental Protection (NJDEP) sets the baseline for regulations, but municipalities often add their own requirements. Whether you have an underground or aboveground tank, removal is never a DIY job. Every step is governed by strict protocols designed to protect both the homeowner and the environment. For a detailed explanation of legal requirements, visit the NJ oil tank removal regulations page to get the latest updates and compliance tips. Ignoring regulations can lead to delays, fines, or even legal action, so staying informed is essential for any nj oil tank removal project.

State and Local Regulatory Overview

Both the NJDEP and your local municipality play key roles in regulating nj oil tank removal. The NJDEP requires all removals, whether underground or aboveground, to be completed by certified contractors. Local governments may have additional expectations, such as specific permit forms, inspection schedules, or reporting procedures.

Tanks above certain capacities require special handling and formal notifications to the NJDEP. Before starting, homeowners must ensure that their chosen contractor holds valid NJDEP certification and insurance.

Permits are mandatory in every municipality. Failing to secure them can stall your project or result in substantial fines. Some towns may also require pre-removal site assessments or public notices. With so many overlapping regulations, it is crucial that you follow every step for nj oil tank removal from the start.

Permit Application and Approval Process

The permit process for nj oil tank removal is structured but can vary by town. Start with a professional site assessment to determine tank size, location, and any immediate risks. Next, complete the municipal permit application, which usually asks for:

-Property surveys

-Details about the tank (size, location, type)

-Contractor’s NJDEP certification and insurance documents

After submission, the municipality reviews your paperwork, typically taking two to four weeks for approval. Delays often occur due to missing documents or incomplete forms. Avoid starting removal before the permit is issued; this can lead to fines or forced project shutdowns. A thorough, organized approach ensures your nj oil tank removal stays on schedule and meets all local and state requirements.

Compliance, Inspections, and Documentation

Compliance for nj oil tank removal does not end once the tank is out of the ground. Municipal officials must inspect the site both before and after removal. These inspections confirm that proper procedures were followed and that the site is safe for continued use.

Soil testing is mandatory to check for contamination. Homeowners receive several key documents, including:

-Official removal report

-Soil test results

-Closure certificate

Keep these documents in a safe place. They are required for future property sales, insurance claims, and to prove legal closure of your nj oil tank removal project. Failing inspection or missing documentation can mean additional remediation work and even legal complications. Always prioritize thorough recordkeeping to protect your investment.

Step-by-Step Guide to Oil Tank Removal in NJ

Navigating the nj oil tank removal process can seem daunting, but breaking it down into clear steps makes it manageable. Understanding each stage helps homeowners avoid costly mistakes and ensures compliance with New Jersey regulations. For a comprehensive breakdown, you can also reference this step-by-step oil tank removal process.

1. Tank Location and Assessment

The first step in nj oil tank removal is identifying whether a tank exists and assessing its condition. Professionals use ground-penetrating radar (GPR) or magnetometers to locate underground tanks, which are often hidden beneath lawns or driveways.

Visual inspections are performed for aboveground tanks, checking for signs of corrosion, leaks, or oil stains. Soil testing near suspected tanks can reveal contamination early.

Sometimes, hidden tanks are discovered during renovations or property sales, surprising homeowners. Hiring experienced assessors is crucial, as missed tanks can lead to expensive remediation later.

2. Securing Permits and Hiring a Certified Contractor

Before starting any nj oil tank removal work, homeowners must obtain all required municipal and NJDEP permits. This step is non-negotiable, as working without permits can result in fines or delays.

Always verify your contractor’s NJDEP certification and insurance coverage. Compare fixed-price contracts to variable pricing, and beware of contractors who suggest skipping permits or offer unusually low quotes.

Working with a reputable, certified contractor can protect you from liability. One homeowner avoided legal trouble by choosing a professional who handled all permits and paperwork correctly.

3. Safe Removal and Soil Testing

During nj oil tank removal, the contractor will excavate the tank if it is underground or disconnect it if aboveground. Any remaining oil is pumped out and disposed of according to state regulations.

The tank is then cut, cleaned, and removed from the property. After removal, soil samples are taken from the tank bed for laboratory analysis. New Jersey law requires immediate reporting if leaks or contamination are found during this stage.

Proper soil testing protects homeowners from future liability and ensures the site is safe for use.

4. Site Restoration and Final Documentation

Completing nj oil tank removal involves restoring the property to its original state. The excavated area is backfilled and repaired, whether it’s a lawn, garden, or driveway.

A final inspection by municipal officials is required. Homeowners should receive a detailed removal report, soil test results, and a closure certificate. Keeping this documentation is vital for smooth property sales or insurance claims.

For example, a homeowner experienced a hassle-free sale because they had complete, certified records of their oil tank removal.

NJ Oil Tank Removal Costs and Financial Assistance in 2026

Understanding the costs and financial assistance options for NJ oil tank removal is essential for homeowners planning to address aging or unused tanks. With new regulations and evolving rebate programs in 2026, knowing what to expect can help you avoid costly surprises and find the best path forward.

Typical Cost Breakdown

The typical cost of NJ oil tank removal for a standard residential tank ranges from $1,400 to $2,500. This estimate covers the removal itself, but additional expenses may include soil testing, remediation, and municipal permit fees. The total price can climb quickly if contamination is discovered during the process.

Several factors influence the final cost:

-Tank size and location on the property

-Whether the tank is aboveground or underground

-Degree of soil contamination, if any

-Local permit and inspection requirements

When comparing contracts, homeowners often choose between fixed-price and variable-price agreements. Fixed-price contracts offer predictability, while variable contracts may seem lower upfront but can result in unexpected charges if issues arise. For a detailed breakdown and to better understand the differences, see this resource on oil tank removal costs and contracts.

Contract Type Pros Cons
Fixed-Price Predictable, no hidden fees May be slightly higher upfront
Variable-Price Lower initial estimate Extra charges if problems are found

For example, a homeowner may face higher costs if contamination is found after removal, emphasizing the importance of clear contract terms for nj oil tank removal. Planning ahead can help avoid financial stress associated with nj oil tank removal.

NJ Rebate and Grant Programs

New Jersey offers financial assistance programs to help offset the costs of nj oil tank removal. The NJDEP Petroleum Underground Storage Tank Remediation, Upgrade & Closure Fund (UST Fund) provides up to $3,000 for eligible non-leaking tank removals.

To qualify, homeowners must:

-Have an annual income under $250,000

-Possess a net worth below $500,000

-Demonstrate financial hardship through tax returns and statements

The application process requires submitting detailed documentation, including contractor estimates and proof of ownership. Processing times can range from 6 to 12 months, and funding availability is subject to state budget constraints. Missing paperwork or deadlines can result in denial, as seen in cases where homeowners failed to provide complete information. Carefully following instructions increases the likelihood of receiving support for nj oil tank removal.

Other Financing and Insurance Options

If you do not qualify for grants or rebates, several financing options are available to help manage the cost of nj oil tank removal. Home equity loans and lines of credit can provide the necessary funds upfront, allowing you to pay over time. Some homeowners’ insurance policies may cover accidental leaks, but removal itself is rarely included.

Environmental liability insurance is another option, especially for properties with a history of oil tank use. Local banks sometimes offer special loans for environmental compliance projects, making it easier to address tank removal needs promptly.

It is crucial to secure funding before starting work on nj oil tank removal. This preparation helps avoid project delays and ensures you can cover all potential costs, including remediation if contamination is discovered.

Choosing the Right Oil Tank Removal Contractor in NJ

Selecting the right contractor for nj oil tank removal is one of the most important decisions you will make as a homeowner. The right choice ensures compliance, protects your investment, and prevents costly mistakes. With strict regulations in New Jersey, being thorough in your selection process is essential for peace of mind and long-term property value.

What to Look for in a Contractor

When evaluating companies for nj oil tank removal, start by confirming their NJDEP certification and valid insurance coverage. Experience matters—choose contractors with a proven track record in both removal and remediation projects.

Look for transparent, fixed-price proposals to avoid surprise costs. Contractors should clearly explain what is included in their quote, from permits to soil testing. Referencing the NJDEP UST Fund Cost Guide can help you understand fair pricing standards in the industry.

Check for positive customer reviews and detailed case studies. A reputable contractor will also assist with rebate paperwork and provide complete documentation for your records. Some even guarantee rebate approval if you meet eligibility criteria.

Questions to Ask Before Hiring

Before committing to a contractor for nj oil tank removal, ask about their experience and success rate in New Jersey. Request recent references or testimonials from satisfied clients.

Clarify what is included in their quote. Are soil testing and remediation extra, or are they bundled? Confirm that the contractor will handle all permits and inspections, as these are mandatory.

Discuss how unexpected contamination is managed and what the process for site restoration involves. A reliable contractor will have clear answers and written procedures for each step.

Red Flags and Common Pitfalls

Be cautious of contractors who suggest skipping permits or inspections during nj oil tank removal. Low-ball quotes with hidden fees for essential services like soil testing or remediation are a warning sign.

Lack of a clear process for handling contamination or poor communication can lead to project delays and additional expenses. Always ask for references and avoid contractors unwilling to provide them.

Hiring an unlicensed contractor can result in legal trouble and costly remediation if something goes wrong. Protect yourself by ensuring all credentials and procedures are in place before work begins.

Importance of Complete Documentation

Complete documentation is critical for future property sales and insurance claims after nj oil tank removal. NJ law requires legal closure records, which protect you from future liability.

Missing removal certificates can delay or jeopardize real estate transactions. Keeping accurate records ensures a smooth process and peace of mind for years to come.

What to Expect After Oil Tank Removal

After completing nj oil tank removal, homeowners often wonder what comes next. The steps following removal are crucial for ensuring your property is safe, compliant, and ready for resale or financing. Understanding the process helps avoid surprises and protects your investment.

Soil Remediation and Cleanup If Contamination is Found

If oil leaks are discovered during nj oil tank removal, immediate action is essential. State law requires prompt notification to the New Jersey Department of Environmental Protection (NJDEP). Professional remediation experts will assess the extent of contamination and create a cleanup plan.

The typical remediation process includes:

-Excavating contaminated soil from around the tank site

-Proper disposal of hazardous materials at approved facilities

-Backfilling the area with clean soil

Costs for remediation can vary widely, sometimes exceeding $100,000 for severe cases. NJDEP or local officials will oversee the cleanup to ensure all standards are met. In some situations, early detection during nj oil tank removal can prevent larger, more expensive problems. For more details on regulatory guidance, the NJDEP UHOT Program Overview explains how residential tank cleanups are managed and approved.

Final Inspections and Property Restoration

Once cleanup is completed, municipal officials conduct a final site inspection. This inspection confirms that the nj oil tank removal and any necessary remediation meet state and local requirements. After passing inspection, you will receive a closure certificate and a final inspection report.

Restoring your property involves:

-Backfilling and grading the excavated area

-Reseeding lawns or repairing driveways

-Ensuring the site matches its original condition

Proper documentation is critical for future real estate transactions and insurance claims. A successful nj oil tank removal, complete with restoration and paperwork, can even increase property value. Buyers and lenders appreciate a property with a clean environmental record.

Selling or Refinancing Your Home After Tank Removal

When selling or refinancing, disclose all details of your nj oil tank removal to buyers or lenders. Complete documentation, including closure certificates and soil test results, makes the process smoother. Properties with a clean removal history often sell faster and at higher values than those with unresolved tank issues.

Now that you understand the risks, costs, and legal requirements around oil tank removal in New Jersey, you’re better prepared to protect your home, your investment, and your peace of mind. If you’re ready to take the next step or have questions about your specific situation, we’re here to help you every step of the way. Our team at Simple Tank Services is committed to transparent pricing, expert guidance, and ensuring your property is fully compliant and safe for the future. Let’s make your oil tank removal process as smooth and stress free as possible—Contact Us today.

NJDEP Guide: Everything You Need to Know in 2026

The New Jersey Department of Environmental Protection (njdep) stands at the center of environmental policy and decision-making in 2026, shaping the daily lives of every resident and business in the state. Recent regulatory shifts and high-profile controversies have placed njdep under intense public scrutiny, making its actions more relevant than ever.

This comprehensive guide will break down everything you need to know, from the agency’s mission and landmark legislative changes to its impact on public health, business, and the environment. Discover how njdep’s evolving role, new laws, and key programs affect you, and gain valuable insights for staying compliant and involved.

Understanding the NJDEP: Mission, Structure, and Core Functions

The New Jersey Department of Environmental Protection, often referred to as njdep, is the primary agency responsible for safeguarding New Jersey’s environment. Established in 1970, its mission centers on protecting natural resources, ensuring public health, and promoting sustainable growth. The agency’s guiding principles have historically focused on reducing pollution, conserving land, and improving water and air quality. Over the decades, njdep has achieved notable milestones such as cleaning up contaminated waterways and implementing landmark air quality standards. For a comprehensive overview of its mission and organizational framework, see NJDEP’s Mission and Structure.

Organizational Structure and Key Divisions

The njdep is organized into several main divisions, each playing a critical role in enforcing environmental regulations:

  • Land Use Regulation: Oversees development permits and protects wetlands.
  • Air Quality: Monitors emissions and enforces clean air standards.
  • Water Resources Management: Regulates water usage and maintains waterway health.
  • Site Remediation: Manages cleanup of contaminated sites and brownfields.

Each division within njdep collaborates with state and federal agencies, such as the EPA, to ensure compliance with both local and national laws. Through interagency partnerships, the njdep leverages resources and expertise to address complex environmental challenges facing New Jersey.

Core Functions and Responsibilities

The primary responsibilities of njdep include:

  • Regulatory Oversight: Issuing permits, monitoring compliance, and enforcing environmental laws.
  • Environmental Monitoring: Collecting and analyzing data on air, water, and soil conditions.
  • Public Education: Engaging communities through outreach and educational programs.
  • Emergency Response: Responding to events like chemical spills or natural disasters.

For example, njdep leads coordination during flood emergencies, working with FEMA on disaster response and managing payouts to affected communities. These core functions ensure that njdep remains at the forefront of environmental stewardship and public safety.

Major NJDEP Regulatory Changes and Legislation in 2026

Sweeping regulatory changes have placed njdep at the center of environmental debate in New Jersey for 2026. New laws and legislative shifts are redefining how the agency operates, with impacts touching every resident and business. Understanding these changes is essential for navigating compliance and protecting the state's natural resources.

Overview of Recent Legislative Actions

2026 has brought landmark legislative activity affecting njdep’s regulatory landscape. Several bills passed during this session aim to streamline permitting and reduce what some call regulatory burdens. At the forefront is Senate Bill S4373, known officially as the “Corporate Polluters Take Over NJDEP Act.” This bill, along with other regulatory updates, signals a shift in how environmental oversight will be conducted in the coming years.

Legislators supporting S4373 argue that these measures will boost economic growth and efficiency. However, critics warn that such changes may come at the expense of public health and environmental protection. Businesses, developers, and local governments are now closely watching how the new njdep framework evolves.

The S4373 Act: Provisions and Controversy

S4373 introduces major reforms to njdep’s regulatory process. Key provisions include the creation of a Commission on Efficiency and Regulatory Review, with significant industry representation and the authority to review and recommend changes to agency rules. This commission holds substantial power over how regulations are shaped and enforced.

Notably, S4373 requires that all proposed rules undergo a cost-benefit analysis focused on business impacts, rather than prioritizing environmental or health concerns. It also mandates use of the “best available science,” a term some worry could allow for industry-biased data. The act provides a 90-day pre-rule comment period, giving industry stakeholders early access to proposed changes. Additionally, rules are now automatically extended unless actively repealed, and annual reporting requirements increase the njdep’s administrative burden.

Impact on Environmental Protections and Public Health

The regulatory changes under S4373 have sparked concern among environmental advocates and public health experts. Many fear that weakening flood, clean water, and toxic cleanup rules could put communities at risk. Longstanding safeguards may be rolled back, increasing the threat of pollution and disaster impacts.

For example, New Jersey’s ongoing battle with PFAS contamination highlights the critical role of njdep in protecting residents. The recent PFAS Settlement in New Jersey illustrates the high stakes for public health and the environment. Critics argue that regulatory rollbacks could lead to more incidents requiring costly remediation and threaten air and water quality across the state.

Stakeholder Perspectives and Data

Stakeholders present sharply divided views on the new njdep regulatory direction. Environmental groups point to New Jersey’s high ranking for FEMA disaster payouts and the prevalence of flood-prone construction as evidence of growing risk. They argue that loosening oversight could worsen air quality and increase vulnerability to climate change.

Conversely, industry representatives claim that the regulatory overhaul will foster innovation and reduce delays. They highlight the potential for faster project approvals and lower compliance costs. Data on air and water quality, sea-level rise, and the frequency of toxic site incidents will be closely monitored as the effects of these legislative changes unfold. The future of njdep’s influence will depend on how these competing priorities are balanced.

Navigating NJDEP Permitting, Compliance, and Enforcement in 2026

Navigating the NJDEP’s regulatory landscape in 2026 requires a clear understanding of permitting, compliance, and enforcement practices. With recent legislative changes, both residents and businesses must adapt to new expectations and procedures.

The Permitting Process: Steps and Requirements

The NJDEP manages a complex permitting process designed to safeguard New Jersey’s environment. Permit categories include land use, water discharge, air emissions, and site remediation. Each type has its own set of requirements and application steps.

Applicants must submit detailed documentation, such as site plans, environmental impact studies, and compliance histories. Under new rules, stricter pre-application consultations may apply, especially for projects in sensitive areas. Recent legislation has introduced additional pre-rule comment periods, making early engagement with the NJDEP more critical than before.

Compliance and Enforcement Actions

Once a permit is secured, ongoing compliance with NJDEP standards is mandatory. The agency conducts routine monitoring and inspections, using advanced data collection to detect violations. Non-compliance can lead to penalties, fines, or mandatory remediation orders.

Common enforcement actions involve illegal dumping, unauthorized air emissions, and failure to report hazardous spills. For instance, recent enforcement cases highlight the NJDEP’s swift response to air quality breaches and unpermitted waste disposal, stressing the importance of maintaining accurate records and timely reporting.

Public Participation and Transparency

Public involvement remains a cornerstone of NJDEP’s regulatory process. Opportunities for comment exist during permit reviews and rulemaking. However, the S4373 Act has changed the landscape, extending pre-rule comment periods but reducing overall transparency in some areas.

Residents can track permit applications and enforcement actions through online databases and public records. Engaging during public hearings or submitting written feedback allows stakeholders to influence environmental decisions and hold both the NJDEP and permit applicants accountable.

Tips for Businesses and Homeowners

Adapting to NJDEP’s evolving standards requires proactive strategies. Businesses and homeowners should:

  • Stay updated on regulatory changes and deadlines.
  • Maintain clear documentation for all environmental activities.
  • Seek expert guidance for complex permit or remediation issues.

For those managing underground oil tanks or dealing with contaminated sites, understanding specific NJDEP requirements is essential. You can find practical advice on compliance and service options by navigating underground oil tank removal services. Regularly consulting official NJDEP resources will also help ensure ongoing compliance and informed decision-making.

Environmental Challenges Facing New Jersey in 2026

New Jersey faces mounting environmental pressures in 2026, placing the njdep at the forefront of urgent policy and regulatory action. Residents and businesses alike are navigating a landscape shaped by climate threats, pollution, development, and ongoing public health concerns.

Climate Change and Flooding Risks

New Jersey ranks second nationally for construction in flood-prone areas, which intensifies vulnerability to storms and rising seas. Hurricanes and severe floods are becoming more frequent, directly impacting communities and infrastructure. The njdep has responded with updated climate adaptation strategies, prioritizing resilience for coastal towns and at-risk properties. This year’s 2026 NJ Coastal Resilience Conference highlights collaborative efforts to address sea-level rise and disaster preparedness. The agency supports municipalities through technical guidance and grant programs, aiming to reduce future losses and enhance statewide climate readiness.

Air and Water Quality Issues

Despite decades of progress, air and water quality remain persistent concerns for the njdep. Only one stream system in the state currently meets the Clean Water Act’s highest standards, emphasizing the need for ongoing vigilance. New Jersey’s air quality consistently ranks among the poorest in the nation, with high rates of asthma and cancer clusters linked to pollution. The njdep continues to monitor emissions, enforce regulations, and oversee cleanup of toxic sites and Superfund locations. These efforts are vital for protecting public health and ensuring safe, clean resources for residents across all regions.

Overdevelopment, Land Use, and Pollution

Rapid development and land use changes pose ongoing challenges for the njdep. Pressure from the building industry often conflicts with the need to safeguard natural resources and prevent overdevelopment in sensitive areas. Recent regulatory rollbacks have led to increased risks, including chemical spills and refinery incidents. Balancing economic growth with environmental protection requires careful oversight and strong enforcement. The njdep works to uphold standards while assessing the long-term impacts of land use decisions on water, air, and soil quality throughout the state.

Community and Environmental Justice Concerns

Environmental burdens are not shared equally; some communities face disproportionate impacts from pollution and natural disasters. The njdep is evolving its approach to incorporate environmental justice into permitting, remediation, and enforcement. This includes targeted outreach and support for vulnerable populations affected by flooding, contaminated sites, and industrial emissions. By prioritizing fairness and community engagement, the njdep aims to ensure all residents benefit from effective environmental protection and have a voice in shaping future policies.

How Recent NJDEP Changes Affect Residents, Businesses, and Advocacy

Recent updates to njdep regulations significantly affect homeowners and property buyers in New Jersey. If you are considering purchasing property, it is crucial to understand new responsibilities regarding flood zones, contaminated sites, and environmental compliance. Home inspections now often include assessments for underground oil tanks and soil contamination. For practical guidance, review essential tips for purchasing a home with an underground oil tank. Staying informed about changing njdep rules ensures you avoid costly surprises and remain compliant throughout the transaction process.

Business and Industry Adaptation

The evolving njdep landscape also poses new challenges for businesses and developers. Regulatory updates have shifted compliance costs and changed expectations for permitting and environmental stewardship. Companies must adapt by investing in sustainable practices and monitoring legislative changes closely. Industries such as construction and real estate face unique hurdles as they navigate site remediation and air quality standards. Proactive engagement with njdep guidelines helps businesses minimize risks and identify opportunities for growth in a changing regulatory environment.

Role of Environmental Groups and Public Advocacy

Environmental groups play a vital role in shaping njdep policy and holding agencies accountable. Recent rule changes have altered public participation, but advocates continue to organize campaigns, submit comments, and attend hearings. Effective advocacy involves staying updated on proposed regulations and mobilizing community support for stronger protections. Success stories from local organizations highlight the power of collective action in influencing njdep decisions and defending public health and the environment.

Resources for Staying Updated

To keep pace with ongoing njdep changes, residents and businesses should utilize official agency updates, legislative tracking tools, and advocacy networks. Subscribing to njdep alerts and exploring transparency platforms provides timely information on regulatory shifts. Staying connected with environmental consultants and community groups ensures you are prepared for new requirements and can respond effectively to policy developments. Remaining vigilant and informed is the best strategy for navigating New Jersey’s evolving environmental landscape.

The Future of Environmental Regulation in New Jersey: What to Watch in 2026 and Beyond

The future of environmental regulation in New Jersey is unfolding rapidly. With the njdep at the epicenter of policy debates, residents, businesses, and advocates must stay alert to emerging trends. What lies ahead will shape the state’s environment, economy, and public health for years to come.

Anticipated Regulatory Trends and Policy Debates

In 2026, regulatory trends are defined by the balance between economic growth and environmental stewardship. Some policymakers advocate for further deregulation to stimulate business, while others push for restoring environmental safeguards. The njdep will continue to face pressure from developers and environmental groups alike.

Key policy debates include:

  • The fate of PFAS and microplastics regulation
  • Renewable energy integration into state policy
  • Green infrastructure incentives

These issues will remain central as the njdep navigates a changing political climate.

Innovations in Environmental Science and Technology

Technological advances are transforming how the njdep manages air, water, and soil quality. Data-driven tools now enable real-time environmental monitoring, supporting faster, evidence-based decision-making. For example, innovations in the crucial role of soil remediation are helping the agency address historic contamination more efficiently.

Recent technology adoption includes:

  • Remote sensing for air and water pollutants
  • Predictive modeling for flood risk
  • Advanced soil and groundwater testing

These innovations empower the njdep to respond quickly to emerging threats.

Community Resilience and Climate Adaptation

Climate adaptation is a top priority for the njdep as New Jersey faces more frequent floods and wildfires. The agency supports local governments with funding, technical guidance, and resilience planning. The 2025 Jones Road Wildfire highlighted the importance of coordinated emergency response and proactive land management.

Efforts to build resilience include:

  • Grant programs for municipalities and nonprofits
  • Climate vulnerability assessments
  • Disaster preparedness training

By leading these initiatives, the njdep helps communities withstand environmental shocks.

How to Prepare for Regulatory Changes

Preparation is essential as njdep regulations continue to evolve. Residents, businesses, and local governments should stay informed about rule changes, permitting requirements, and compliance resources. Building partnerships with environmental consultants and advocacy groups can provide valuable support.

Key steps for preparation:

  • Subscribe to njdep alerts and updates
  • Attend public hearings and comment periods
  • Consult experts on compliance and remediation

Staying proactive ensures you are ready for any regulatory shift.

Key Takeaways for 2026

Looking ahead, the most significant changes involve a greater reliance on technology, evolving policy debates, and a continued focus on climate resilience. The njdep’s actions will directly influence the future of New Jersey’s environment and economy. By remaining engaged and informed, everyone can help shape a healthier, more sustainable state.

As we’ve explored, navigating NJDEP regulations in 2026 can feel overwhelming, especially with new legislative changes and evolving environmental challenges in New Jersey. If you’re a homeowner or property buyer concerned about oil tank removal, soil testing, or ensuring full compliance with the latest rules, you don’t have to figure it out alone. We’re here to offer transparent, fixed-price solutions and guide you every step of the way. If you have questions or need expert help tailored to your situation, reach out to us today—your peace of mind starts with a conversation. Contact Us

Grandby Tank Guide: Essential Insights for 2026

Are you ready for the new standards shaping fuel storage in 2026? Understanding the grandby tank is more important than ever for property owners, contractors, and facility managers. This comprehensive guide offers the essential knowledge you need to make informed choices about installation, ongoing maintenance, and regulatory compliance.

Inside, you will discover what sets Grandby tanks apart, their unique advantages, step-by-step installation guidance, best practices for maintenance, the latest regulatory updates for 2026, and expert tips to extend your tank’s lifespan. Stay ahead of industry trends and ensure your fuel storage is safe, efficient, and compliant.

Understanding Grandby Tanks: Features, Types, and Uses

What Is a Grandby Tank?

A grandby tank is a specialized storage solution designed for safe and efficient containment of fuels, most commonly heating oil. Originating from a legacy of engineering innovation, Grandby tanks have been trusted in North America for decades. Their focus on robust construction and adaptability has made them a leading choice for property owners.

These tanks are widely used across residential, commercial, and industrial environments. What sets a grandby tank apart from other brands is its combination of advanced safety features, flexible sizing, and compliance with stringent industry standards. Whether for a single-family home or a large-scale facility, these tanks are engineered for reliability and longevity.

Grandby Tank Types and Specifications

Grandby tanks come in both horizontal and vertical models, each designed to maximize space efficiency and meet various installation requirements. Horizontal tanks are popular for basement and outdoor placements, while vertical models suit areas with limited floor space.

Standard capacities include 275, 330, and 500 gallons, accommodating different fuel storage needs. Material options range from single-wall steel to double-wall and fiberglass-lined variants, each offering unique benefits. For those prioritizing safety, the Granby Industries’ 2-in-1 Double-Wall Oil Tanks provide an extra layer of protection against leaks and environmental hazards.

All grandby tank models are UL and ULC certified, ensuring they meet rigorous safety and performance benchmarks. Choosing the right type depends on your site layout, fuel usage, and regulatory requirements.

Core Features and Advantages

A grandby tank is engineered with corrosion-resistant materials, significantly reducing the risk of rust and extending service life. Advanced leak prevention technology, such as double-wall construction and sealed seams, provides peace of mind for property owners.

Integrated safety features are standard. These include overfill alarms, accurate fuel level gauges, and pressure relief valves. Such measures help prevent accidents and ensure compliance with modern safety codes.

Warranty coverage for a grandby tank typically ranges from 10 to 25 years, depending on the model and installation. With proper care, many tanks remain in service far beyond their warranty period, making them a sound investment for long-term property management.

Common Uses and Scenarios

The grandby tank is a versatile solution used for several essential applications. In homes, it’s the primary choice for heating oil storage, ensuring consistent warmth during colder months. Commercial properties rely on these tanks for on-site fuel supply, supporting daily operations and reducing downtime.

In addition, grandby tank systems often serve as backup emergency fuel sources, particularly in facilities that require uninterrupted power or heating. They integrate seamlessly with HVAC systems and generators, providing a reliable safety net during outages or extreme weather events.

Market Data and Trends

Grandby tanks hold a significant market share in North America, with recent industry reports estimating their presence in over 40% of residential oil-heated properties. Demand continues to rise as more property owners seek tanks with advanced safety features and compliance with evolving regulations.

Key trends shaping the grandby tank market include the adoption of smart monitoring technologies, increased use of double-wall designs, and a focus on environmental sustainability. As regulatory standards advance, the popularity of certified, high-performance tanks is expected to grow further.

Installation Process: Step-by-Step Grandby Tank Setup for 2026

A successful grandby tank installation starts with careful planning and follows a proven process. Whether you are a property owner or a contractor, understanding each stage helps ensure safety, compliance, and long-term performance.

Pre-Installation Planning

Before installing a grandby tank, assess your site thoroughly. Consider space limitations, access routes, and proximity to buildings or property lines. Check local codes and secure the necessary permits, as regulations for grandby tank installations can change based on jurisdiction.

Select the right grandby tank model for your needs. Evaluate capacity, layout, and material options based on your fuel usage and site conditions. Comprehensive planning at this stage helps avoid costly mistakes and ensures your system meets both current and future requirements.

Delivery and Site Preparation

Coordinating delivery is critical to prevent delays or damage. Arrange for professional transportation and follow all handling guidelines to protect your grandby tank during transit. Prepare a solid, level foundation, such as a concrete pad or approved supports, to ensure stability.

Assess environmental considerations like drainage and flood risk. Proper site preparation minimizes the risk of corrosion and extends the lifespan of your grandby tank. Always verify that the installation location complies with local environmental standards.

Installation Steps (Chronological)

The grandby tank installation process follows a specific sequence to guarantee safety and functionality. Begin by positioning the tank on the prepared foundation, ensuring it is level and secure. Connect fill and vent pipes according to manufacturer specifications.

Install safety features including gauges, overfill alarms, and shutoff valves. Secure the grandby tank against tipping or movement, especially in areas prone to seismic activity or high winds. Conduct a final inspection, checking for leaks and verifying all connections.

  • Position tank and check level

  • Connect fill and vent pipes

  • Install gauges and alarms

  • Anchor tank securely

  • Perform leak and pressure tests

A thorough installation ensures your grandby tank operates safely and efficiently from day one.

Post-Installation Checklist

Once the grandby tank is installed, complete all necessary documentation and register your warranty. Follow initial fill procedures recommended by the manufacturer to prevent airlocks or contamination. Provide comprehensive training and a safety briefing to all operators or property managers.

Key checklist items:

  • Register warranty and keep documentation

  • Complete initial fill slowly and monitor for leaks

  • Train all users on safe operation and emergency protocols

Proper post-installation steps set the foundation for safe and compliant grandby tank operation.

Professional vs. DIY Installation

Choosing between a certified installer and a DIY approach impacts safety, compliance, and insurance eligibility. Professional installation minimizes liability and ensures adherence to all codes, while DIY projects can risk costly errors or void warranties. For those considering future tank replacement, understanding the oil tank removal process can inform your installation decisions.

On average, professional installation costs range from $1,200 to $3,000, depending on tank size and site complexity. Investing in expertise pays off with peace of mind and regulatory compliance.

Maintenance and Safety: Best Practices for Grandby Tanks

Regular maintenance is essential for ensuring the safety and reliability of your grandby tank. By following industry best practices, property owners can extend system lifespan, reduce risks, and stay compliant with evolving standards. Let us break down essential routines and safety measures for 2026.

Routine Inspection and Maintenance Tasks

Routine inspections are the foundation of grandby tank care. Conduct a visual check every month for signs of corrosion, leaks, or structural issues. Annually, schedule a professional inspection to assess the tank’s integrity and confirm it meets all standards.

Key maintenance tasks include:

  • Inspecting all seams, fittings, and connections.

  • Cleaning the tank interior to prevent sediment buildup.

  • Testing gauges and safety devices for proper function.

By keeping your grandby tank on a regular inspection schedule, you can catch issues early and avoid costly repairs.

Leak Prevention and Detection

Preventing leaks is critical for safety and environmental protection. Look for early warning signs such as staining, rust, or dampness near the tank base. Installing a leak detection system offers peace of mind and rapid response in case of failure.

If you suspect a problem, refer to resources like Warning Signs of Tank Failure to identify red flags before they escalate. Immediate action helps minimize potential hazards and cleanup costs.

Regulatory Maintenance Requirements for 2026

In 2026, maintenance for grandby tank systems must align with updated EPA and local requirements. Documentation is vital, including inspection records, repair logs, and certification reports.

Key requirements:

  • Maintain records for all inspections and repairs.

  • Complete mandated certifications at specified intervals.

  • Ensure compliance with secondary containment and leak detection standards.

Staying current with regulations protects your investment and ensures your grandby tank operates safely.

Winterization and Seasonal Care

Cold weather can pose unique challenges for tank owners. To prevent freezing, insulate exposed pipes and fittings. Ensure all lines are free of water and debris before winter arrives.

Prepare for storms by securing the tank and checking that all safety devices function correctly. A proactive approach limits downtime and helps your system withstand harsh conditions.

Safety Protocols and Emergency Preparedness

Strong safety protocols are essential for any fuel storage system. Install fire safety devices and keep spill containment materials accessible. Create and display emergency contact lists near the tank.

In case of an emergency:

  • Shut down the tank and alert authorities.

  • Use spill kits to contain minor leaks.

  • Document incidents for insurance and regulatory needs.

Thorough preparation ensures a swift and effective response to any grandby tank emergency.

Regulatory Compliance and Industry Changes in 2026

Staying compliant with evolving regulations is essential for any grandby tank installation in 2026. The latest updates affect every stage, from installation to daily operations. Understanding these changes will help property owners and managers avoid costly penalties while ensuring safe, environmentally responsible fuel storage.

Key Regulatory Updates Affecting Grandby Tanks

In 2026, both federal and local authorities are introducing stricter requirements for grandby tank systems. These include enhanced secondary containment, advanced leak detection, and regular inspection mandates. For detailed federal guidelines, consult the EPA’s Oil Spill Prevention and Preparedness Regulations. Keeping up with these changes is crucial for compliance and operational safety.

Certification and Documentation

Every grandby tank must have up-to-date certifications confirming compliance with new standards. Documentation should include installation records, inspection reports, and maintenance logs. Certified inspectors will verify that tanks meet UL and ULC requirements. Maintaining thorough, organized records is not only mandatory, but also simplifies future audits and insurance claims.

Environmental Impact and Sustainability

Environmental concerns are driving new sustainability requirements for grandby tank designs. Modern tanks are built to minimize leaks, reduce emissions, and support recycling at end of life. Proper disposal of old tanks is regulated to prevent soil and groundwater contamination. Facility managers must plan for eco-friendly upgrades and responsible decommissioning to meet 2026 standards.

Insurance and Liability Considerations

Insurance policies for grandby tank owners are evolving alongside regulations. Providers now require proof of compliance with inspection and maintenance schedules. Failure to comply could limit coverage or increase premiums. Liability for leaks, spills, or environmental harm falls on the property owner, so proactive risk management is essential for financial protection.

Industry Trends and Future Outlook

Looking ahead, the grandby tank industry is embracing smart technology for compliance. Innovations such as remote monitoring, automated leak detection, and digital record-keeping are becoming standard. These advancements not only streamline regulatory processes, but also help tank owners avoid unplanned downtime. Expect more digital solutions as compliance requirements grow.

Compliance Statistics and Market Impact

Recent data shows over 60% of grandby tank installations in North America have been upgraded for 2026 compliance. Regulatory changes are driving a surge in tank replacements and retrofits. As a result, the market is shifting toward safer, longer-lasting solutions. Staying ahead of these trends ensures consistent operation and regulatory peace of mind.

Maximizing the Lifespan of Your Grandby Tank

Extending the service life of your grandby tank is not only a smart investment, but also essential for safety and regulatory compliance. By understanding what impacts longevity and following best practices, you can ensure your system delivers reliable performance for years to come.

Factors Influencing Tank Longevity

Several factors determine how long your grandby tank will last. Material quality is critical—tanks made from high-grade steel or double-wall construction offer superior durability. Proper installation also plays a key role, as tanks exposed to moisture or installed without adequate foundation support may deteriorate faster.

Environmental exposure, such as contact with corrosive soil or standing water, can accelerate wear. Following manufacturer guidelines for location and setup helps mitigate these risks. Regularly reviewing installation conditions ensures your grandby tank operates optimally.

Preventative Maintenance Strategies

Preventative maintenance is vital to maximize the lifespan of your grandby tank. Applying protective coatings and rust inhibitors reduces the risk of corrosion. Schedule routine inspections to spot early signs of wear, and clean out sediment buildup to maintain tank integrity.

Incorporating a maintenance log helps you track service intervals and repairs. Adopting these proactive strategies not only extends the life of your grandby tank, but also minimizes the risk of costly failures or regulatory issues.

Upgrades and Retrofits for Extended Use

Modernizing your grandby tank with upgrades can significantly extend its service life. Consider adding double-wall protection for enhanced leak prevention, or upgrading to advanced gauges and electronic leak detection systems for improved monitoring.

These enhancements provide additional layers of safety and help meet evolving regulatory requirements. Investing in retrofits ensures your grandby tank remains compliant and efficient as standards and technologies advance.

Signs It’s Time to Replace Your Tank

Watch for visible signs that indicate your grandby tank may need replacement. These include significant corrosion, deformation, or repeated leaks. Failing inspection or noticing persistent operational issues are strong signals it is time for a new system.

To avoid common pitfalls during this process, review the Common Oil Tank Mistakes to Avoid before making a decision. Timely action helps you maintain safety and compliance.

Cost-Benefit Analysis: Repair vs. Replacement

Assessing whether to repair or replace your grandby tank involves comparing costs and expected lifespan. On average, a well-maintained grandby tank lasts 20 to 25 years. If repair expenses approach the cost of a new installation, replacement is often the more economical choice.

Option

Average Cost

Expected Additional Life

Key Considerations

Repair

$500–$2,000

2–5 years

Short-term fix, risk of recurring issues

Replacement

$2,500–$5,000

20–25 years

Long-term reliability, warranty coverage

Carefully weigh financial implications and the benefits of a new grandby tank for long-term peace of mind.

Real-World Examples and User Testimonials

Many property owners report their grandby tank has performed reliably for more than two decades with proper care. Case studies highlight tanks that exceeded lifespan expectations thanks to regular inspections and timely upgrades.

Users often note that proactive maintenance and prompt attention to minor issues are key to maximizing value. Their experiences reinforce the importance of ongoing diligence for optimal tank performance.

Choosing the Right Grandby Tank Model for Your Needs

Selecting the ideal grandby tank requires careful consideration of your specific fuel storage needs and long-term goals. An informed choice not only supports efficient operations but also ensures compliance and safety for years to come.

Assessing Your Storage Requirements

Begin by evaluating your current and projected fuel usage. Calculate the maximum volume needed during peak periods to avoid running short. Factor in potential expansions, seasonal fluctuations, and backup requirements.

For residential settings, a grandby tank with a 275 or 330-gallon capacity often suffices. Commercial or industrial facilities may need larger models or multiple tanks to ensure uninterrupted supply. Proper assessment lays the foundation for a reliable and cost-effective installation.

Comparing Grandby Models and Features

Grandby tanks are available in various configurations to suit diverse needs. Common models include horizontal and vertical designs, each offering unique installation benefits. The following table provides a quick comparison:

Model Type

Capacity Options

Key Features

Horizontal

275, 330, 500

Space-saving, easy access

Vertical

275, 330

Smaller footprint, efficient fill

When selecting a grandby tank, look for corrosion-resistant construction, integrated safety systems, and certifications such as UL or ULC to ensure compliance and durability.

Budgeting and Total Ownership Costs

Understanding the total cost of owning a grandby tank is essential for effective budgeting. Factor in not only the initial purchase price, which varies by model and capacity, but also installation, permitting, and ongoing maintenance expenses.

Over the lifespan of a grandby tank, routine inspections, cleaning, and occasional upgrades contribute to long-term value. Investing in quality from the start can reduce costly repairs or early replacement down the road.

Sourcing and Purchasing Tips

To ensure you receive a genuine grandby tank, purchase only from authorized dealers or reputable online marketplaces. Confirm that the supplier offers proper documentation, warranty coverage, and after-sales support.

Request detailed product specifications and ask about delivery logistics. A reliable source will provide guidance on selecting compatible accessories and help you navigate local code requirements for your area.

Common Mistakes to Avoid

Avoid the pitfalls of undersizing or oversizing your grandby tank. Undersized tanks require frequent refills, while oversized tanks can lead to stagnant fuel and higher costs.

Neglecting local regulations or skipping regular maintenance are common errors that may result in compliance issues or system failures. Plan for ongoing care from the outset to maximize performance and lifespan.

As you’ve seen, navigating the ins and outs of Grandby tank installation, maintenance, and compliance is crucial for peace of mind and long term savings. Whether you’re considering a new setup or ensuring your current tank meets 2026 regulations, partnering with experts can make all the difference. At Simple Tank Services, we’re dedicated to delivering transparent, fixed price solutions that put your safety and property first. If you’re ready to take the next step or need tailored advice for your unique situation, I encourage you to Contact Us today.

Roth Tank Guide: Essential Insights for 2026 Buyers

Are you thinking about installing a roth tank on your property in 2026? Choosing the right fuel storage system can safeguard your investment and give you peace of mind.

With new regulations and growing safety concerns, buyers need reliable information. This guide covers everything from roth tank technology and compliance to sizing, installation, and maintenance.

Discover what sets these tanks apart, learn how to select the best option for your needs, and understand key cost factors. Use this comprehensive resource to make a confident, compliant purchase that protects your property and the environment.

Understanding Roth Tanks: What Sets Them Apart?

Choosing the right storage tank is a critical decision for property owners. With evolving safety standards and environmental concerns, the roth tank stands out as a modern solution for secure and reliable fluid storage. Let us explore what makes it unique.

Roth Tank Technology Explained

The roth tank features advanced double-wall construction. The inner tank is made from high-density polyethylene (HDPE), providing a seamless, rust-proof barrier for fuel. Surrounding this is a galvanized steel outer tank, creating a robust secondary containment layer.

This design delivers multiple benefits:

  • Leak protection: If the inner tank fails, the outer shell contains any spills.

  • Corrosion resistance: Plastic liner prevents rust, unlike traditional steel tanks.

  • Longevity: With proper care, a roth tank can last over 30 years.

  • Environmental safety: The double-wall setup minimizes soil and water contamination risk.

Compared to single-wall or basic steel tanks, the roth tank offers superior safety and durability. Many models are UL-listed, meeting strict industry standards for fire and impact resistance. For a deeper look at construction and compliance, see the Roth Double-Wall Heating Oil Tanks overview.

Key Applications and Uses

A roth tank is versatile enough for a range of settings:

  • Residential: Commonly used for home heating oil storage.

  • Commercial and industrial: Safely stores waste oil, lubricants, or alternative fuels.

  • Aboveground and underground: Can be installed indoors or outside, depending on site needs.

  • Alternative fuels: Compatible with biodiesel and diesel exhaust fluid (DEF).

Regions with strict environmental regulations, such as the Northeast U.S., have seen a surge in roth tank adoption. This is often due to code requirements for double-wall containment and spill prevention. Whether for a home or business, the roth tank adapts to changing fuel types and installation scenarios.

Common Myths and Misconceptions

Misunderstandings about the roth tank can lead to hesitation among buyers. Let us address some common myths:

  • “Plastic tanks are not durable.” In reality, the inner HDPE shell is engineered for strength and chemical resistance, rivaling steel.

  • Installation is complex. Actually, the roth tank has clear installation guidelines and is lighter than steel, making placement straightforward.

  • Warranty confusion. Many believe coverage is limited, but the roth tank often comes with a robust 30-year warranty.

  • Cost concerns. While initial investment may be higher, long-term savings on maintenance and liability are significant.

  • Overlooked safety features. Integrated leak detection ports and secure caps enhance overall safety.

By understanding the facts, buyers can realize the true value a roth tank brings to property protection and regulatory compliance.

Roth Tank Construction, Features, and Safety

A roth tank stands out for its advanced engineering and commitment to safety. Understanding its construction, features, and compliance benefits is key to making an informed decision.

Double-Wall Design and Materials

The roth tank features a double-wall construction, which is central to its reputation for durability and safety. The inner tank is made from high-density polyethylene (HDPE), a material chosen for its resistance to corrosion and chemical degradation. Surrounding this is a layer of galvanized steel, forming a robust outer shell that provides structural reinforcement.

This dual-layer approach allows the roth tank to detect leaks early through integrated ports and visual indicators. Any breach in the inner tank is captured by the secondary containment, preventing environmental contamination. Fire and impact resistance are also enhanced by this design, as the steel exterior shields the polyethylene liner from damage.

The roth tank meets rigorous industry standards, such as UL 2258 and UL 142. For a detailed breakdown of its features and compliance, see the Roth Double-Wall Tank System.

Built-in Safety and Environmental Protections

Safety is at the heart of every roth tank installation. Overfill prevention mechanisms are standard, ensuring that accidental spills are minimized during filling. Each roth tank is designed to hold 110% of the inner tank’s volume, providing ample secondary containment in case of a leak.

Corrosion-resistant fittings and connections further protect the tank from environmental wear. Lockable fill and vent caps add an extra layer of security, preventing unauthorized access and reducing the risk of tampering.

A key advantage of the roth tank is its 30-year limited warranty, which speaks to the manufacturer’s confidence in its safety and longevity. These features collectively ensure that your investment remains secure and environmentally responsible.

Regulatory and Insurance Considerations

Choosing a roth tank can simplify compliance with local, state, and federal regulations. Its double-wall design helps property owners meet secondary containment requirements, which are now standard in many regions. Documentation for code compliance is typically straightforward, thanks to the tank’s UL certification and robust safety features.

Insurance providers often recognize the safety benefits of a roth tank by offering reduced premiums for compliant installations. This can translate to significant long-term savings. For example, New Jersey mandates secondary containment, and a roth tank is often the preferred solution for meeting these standards.

Proper documentation and professional installation ensure that your roth tank remains an asset, both for regulatory compliance and when seeking insurance coverage.

Sizing and Selecting the Right Roth Tank

Choosing the right roth tank for your property is a crucial decision that impacts safety, efficiency, and long-term value. With multiple sizes and configurations available, understanding your specific needs helps ensure your investment is both practical and future-proof.

Assessing Your Storage Needs

Begin by evaluating your average fuel or fluid consumption throughout the year. This step determines the minimum capacity your roth tank should offer. Common sizes include 110, 165, 275, 400, and 500+ gallons, each suited for different usage patterns and property sizes.

Consider the available space where you plan to install the roth tank. Indoor basements often have different space limitations compared to outdoor slabs. For example, a 275-gallon roth tank typically has a smaller footprint than a standard steel tank of similar capacity, making it ideal for tight indoor spaces.

Choosing the proper size not only prevents frequent refills but also helps manage costs over time. Assess both current and anticipated needs to avoid undersizing or oversizing, which can lead to inefficiencies or wasted space.

Evaluating Site and Installation Constraints

Installation requirements play a significant role in roth tank selection. It’s important to verify clearance distances from walls, appliances, and property lines. Local codes may dictate specific spacing, so always consult municipal guidelines before finalizing your plan.

Decide between indoor basement placement and outdoor slab installation. Each option presents unique challenges, such as weight-bearing requirements and exposure to environmental factors. Logistics, including the ability to transport the roth tank to the installation site, should also be considered.

Accessibility for refueling and routine inspections is another key factor. Ensure there is adequate space around the roth tank for service personnel and delivery equipment. Proper planning at this stage minimizes operational headaches later.

Installation Process and Best Practices for 2026

Selecting the right installation approach is crucial for maximizing the safety and lifespan of your roth tank. Whether you’re upgrading an existing system or starting fresh, careful planning and adherence to best practices will ensure compliance and peace of mind.

Pre-Installation Planning and Permits

Proper planning is the foundation of every successful roth tank installation. Start by conducting a thorough site assessment, including soil testing for stability and environmental safety. Check local and state regulations, as many areas require specific permits and documentation before work begins.

Prepare the installation site by selecting a level surface, such as a concrete pad or slab, that can support the full weight of a filled roth tank. Allow adequate clearance from walls, appliances, and property lines to facilitate inspections and refueling.

Review local code requirements, which often specify minimum distances and secondary containment measures. For comprehensive guidance on installation and regulatory considerations, consult the Roth DWT Installation Manual 2023. This resource provides step-by-step instructions aligned with industry standards.

Step-by-Step Installation Overview

The installation process for a roth tank follows a structured sequence to ensure safety and compliance. Begin by positioning the tank on the prepared foundation, confirming it is level and stable. Secure the tank to prevent shifting or settling over time.

Connect the fill, vent, and gauge components according to manufacturer specifications. Each connection must be tight and properly sealed to prevent leaks or vapor escape. After assembly, conduct a leak test using approved methods, such as pressure or vacuum testing, to verify system integrity.

Complete an initial inspection, documenting all steps for future reference. The typical installation timeline for a 275-gallon roth tank ranges from a few hours to a full day, depending on site conditions and complexity. Always follow local inspection protocols before placing the tank into service.

Maintenance, Monitoring, and Longevity

Keeping your roth tank in optimal condition requires regular attention and a proactive approach. Proper maintenance not only ensures safety but also maximizes the lifespan and value of your investment.

Routine Inspection and Maintenance Tasks

Routine care is essential for every roth tank owner. Begin with visual inspections to check for leaks, corrosion, or damage to the exterior and fittings. Regularly clean vent and fill pipes to prevent blockages and maintain proper airflow.

A typical maintenance checklist includes:

  • Inspecting leak detection ports and alarms

  • Examining the base for stability or shifting

  • Checking for signs of moisture or staining around the tank

Annual professional inspections are highly recommended to verify all safety systems are functional. By following a consistent schedule, you help your roth tank perform reliably for decades.

Extending Tank Life and Warranty Coverage

Environmental factors such as humidity and temperature can influence how long your roth tank lasts. Proper anchoring and support are crucial, especially in areas prone to shifting soil or flooding. Always follow manufacturer guidelines for installation and site preparation.

To maintain warranty eligibility, keep records of all inspections and maintenance. Avoid unauthorized modifications, as these may void coverage. For additional peace of mind, homeowners should review their insurance coverage for oil tanks to understand what protections apply to their roth tank investment.

Roth’s 30-year limited warranty is a testament to the tank’s durability, but it requires careful adherence to care and documentation standards.

Troubleshooting and Common Issues

Recognizing issues early helps prevent costly repairs. Watch for unusual odors, visible stains, or alarm triggers near your roth tank. If you notice any of these warning signs, act promptly by contacting qualified service professionals.

In case of a suspected leak or spill, follow emergency procedures and notify local authorities if needed. Quick response limits environmental impact and protects property value. Keep contact information for emergency services readily available near your roth tank.

By staying vigilant and informed, you can resolve most issues before they escalate, ensuring long-lasting performance and safety.

Innovations and 2026 Market Outlook

By 2026, roth tank technology has evolved to include smart monitoring capabilities and IoT integration, allowing for real-time leak detection and fuel tracking. These innovations help owners stay proactive about maintenance and compliance.

Market trends show a growing preference for double-wall tanks, especially in regions with strict environmental regulations. Anticipated updates to fuel storage codes are expected to further drive roth tank adoption, securing their place as a future-proof choice for property owners.

After exploring the key features, safety benefits, and regulatory considerations of Roth tanks, you can see how crucial it is to make informed decisions for your property. Choosing the right tank not only protects your investment but also ensures compliance and peace of mind for years to come. If you want a partner who brings transparency and fixed pricing to every project, we are here to help you navigate the entire process—from removal to installation and soil remediation. Ready to take the next step toward a safer, compliant solution?
Our Services

Tank Removal Guide: Essential Steps and Tips for 2025

Did you know that improper tank removal can expose property owners to costly fines and dangerous environmental hazards? As regulations tighten in 2025, the need for safe, compliant tank removal has never been more critical.

Leaking or outdated tanks can contaminate soil and water, put your health at risk, and even lower your property value. Ignoring these risks can delay real estate transactions and lead to unexpected legal liabilities.

This comprehensive guide delivers step-by-step instructions and expert advice for a smooth, legal, and cost-effective tank removal process. You will discover essential steps, regulatory requirements, preparation tips, removal procedures, soil remediation strategies, and best practices to safeguard your investment.

Start your journey to compliance and property protection with this roadmap for safe tank removal.

Understanding Tank Removal: Types, Risks, and Regulations

Tank removal is a critical process for property owners, especially as regulations tighten in 2025. To understand why tank removal matters, it is important to first know the types of tanks commonly found on residential and commercial properties.

Common Tank Types

Tank Type

Typical Use

Location

Underground Storage Tank (UST)

Fuel, chemicals, heating oil

Buried below ground

Aboveground Storage Tank (AST)

Fuel, water, chemicals

On or above ground

Residential Heating Oil Tank

Home heating oil

Above or below ground

Each tank type presents unique challenges during tank removal, depending on its size, construction, and installation location.

Risks of Aging or Abandoned Tanks

Aging or abandoned tanks pose several risks:

  • Soil and groundwater contamination from leaks

  • Health hazards due to vapor intrusion or direct exposure

  • Legal liabilities, including fines and mandatory cleanup orders

These risks can significantly impact property value. For example, a leaking underground tank can halt a real estate transaction or require expensive remediation. According to Risks of Underground Oil Tank Leaks, undisclosed leaks often lead to environmental claims and devaluation.

Impact on Property Value and Transactions

Properties with unresolved tank removal issues may face:

  • Loss of buyer interest

  • Reduced appraisal values

  • Delays in financing or closing

Buyers are increasingly cautious, and lenders may require proof of proper tank removal before approving a mortgage.

Regulatory Overview and Updates for 2025

Tank removal is governed by federal, state, and local agencies. The EPA sets national standards for USTs, while states like New Jersey enforce additional requirements through agencies such as NJDEP. Local municipalities may have their own permit and inspection processes.

Regulations are evolving. For instance, 2025 brings stricter closure deadlines for older tanks in several states, plus new requirements for secondary containment and enhanced reporting. Staying current with these changes is essential for compliance and avoiding penalties.

Case Study and Statistics

Consider a property that lost 20 percent of its value after a leaking tank was discovered post-sale. The average cleanup cost for contaminated sites can exceed $20,000, with some cases going much higher. Studies estimate that thousands of tanks nationwide are at risk of leaking, making proactive tank removal a prudent choice for property protection.

Step 1: Site Assessment and Initial Planning

Preparing for tank removal begins with a thorough site assessment and detailed planning. This stage sets the foundation for a safe, compliant, and cost-effective process. A proactive approach helps property owners avoid costly surprises and ensures all legal requirements are met.

Why Site Assessment is Critical

A professional site assessment is the first essential step in any tank removal project. Experts use advanced tools like ground-penetrating radar (GPR) to accurately locate underground tanks, determine their size, and assess their condition. Identifying the presence of leaks or corrosion early can prevent widespread soil or groundwater contamination.

Environmental consultants also look for signs of previous spills or abandoned tanks that may not appear on public records. For example, during a property sale inspection, an unregistered tank may be discovered, leading to unexpected delays and additional costs. By investing in a proper site assessment, property owners can mitigate risks and plan for any necessary remediation before tank removal begins.

Developing a Removal Plan

After the assessment, a clear tank removal plan is developed to guide the next steps. This plan includes an itemized proposal outlining the scope of work, estimated costs for removal, remediation, and site restoration. Accurate budgeting at this stage helps avoid overruns and ensures funds are available for each phase.

Securing permits is crucial before any work starts. Local authorities often require notification well in advance, and failure to comply can result in fines or project delays. Property owners should also coordinate with licensed contractors and environmental consultants to schedule the work and address any site-specific challenges. Effective planning streamlines tank removal and reduces the risk of unforeseen complications.

Regulatory Compliance and Documentation

Regulatory compliance is a cornerstone of successful tank removal. Property owners must gather and maintain all required documentation, including permits, notifications, and post-removal reports. Understanding liability transfer and ensuring proper insurance coverage are vital to protect against future claims.

Maintaining comprehensive records is especially important for future property transactions or refinancing. Missing paperwork can lead to costly fines or delays in closing deals. For example, incomplete documentation has resulted in projects being halted until proper records were produced.

Consulting resources such as the Underground Oil Tank Removal Contracts page can help clarify the contractual and compliance aspects of tank removal. Prioritizing documentation at every stage ensures a legally sound and smooth process.

Step 2: Preparing the Site for Tank Removal

Before any tank removal can begin, careful preparation of the site is essential. This phase sets the foundation for a safe, compliant, and efficient process. By following strict protocols, you can avoid costly mistakes and ensure environmental protection throughout the project.

Safety Protocols and Environmental Protections

Every tank removal project must prioritize safety for both workers and the environment. Begin by implementing OSHA safety standards, which require the use of personal protective equipment such as gloves, goggles, and respirators. Establish containment barriers around the tank area to prevent accidental spills and cross-contamination.

Air quality monitoring is crucial, especially when dealing with vapor hazards from underground tanks. Ventilation fans and gas detectors help maintain a safe atmosphere. Keep spill kits and emergency response plans on hand in case of unexpected leaks. These measures protect not only your team but also surrounding soil and groundwater from contamination.

Utility Markouts and Access Preparation

Before excavation begins for tank removal, it is vital to identify and mark all underground utilities. Contact local utility companies to schedule professional markouts. Clearly flag water, gas, electric, and communication lines to prevent accidental damage during digging.

Next, clear the site of vegetation, debris, and any obstacles that could impede equipment access. Plan the movement of heavy machinery, considering site logistics and minimizing disruption to the property. Proper access preparation reduces delays and ensures that the tank removal proceeds without unnecessary complications.

Notifying Stakeholders and Neighbors

Communication is a key aspect of responsible tank removal. Notify neighbors, tenants, and local authorities about the upcoming work. Provide details about the schedule, expected noise, and safety precautions in place.

Address any concerns about traffic or disruptions early in the process. Open communication helps build trust and ensures the project runs smoothly for everyone involved.

Example Timeline and Checklist

A well-structured timeline keeps the tank removal project on track. Here is a sample checklist to guide your preparation:

Task

Responsible Party

Timeline

Site assessment

Environmental consultant

Day 1

Permit acquisition

Property owner/contractor

Day 2-5

Utility markouts

Utility company

Day 6

Site clearing

Contractor

Day 7

Stakeholder notification

Property owner

Day 7

Each task must be documented and verified before moving to the next stage. For a deeper look at the Oil Tank Removal Process, review industry best practices and tips from experienced professionals.

Following this checklist ensures compliance, efficiency, and safety at every step of tank removal.

Step 3: Tank Extraction and Handling Contaminated Materials

Tank removal reaches its most critical stage during extraction and material handling. At this point, safety and compliance are paramount, as improper procedures can lead to environmental damage, regulatory penalties, or costly project delays. Here is how to ensure this step is handled professionally and in line with the latest standards.

Safe Tank Extraction Procedures

Tank removal begins with a thorough review of the site assessment and removal plan. For aboveground tanks, technicians disconnect all lines, purge vapors, and use vac-trucks or pumps to safely extract residues. Underground tanks require excavation, shoring for trench safety, and careful lifting with cranes or excavators.

Specialized equipment, such as non-sparking tools, is used to minimize ignition risks. All steps must align with current federal and state guidelines. For example, the EPA UST Regulation Revisions outline critical requirements for safe tank removal, including operator training and secondary containment. Following these protocols reduces the risk of accidental leaks or regulatory violations.

Handling and Disposal of Residual Contents

During tank removal, managing leftover liquids, sludge, and vapor is essential for safety and compliance. Contractors first sample and test residual contents to classify them as hazardous or non-hazardous waste. Approved containers are used for transfer, and materials are transported only to licensed disposal or recycling facilities.

A common pitfall is neglecting to fully drain tanks, which may result in spills and secondary contamination. To avoid this, crews always double-check tanks after extraction. Documenting every step of the disposal process is not only best practice but also required by most jurisdictions for tank removal projects.

Soil and Groundwater Sampling

Once the tank is removed, soil and groundwater around the excavation site are sampled to detect any contamination. Samples are collected at multiple depths and locations, then sent to certified laboratories for analysis. Results determine if remediation is needed and are crucial for closing out tank removal projects with regulatory agencies.

Proper documentation of sampling procedures and results is mandatory. If contamination is detected, detailed reports must be submitted, and further actions outlined. This step helps property owners demonstrate due diligence and protects them from future liability related to tank removal.

Emergency Response and Spill Management

Despite careful planning, spills or leaks can occur during tank removal. Immediate action is critical. Crews deploy spill containment kits and absorbent materials to capture leaked substances. Air monitoring equipment is used to ensure the safety of workers and nearby residents.

All incidents are documented and reported to local authorities as required. Having an emergency response plan in place is a non-negotiable aspect of responsible tank removal. Quick response not only minimizes environmental impact but also keeps projects on track and in compliance with legal requirements.

Step 4: Soil Remediation and Site Restoration

Once tank removal is complete, the next step is to ensure the site is safe, clean, and compliant. Soil remediation and site restoration are essential to protect your property, meet regulatory demands, and restore value.

Assessing and Addressing Contamination

After tank removal, professionals analyze soil and groundwater samples to determine if contamination is present. Interpreting these results is critical, as even minor leaks can pose significant risks to health and property. The scope of remediation depends on the severity and extent of contamination detected.

For example, during a recent tank removal, a homeowner discovered elevated petroleum levels in the soil, requiring immediate action. A thorough assessment outlines the necessary steps to remove pollutants and ensures all regulatory guidelines are met. Accurate evaluation at this stage lays the groundwork for a successful remediation process.

Soil Remediation Techniques

There are several proven soil remediation techniques following tank removal. The most common approach is excavation, where contaminated soil is removed and safely disposed of according to local regulations. In-situ methods, such as bioremediation or chemical treatment, are also used to treat soil without excavation.

Choosing the right technique depends on contamination type, site access, and regulatory requirements. For property owners in New Jersey, the Soil Remediation in New Jersey resource provides detailed guidance on selecting and implementing effective solutions after tank removal. Always ensure all hazardous materials are managed and transported by licensed professionals.

Site Backfilling and Restoration

Once soil remediation is complete, site backfilling and restoration begin. Clean soil is placed into the excavated area, restoring proper grading and stability. Depending on the original site features, landscaping, paving, or rebuilding may follow to return the area to its previous condition.

A successful restoration after tank removal ensures the property is both visually appealing and structurally sound. This step also helps prevent erosion, uneven settlement, or future environmental issues. Proper site restoration is essential for maintaining property value and safety.

Monitoring and Final Reporting

The final step after tank removal is ongoing monitoring and comprehensive reporting. Follow-up soil and groundwater tests confirm the effectiveness of remediation. Detailed reports are prepared for regulatory agencies and kept with property records.

Maintaining this documentation is crucial for future property transactions or refinancing. Consistent monitoring ensures that no residual contamination remains and that your property remains compliant and safe for years to come.

Step 5: Post-Removal Best Practices and Future Prevention

Proper post-removal practices are critical for ensuring long-term property safety and regulatory compliance. Once tank removal is complete, your responsibilities do not end. Maintaining organized documentation is essential. These records will be invaluable for future property sales, refinancing, or insurance claims.

Keep all permits, environmental reports, remediation summaries, and receipts. If you ever need to prove that tank removal was performed legally and safely, having these documents readily available can prevent costly disputes. For example, one homeowner in New Jersey avoided a legal battle during the sale of their property by providing a complete record of tank removal, including soil test results and regulatory clearances.

Continuous monitoring is another best practice. Even after successful tank removal, residual contamination or ground settlement may occur. Schedule periodic inspections of the site, especially during the first year after remediation. Early detection of issues can save thousands in future cleanup costs.

If your property still uses heating oil or fuel storage, regular inspections of remaining tanks and associated systems are vital. Look for signs of leaks, corrosion, or unstable ground. Consider upgrading to modern, double-walled tanks or alternative energy systems. These upgrades not only improve safety but may also qualify you for insurance discounts or local incentives.

Educate all property occupants about environmental safety. Post-removal, ensure everyone knows what to do if they notice unusual odors, visible spills, or ground shifts. A proactive approach reduces risk and builds confidence among residents or tenants.

As regulations evolve, stay informed about state and local requirements. For example, California property owners should review the California UST Closure Deadline 2025, which mandates closure of certain underground tanks by the end of 2025. Compliance with such rules is essential for future prevention and avoiding penalties.

Below is a quick-reference table highlighting key post-removal best practices and statistics:

Best Practice

Benefit

Statistic/Note

Maintain all tank removal records

Prevents legal disputes, aids resale

1 in 5 deals delayed due to missing documents

Schedule site monitoring

Early detection saves on remediation

12% require follow-up cleanup

Inspect and upgrade remaining systems

Reduces future environmental risks

Modern tanks reduce leaks by 70%

Educate occupants

Promotes quick response to issues

Awareness reduces incident response time

By following these post-removal steps, you protect your property investment and ensure ongoing compliance. Effective tank removal management does not stop at extraction; it extends into diligent recordkeeping, monitoring, and future-proofing your site.

Expert Tips for a Smooth Tank Removal in 2025

Planning a successful tank removal project in 2025 requires more than just following the steps. Property owners benefit most by applying expert insights, reducing unexpected costs, and staying compliant throughout the process.

Follow these expert tips to ensure a smooth tank removal:

  • Hire Licensed, Experienced Contractors
    Always select contractors with a strong track record in tank removal. Ask for references and verify licensing to avoid liability issues.

  • Compare Pricing Models
    Evaluate both fixed-price and variable pricing models. Fixed-price contracts offer cost certainty, while variable pricing may adjust based on site conditions. Review all terms to prevent budget surprises.

  • Demand Transparent Proposals
    Insist on detailed, itemized proposals. This helps you spot hidden fees and ensures you know exactly what services are included in the tank removal process.

  • Leverage Modern Technology
    Choose professionals who use advanced detection and removal technologies. Innovations such as ground-penetrating radar and remote monitoring can make tank removal safer and more efficient.

  • Stay Informed on Regulations
    Regulations can change quickly. For example, Oregon UST Rule Updates 2025 highlights new contractor requirements and removal standards. Check your state’s latest guidelines before starting any project.

  • Act Early to Save Costs
    Proactive tank removal often leads to significant savings. For instance, early detection of a minor leak helped one homeowner avoid thousands in cleanup expenses compared to waiting until a major spill occurred.

  • Maintain Comprehensive Documentation
    Keep all permits, reports, and receipts organized. Complete documentation is invaluable for future property sales and protects you from legal disputes.

By applying these expert strategies, you can ensure your tank removal is efficient, compliant, and cost-effective. Careful planning and professional support are the keys to protecting both your investment and the environment.

As you’ve seen throughout this guide, navigating tank removal in 2025 requires careful planning, expert knowledge, and adherence to evolving regulations. Whether you’re concerned about environmental risks, property value, or simply want the peace of mind that comes with a job done right, partnering with experienced professionals makes all the difference. At Simple Tank Services, we take pride in offering fixed-price solutions and transparent service every step of the way. If you’re ready to safeguard your property and ensure compliance, I encourage you to explore Our Services to see how we can help.

Basement Tank Removal Guide: Expert Steps for 2025

Basement tank removal is becoming a top priority for homeowners as environmental regulations tighten in 2025. Removing old tanks is no longer just a suggestion, it is essential for safety, property value, and legal compliance.

This guide provides a step-by-step, expert-backed process for basement tank removal that is safe, compliant, and cost-effective. You will learn how to navigate new regulations, prepare your home, manage every stage of the removal, handle contamination, and complete final post-removal steps.

Discover the risks of aging tanks, avoid costly mistakes, and gain confidence with expert advice. Take action now to protect your home and stay ahead of 2025 requirements.

Understanding Basement Tanks and 2025 Regulations

What Are Basement Tanks and Why Are They Common?

Basement tanks are storage containers installed below ground level, typically within a home’s basement, and are used to hold oil, fuel, or water. These tanks became especially common in residential properties built before the 1980s, when oil heating systems were the standard in colder regions. In fact, 60% of homes in the Northeast with oil heating systems still rely on basement tanks.

Most basement tanks are made from either steel or fiberglass. Steel tanks usually last 15 to 20 years, while fiberglass models can extend up to 30 years if properly maintained. To make this clear, consider the following table:

Material

Typical Lifespan

Steel

15–20 years

Fiberglass

25–30 years

Over time, aging tanks present significant risks. Corrosion is a major concern, often leading to leaks that can contaminate soil and groundwater. Additionally, accumulated sludge and rust increase the chance of fire hazards. Homeowners should pay attention to these risks and understand how basement tank removal can prevent serious issues.

2025 Regulatory Changes Impacting Tank Removal

With new environmental regulations coming into effect in 2025, basement tank removal is no longer just a best practice, but a legal requirement in many states. The EPA and several state agencies have introduced stricter rules for residential tank removal, including mandatory inspections and defined removal timelines for non-compliant tanks.

Key regulatory changes include:

  • Increased penalties for failing to remove old tanks or for improper disposal.

  • Requirements to hire certified contractors with proper documentation.

  • Obligations to conduct soil testing after tank removal, as highlighted by New Jersey’s revised code, which mandates soil analysis for all removals after January 1, 2025.

For a more detailed overview of these legal requirements, homeowners can review the oil tank removal regulations to ensure their project is fully compliant.

By understanding these new guidelines, homeowners can avoid costly fines and ensure their basement tank removal process meets all current standards.

Why Timely Removal Matters

Timely basement tank removal is essential for protecting both the environment and your investment. Leaking tanks are a leading source of soil and groundwater contamination, impacting drinking water supplies and local ecosystems. According to recent statistics, incidents of contamination are on the rise as tanks age.

Health and safety risks are also considerable. Exposure to leaking fuel can cause respiratory issues and pose fire dangers. From a financial perspective, an old or non-compliant tank can lower property value and complicate real estate transactions. Many insurance providers now require proof of tank removal before issuing or renewing policies.

Taking prompt action with basement tank removal not only safeguards your property, but also helps you stay ahead of regulatory changes and insurance requirements.

Preparing for Basement Tank Removal

Preparing for basement tank removal starts with a thorough assessment and strategic planning. Each step ensures your project remains safe, compliant, and within budget. With new regulations arriving in 2025, careful preparation is more important than ever.

Initial Assessment and Planning

Before moving forward with basement tank removal, you need to determine if your tank requires removal. Begin with a visual inspection for signs of rust, leaks, or structural damage. Check the installation date—tanks older than 30 years are at greater risk of failure.

Consider hiring a licensed inspector or environmental consultant. Professionals can identify hidden issues and provide recommendations. According to industry reports, up to 30 percent of tanks inspected in 2023 showed leakage.

Gather all necessary documentation, including permits, property records, and maintenance logs. This paperwork streamlines the approval process and supports compliance.

If you are unsure about your tank’s condition, review warning signs your tank needs removal to make an informed decision.

Budgeting and Cost Expectations

Understanding the financial side of basement tank removal is essential. Costs usually fall into several categories: inspection, removal, remediation, and disposal. The total price depends on tank size, ease of access, and any contamination found.

Here’s a sample cost breakdown for 2025:

Service

Average Cost ($)

Inspection

250–500

Removal

800–1,500

Remediation (if needed)

500–2,000

Disposal

200–400

Standard basement tank removal typically ranges from $1,400 to $3,000. Always request detailed quotes and inquire about potential hidden fees. Compare offers from multiple contractors to ensure fair pricing.

Budget extra for unexpected remediation, especially if your tank has leaked. Clear, upfront cost estimates help you avoid surprises during the process.

Choosing the Right Contractor

Selecting a qualified contractor is critical for a safe and compliant basement tank removal. Look for professionals with proper licensing, insurance, and documented experience handling basement tanks.

Ask for fixed-price contracts to eliminate variable costs. Transparent agreements protect you from surprise charges. Reliable contractors provide references and clearly outline their removal process.

Watch for red flags such as vague pricing, missing credentials, or reluctance to answer your questions. Before hiring, ask these key questions:

  • Are you licensed and insured for basement tank removal?

  • Can you provide references from recent projects?

  • Is your pricing fixed and all-inclusive?

  • What is your process for handling contamination?

Choosing the right partner ensures your basement tank removal meets all safety and regulatory standards.

Step-by-Step Basement Tank Removal Process

Removing a basement tank is a complex project that demands careful planning, safety protocols, and regulatory compliance. The following expert-backed process breaks down the essential steps for safe, efficient, and compliant basement tank removal. Each phase is designed to minimize risk and meet 2025 environmental standards.

Step 1: Site Preparation and Safety Measures

Start by clearing the basement area of all unnecessary items and debris to ensure safe access. Proper ventilation is crucial, as fumes from residual oil or fuel can linger. Before any work begins, shut off all fuel lines and disconnect utilities related to the tank.

Use appropriate personal protective equipment (PPE), including gloves, goggles, and respirators. Fire prevention is critical, so keep extinguishers nearby and eliminate ignition sources. OSHA standards recommend continuous air monitoring and a buddy system when working in confined spaces.

A thorough safety checklist helps prevent accidents and protects everyone involved. By prioritizing preparation, homeowners lay the groundwork for a successful basement tank removal.

Step 2: Draining and Cleaning the Tank

The next step involves safely draining any remaining fuel or liquid from the tank. This process prevents spills and reduces environmental hazards. Collect all fluids in approved containers for disposal at licensed facilities.

After draining, clean out sludge and sediment from the tank’s interior. This material often contains hazardous substances and must be handled according to EPA hazardous waste guidelines. Use non-sparking tools and containment trays to avoid accidental releases.

Proper cleaning not only safeguards the environment but also ensures compliance with regulatory requirements. Effective preparation at this stage is vital for the overall basement tank removal process.

Step 3: Tank Disconnection and Extraction

With the tank cleaned, disconnect all pipes, vents, and fill lines. Carefully cut or dismantle the tank if it does not fit through the basement exit. Use lifting equipment designed for confined spaces to prevent injuries or property damage.

Professional handling is essential, as improper removal can cause structural issues or hazardous spills. For a detailed walkthrough of this phase, see the Oil tank removal process steps. Experienced contractors follow strict protocols to maintain safety and efficiency throughout basement tank removal.

Step 4: Inspection and Soil Testing

Once the tank is removed, inspect both the tank and surrounding area for signs of leaks or corrosion. Mandatory soil testing is required under 2025 regulations to detect contamination. Use certified labs to analyze soil samples within 72 hours, as some states mandate prompt reporting.

Interpret test results carefully. If contamination is found, plan for remediation according to local guidelines. Accurate documentation of inspections and testing is crucial for regulatory compliance and future real estate transactions.

This step ensures the basement tank removal process meets all legal and environmental standards.

Step 5: Disposal and Documentation

Transport the removed tank to an approved recycling or disposal facility. Ensure all hazardous materials are handled according to state and federal regulations. Complete and retain all required documentation, including certificates of removal and soil test reports.

Proper paperwork is vital for insurance claims and property sales. Provide homeowners with a clear record of compliance to avoid future liabilities. By finalizing these details, you close the loop on a thorough and responsible basement tank removal project.

Managing Contamination and Remediation

Basement tank removal is not just about physical extraction. Managing contamination is a crucial step to safeguard your home and property value. Addressing contamination promptly ensures compliance and protects your investment.

Identifying and Assessing Contamination

Detecting contamination early during basement tank removal is essential. Common signs include strong fuel odors, visible stains on concrete or soil, and unusual soil discoloration near the tank. Homeowners may also notice dying vegetation around the exterior foundation.

Professional soil and groundwater testing is vital to confirm the extent of contamination. In fact, 1 in 5 oil tanks removed in 2024 required remediation, underlining the importance of thorough inspection. For a detailed guide on what to expect during soil analysis, see Soil testing after tank removal.

These assessments form the foundation for a safe and compliant basement tank removal process.

Remediation Options and Procedures

Once contamination is confirmed, several remediation methods are available. The most common options include:

Method

Typical Use Case

Timeline

Soil Excavation

Heavy contamination

1–3 weeks

Bioremediation

Moderate contamination

2–6 months

Chemical Treatment

Targeted contamination

1–4 weeks

The choice depends on contamination level and local regulations. Fixed-price remediation contracts help prevent unexpected expenses during basement tank removal. Project timelines and costs vary, so request detailed proposals upfront.

Staying informed about regulatory expectations is key. For federal guidelines, review the EPA Oil Spill Prevention Regulations.

Working with Environmental Agencies

Collaboration with environmental agencies is mandatory during basement tank removal. Homeowners must notify local and state authorities when contamination is detected. Each state sets specific deadlines for reporting and remediation documentation.

Properly documenting every step, including notifications and cleanup efforts, is essential for regulatory approval. For example, New Jersey requires timely submission of remediation records to the Department of Environmental Protection.

Following agency protocols ensures your basement tank removal remains in compliance and avoids costly delays.

Protecting Your Property Value and Liability

Effective remediation directly impacts property value and liability. Incomplete or undocumented cleanup can delay home sales or result in insurance complications. Many insurers now require proof of proper basement tank removal and remediation before issuing or renewing policies.

A recent case highlighted how missing documentation postponed a home sale for months. Ensuring all records are complete helps transfer liability and reassures buyers.

Taking these steps during basement tank removal not only protects your investment but also secures peace of mind for the future.

Post-Removal Actions and Maintenance

After basement tank removal, your focus shifts to restoring your property, ensuring compliance, and protecting your investment for years to come. Addressing each post-removal step thoroughly reduces risk and supports a safe, valuable home environment.

Restoring the Basement Space

The first step after basement tank removal is repairing and improving the affected area. Removal may leave behind minor structural issues or cosmetic blemishes, so prompt restoration is essential.

  • Inspect floors and walls for cracks or moisture.

  • Repair concrete, patch holes, and reinforce supports as needed.

  • Clean and treat surfaces to prevent lingering odors.

Waterproofing is highly recommended after basement tank removal. Apply sealants, improve drainage, and consider a sump pump to reduce future water damage. Mold prevention is also key, so use dehumidifiers and monitor humidity levels.

Once repairs are finished, you have options for repurposing the space:

  • Create a finished basement for living or recreation.

  • Add storage solutions or a workshop.

  • Upgrade lighting and ventilation for comfort and safety.

Final Inspections and Compliance Checks

Completing final inspections is critical to ensure your basement tank removal meets all legal requirements. Local authorities may require scheduled inspections to verify proper removal and remediation.

Keep these documents organized:

  • Removal and disposal certificates

  • Soil and groundwater test results

  • Contractor licenses and permits

  • Remediation reports

Proper documentation is not just for peace of mind—it is essential for real estate transactions and insurance. Missing paperwork can result in fines or delays. For New Jersey homeowners, detailed procedures and required documentation are outlined in the New Jersey Residential Oil Tank Removal Bulletin.

Ongoing Monitoring and Environmental Safety

After basement tank removal, regular monitoring ensures long-term safety. Schedule periodic soil and groundwater tests, especially if your area had previous contamination.

Consider these monitoring options:

Monitoring Method

Frequency

Purpose

Soil Testing

Every 1-2 years

Detect residual contamination

Groundwater Testing

Every 2-3 years

Ensure water safety

Visual Inspections

Biannually

Spot new issues quickly

If you suspect lingering issues, install monitoring wells for deeper analysis. Homeowners seeking more guidance can consult the NYSDEC Guide on Underground Heating Oil Tanks for best practices in ongoing environmental safety.

Preparing for Future Regulations

Environmental standards around basement tank removal continue to evolve. Staying informed protects your property and ensures compliance with future policies.

Proactive steps include:

  • Joining local homeowner associations to receive updates

  • Subscribing to state environmental agency newsletters

  • Retaining all records of basement tank removal and remediation

Anticipate changes and act early to avoid costly surprises. By monitoring regulations and maintaining up-to-date documentation, you safeguard your property’s value and your family’s well-being.

Now that you understand the steps for safe and compliant basement tank removal in 2025, it’s important to have a trusted partner by your side. With changing regulations and the risks that come with old tanks, ensuring every detail is handled correctly protects both your property and peace of mind. If you want a fixed price, no surprises, and a team that truly understands New Jersey’s requirements, we’re here to help. Let’s make your tank removal process simple, transparent, and stress free—reach out today through Contact Us to get started.

Soil Remediation Guide: Essential Strategies for 2025

One third of the world’s soils are now degraded, according to the Food and Agriculture Organization. This stark reality underscores the urgent need for effective soil remediation to protect both the environment and public health.

This guide offers a comprehensive look at soil remediation strategies that will define sustainable land management in 2025. Whether you are a landowner, developer, or policy maker, understanding these solutions is essential for responsible stewardship.

We will explore the causes and impacts of soil contamination, the evolving regulatory landscape, and a step-by-step remediation process. You will also discover the latest technological advances, real-world case studies, and future trends shaping the field.

By the end of this article, you will have actionable insights and practical steps to address soil remediation challenges, ensuring compliance and sustainability for years to come.

Understanding Soil Contamination: Causes, Impacts, and Urgency

Soil contamination is a pressing challenge with wide-reaching consequences. Understanding how and why contamination occurs is the first step in effective soil remediation. By examining causes, impacts, and current statistics, stakeholders can appreciate the urgency and necessity of action.

Key Sources of Soil Contamination

Soil contamination stems from a range of activities and events. The most common sources include:

  • Industrial operations such as manufacturing, mining, and waste disposal

  • Use of agricultural chemicals, including pesticides and fertilizers

  • Urbanization, construction, and infrastructure expansion

  • Oil tank leaks and hydrocarbon spills

  • Both natural and human-caused contamination

For those new to this field, What is Soil Remediation and Why is it Important provides a clear overview of why addressing these sources is vital.

Environmental and Human Health Impacts

Contaminated soils can leach toxins into groundwater and surface water, affecting drinking supplies and ecosystems. Heavy metals and hydrocarbons often accumulate in plants and animals, entering the food chain. This bioaccumulation increases risks of cancer, respiratory, and neurological disorders in humans. Soil degradation also leads to reduced agricultural productivity, threatening food security and local economies.

Site Assessment and Liability

Before starting soil remediation, a thorough site assessment is mandatory. This includes soil sampling, risk analysis, and identifying contaminants. Legal responsibility for contamination often extends to current property owners, developers, and sometimes past land users. A clear chain of custody and accurate records are essential to avoid costly liability or delays during property transfers.

Permitting and Documentation

Most soil remediation initiatives require multiple permits at different government levels. Common documentation includes site assessment reports, remediation plans, and compliance logs. Accurate, up-to-date records are crucial during real estate transactions and regulatory inspections. Transparent documentation helps demonstrate due diligence and ensures smoother project approval.

Funding and Incentive Programs

Governments offer a range of financial incentives for soil remediation, including grants, tax credits, and support for brownfield redevelopment. Public-private partnerships can help share costs and accelerate land restoration. Accessing these funds requires careful application, thorough project planning, and compliance with program requirements. Early engagement with funding agencies improves project outcomes.

Site Investigation and Risk Assessment

The first step in soil remediation is a comprehensive site investigation. Environmental professionals collect soil samples, conduct laboratory analyses, and use remote sensing or GIS tools to map contamination patterns. Identifying pollutants such as heavy metals, hydrocarbons, or organics is critical.

Risk assessment protocols evaluate potential threats to human health and the ecosystem. For example, New Jersey mandates strict soil testing before property transfers, emphasizing the value of early detection. Thorough investigation lays the groundwork for selecting the right soil remediation approach.

Selecting the Right Remediation Strategy

Choosing an effective soil remediation strategy depends on several factors. Decision-makers weigh contaminant type, site size, regulatory requirements, and sustainability goals. Both in situ (on-site) and ex situ (off-site) methods are considered.

A detailed cost-benefit analysis helps prioritize solutions that balance efficiency and minimal environmental impact. Engaging stakeholders, including local communities, ensures that the selected soil remediation technique addresses both technical and social needs.

As we’ve explored, soil remediation is more urgent than ever, with new challenges and regulations shaping how we manage our land in 2025. Whether you’re a homeowner concerned about an old oil tank, a developer navigating compliance, or simply want peace of mind about your property’s future, having a knowledgeable and transparent partner makes all the difference. At Simple Tank Services, we take pride in offering fixed pricing and expert guidance every step of the way, so you always know what to expect. If you’re ready to take the next step or have questions about your specific situation, Contact Us.

Oil Tank Removal Guide: Essential Steps for 2025

Rising regulations and heightened environmental awareness make oil tank removal a top concern for homeowners in 2025. With stricter laws and increasing risks to property value, understanding every step is more important than ever.

This guide walks you through the oil tank removal process, ensuring you stay safe, compliant, and protect your investment. You will learn how to assess your tank, navigate legal requirements, hire the right professionals, and manage remediation and post-removal steps.

Whether you are concerned about contamination, legal liabilities, or simply want peace of mind, follow our essential steps for a cost-effective and responsible solution.

Assessing the Need for Oil Tank Removal

For many property owners, understanding when oil tank removal becomes necessary is a critical first step toward protecting both their investment and the environment. In 2025, increased scrutiny from regulators and insurers means that proper assessment of your heating oil storage is more important than ever. Failing to act on warning signs can lead to costly consequences, so it is essential to recognize when your tank may be putting your property at risk.

Assessing the Need for Oil Tank Removal

Warning Signs Your Oil Tank Needs Removal

Several clear indicators suggest it is time to consider oil tank removal. Visible leaks or pooling oil near the tank, strong odors of fuel, or signs of corrosion on the tank surface should prompt immediate action. Tanks that are over 20 to 30 years old, particularly those made from steel, are more likely to fail. Insurance companies may require removal if the tank is outdated or if there is evidence of past leakage. If you notice unexplained increases in fuel usage or receive warnings from local authorities during property assessments, these are also signals that your tank may need to be removed.

Risks of Keeping an Old Oil Tank

Leaving an old or damaged oil tank in place exposes your property to significant risks. One of the most serious is soil contamination, which can spread hazardous substances into the ground and even reach groundwater supplies. This not only endangers local ecosystems but can also trigger expensive cleanup requirements. Additionally, the presence of an unused or leaking tank can reduce your property value and make it difficult to sell. Legal liabilities may arise if contamination is discovered during a future transaction, leading to lawsuits or required remediation. Notable cases have shown property devaluation of tens of thousands of dollars when undisclosed tanks are found during home sales.

Regulatory Pressures and Property Impacts in 2025

State and local regulations regarding oil tank removal are tightening across the country in 2025. Many jurisdictions now enforce stricter deadlines for compliance, with increased fines for non-removal or improper abandonment of tanks. For example, the EPA estimates there are still over 550,000 underground storage tanks in the US, with thousands leaking each year. Homeowners face growing pressure from both regulators and mortgage lenders to address old tanks before they become a liability. For a full overview of these requirements and best practices, consult the Comprehensive oil tank removal guide, which details the step-by-step process and current legal standards.

Environmental, Insurance, and Market Considerations

Environmental hazards from neglected tanks are a major concern. Leaking tanks can contaminate groundwater, affecting both your property and neighboring lots. Vapor intrusion from petroleum products can present health risks to residents. Insurance providers may deny coverage or increase premiums if a tank is present, and mortgage lenders could require removal before approving loans. The differences between underground and aboveground tanks also matter, as underground tanks are harder to monitor and more likely to leak undetected. Proactive oil tank removal is not only a regulatory requirement but also a smart move to maintain property value and ensure a safe living environment.

Legal and Regulatory Requirements for Oil Tank Removal in 2025

Navigating the legal landscape of oil tank removal in 2025 is more complex than ever for property owners. With rising environmental concerns and stricter oversight, understanding the rules that govern oil tank removal is essential to avoid costly penalties and ensure property safety.

Legal and Regulatory Requirements for Oil Tank Removal in 2025

Federal, State, and Local Regulations

Oil tank removal is regulated at multiple levels. Federally, the Environmental Protection Agency (EPA) oversees underground storage tanks, setting standards for leak detection, closure, and cleanup. However, state and local governments often enforce stricter rules that impact how oil tank removal is performed.

States like New Jersey and New York have adopted more rigorous standards in recent years. Local governments may also require additional steps, such as advance notifications and site-specific environmental safeguards. Always check both state and municipal codes before starting any oil tank removal project.

Permits, Documentation, and Testing Standards

Obtaining the proper permits is a mandatory step for oil tank removal. Most municipalities require homeowners to submit detailed applications, including site maps and tank specifications, before granting approval. In 2025, many regions have streamlined digital permitting, but delays can still occur if paperwork is incomplete.

Environmental standards now require comprehensive soil and groundwater testing following oil tank removal. These tests ensure that no contamination remains. Results must typically be submitted to local authorities as part of the closure process. Failing to provide this documentation can stall property sales or refinancing.

2025 Regulatory Updates in the Northeast

The Northeastern US, especially New Jersey, has introduced significant updates for oil tank removal. In 2025, New Jersey revised its permit process, mandating earlier notification to local fire officials and stricter inspection protocols. According to the New Jersey Heating Oil Tank Removal Bulletin, every residential oil tank removal must now be supervised by a qualified inspector, with detailed logs kept for all steps.

Other states in the region are following suit, adopting similar requirements. Homeowners should expect more frequent site visits and expanded documentation, ensuring every oil tank removal meets the latest environmental and safety standards.

Consequences of Non-Compliance

Ignoring oil tank removal regulations can lead to severe consequences. In New Jersey, average fines for non-compliance range from $5,000 to $25,000. Legal action is common if contamination is discovered after an improper removal, and unresolved violations can block property sales.

Lenders and insurers increasingly require proof of compliant oil tank removal before approving mortgages or issuing policies. Skipping steps or hiring unqualified contractors can jeopardize both property value and legal standing.

The Importance of Licensed and Insured Professionals

Working with licensed and insured contractors is vital for any oil tank removal. These professionals understand the evolving regulatory environment and possess the necessary credentials to secure permits, conduct safe removals, and complete required testing.

When selecting a contractor, verify their licensing status and request references. A reputable professional will provide clear contracts and guarantee full compliance with all oil tank removal regulations. This not only protects homeowners from fines but also ensures the long-term safety and value of the property.

Choosing the Right Oil Tank Removal Professional

Hiring the right oil tank removal professional is a decision that can affect your property’s safety, compliance, and future value. Mistakes or shortcuts can lead to costly environmental issues, insurance problems, or legal liabilities. With stricter regulations in 2025, it is more important than ever to choose a qualified expert for oil tank removal.

Choosing the Right Oil Tank Removal Professional

What to Look for in an Oil Tank Removal Professional

When searching for a contractor, consider these key qualities:

  • Licensing and Insurance: Always verify that your oil tank removal provider is properly licensed and fully insured.
  • Experience: Look for specialists with a proven track record and references in oil tank removal.
  • Reputation: Ask for client testimonials or check online reviews.
  • Transparency: Ensure you receive detailed estimates and clear contracts.

Specialized contractors are familiar with the latest environmental and legal requirements. In New Jersey, over 60% of oil tank removal projects are handled by such experts, demonstrating the value of working with professionals who understand the complexities involved.

Comparing Pricing Models: Fixed-Price vs Variable Pricing

Understanding how contractors charge for oil tank removal is essential. Here’s a quick comparison:

Model Pros Cons
Fixed-Price Predictable costs, no surprises, easier budgeting May be slightly higher if all risks are included
Variable Lower upfront estimate Risk of unexpected charges, less transparency

For a deeper dive into how these pricing models work, review Understanding oil tank removal costs. This resource explains what to expect from contracts and how to avoid hidden fees.

Questions to Ask Before Hiring

Before you commit, consider asking:

  • What is your process for oil tank removal and how long will it take?
  • Do you guarantee your work and offer post-removal support?
  • Can you provide documentation required for insurance or property sale?
  • Who will be on-site during the project?

Why Local, Employee-Owned Companies Matter

Choosing a local, employee-owned business brings added accountability and customer service. These companies are deeply invested in community reputation and are more likely to prioritize compliance, safety, and customer satisfaction.

Common Pitfalls: The Risks of Unlicensed Contractors

Homeowners sometimes try to save money by hiring unlicensed or inexperienced contractors. This often backfires, resulting in incomplete removal, environmental violations, or denied insurance claims. Always check credentials and references.

Selecting the right oil tank removal professional protects your investment and peace of mind. Take the time to research, ask questions, and choose a partner who will deliver safe, compliant, and efficient results.

Step-by-Step Oil Tank Removal Process

Removing an oil tank from your property is a detailed process that requires careful planning, strict compliance, and expert execution. As regulations tighten in 2025, understanding each phase of oil tank removal is crucial for minimizing risks and ensuring your property remains safe, compliant, and valuable.

Step-by-Step Oil Tank Removal Process

Step 1: Initial Site Assessment and Tank Location

The first step in any oil tank removal project is a thorough site assessment. Professionals use ground-penetrating radar and review historical property records to locate the exact position of the oil tank. This step helps determine whether the tank is aboveground or underground, its size, and its current condition.

A detailed assessment identifies potential hazards and ensures that the right equipment and removal strategies are used. For example, during property sales, undocumented tanks are sometimes discovered, complicating transactions. Early detection helps avoid legal and environmental setbacks.

Property owners should look for signs such as dead vegetation, stained soil, or unexplained odors, which may indicate a leaking tank. Accurate location and assessment set the stage for a safe and compliant oil tank removal process.

Step 2: Securing Permits and Preparing the Site

Before starting oil tank removal, obtaining the necessary municipal permits is essential. The application process typically involves submitting site plans and tank information to local authorities. Permit approval timelines can vary, so it's important to plan ahead.

On-site preparations include marking utilities, installing temporary fencing, and taking environmental precautions to protect nearby structures and landscaping. Safety protocols are strictly enforced to minimize risks to workers and property.

Proper preparation ensures that the oil tank removal proceeds smoothly, reduces the likelihood of delays, and keeps the project compliant with all legal requirements. Clear communication with your contractor and local officials is vital during this phase.

Step 3: Tank Cleaning and Preparation

Once permits are secured, the next phase of oil tank removal is cleaning the tank. All residual oil and sludge are carefully pumped out and disposed of according to EPA guidelines. This step is critical to prevent spills, soil contamination, and harmful fumes during removal.

Technicians use specialized equipment to clean the tank interior. They also check for any hazardous buildup that could pose additional risks. Following strict cleaning protocols protects both the environment and the crew.

A clean, empty tank is much safer to handle and transport. This meticulous preparation is a key part of a responsible oil tank removal strategy, reducing liability and ensuring compliance with health and safety regulations.

Step 4: Excavation and Physical Tank Removal

Excavation is where the oil tank removal process becomes highly visible. For underground tanks, crews use backhoes or mini-excavators to carefully dig around the tank, minimizing damage to surrounding property. Aboveground tanks require hoisting equipment and support platforms for safe removal.

Crews often encounter unexpected obstacles such as tree roots, rocks, or utility lines. Experienced professionals adjust their methods to overcome these challenges without causing property damage. For example, in dense urban areas, compact equipment and hand-digging may be necessary.

Throughout this step, contractors prioritize safety and environmental controls, ensuring that the oil tank removal disturbs as little of the property as possible. Proper excavation techniques are essential for a successful and compliant project outcome.

Step 5: Soil Testing and Environmental Assessment

After removing the tank, soil sampling is performed to detect any contamination. Samples are collected from multiple locations around the excavation and sent to certified laboratories for analysis. Regulatory thresholds determine if further action is needed.

If contamination is found, immediate remediation steps are initiated to protect groundwater and public health. Working with specialists ensures accurate results and compliance with local standards. For a detailed look at this process, see Soil testing after tank removal.

Soil testing is a non-negotiable step in oil tank removal, as it documents environmental conditions and supports property value during future real estate transactions.

Step 6: Site Restoration and Documentation

Once testing is complete, the site is restored to its original condition. Crews backfill the excavation, grade the soil, and repair landscaping or hardscaping as needed. Restoration ensures the property remains functional and visually appealing.

Final documentation includes detailed reports, photographs, and permits, which are provided to the homeowner. These records are essential for insurance purposes and future property sales.

Proper site restoration and thorough documentation conclude the oil tank removal process, giving property owners peace of mind and proof of compliance.

Step 7: Post-Removal Reporting and Compliance

The last phase involves submitting closure reports to the relevant authorities. These documents confirm that the oil tank removal was completed according to all regulations and that the site meets environmental standards.

Homeowners should retain all documentation for future reference, especially when selling the property. A successful property sale often depends on clear evidence that oil tank removal and remediation were handled correctly.

Staying organized and meeting all reporting requirements ensures long-term compliance, protects property value, and reduces legal risks associated with past oil tank storage.

Soil Remediation and Environmental Cleanup After Tank Removal

After an oil tank removal, soil remediation becomes essential if tests reveal contamination. This step safeguards your property, health, and the environment from lingering pollutants. Contaminated soil can result from leaks, spills during removal, or years of undetected corrosion. Common indicators include strong petroleum odors, stained soil, or failed environmental tests. Addressing these issues quickly reduces risks to groundwater and property value. In 2025, stricter regulations require homeowners to act promptly when contamination is detected, making soil remediation a non-negotiable aspect of oil tank removal.

Soil remediation after oil tank removal relies on several proven methods. The most common is excavation, which involves removing contaminated soil and transporting it to a licensed disposal facility. Bioremediation uses naturally occurring microbes to break down pollutants in place, while chemical treatments neutralize or bind hazardous substances. The chosen method depends on contamination levels, soil type, and local regulations. For a detailed look at remediation standards and procedures, refer to Soil remediation in New Jersey, which outlines the latest accepted practices for safe, thorough cleanup.

The timeline and costs for soil remediation after oil tank removal vary by site and severity. In New Jersey, the average residential cleanup ranges from $8,000 to $20,000. Most projects last one to four weeks, including initial testing, active remediation, and follow-up assessments. Monitoring is crucial; property owners must ensure that post-removal soil meets regulatory standards before closing the project. Regular follow-up testing helps confirm that all contaminants have been addressed, protecting both your property and local water resources.

Hiring certified environmental professionals is critical for effective soil remediation after oil tank removal. These experts ensure compliance with state and federal standards while minimizing risks to your home and community. For example, a recent project in Bergen County involved prompt excavation and bioremediation, preventing petroleum from seeping into a nearby creek. By working with qualified specialists, homeowners avoid legal liabilities and secure their property value for future transactions. Always request documentation and maintain clear records for insurance and resale purposes.

Post-Removal Considerations and Preventative Measures

After completing oil tank removal, your responsibilities as a homeowner do not end. Ensuring your property remains safe, compliant, and valuable requires a series of important post-removal steps. Being proactive now can prevent costly problems later and position your property for future success.

Long-term Monitoring for Residual Contamination

Even after oil tank removal, trace contaminants can linger underground. Regular soil and groundwater testing is vital for detecting any delayed issues. Many states require ongoing monitoring, especially if minor contamination was found during the initial oil tank removal.

Homeowners should schedule periodic environmental assessments and keep records of all test results. Following state-specific guidelines, such as those listed in the Nevada Heating Oil Tank Regulations, ensures you remain compliant and eligible for potential state reimbursements if any future cleanup is needed.

Insurance Updates and Property Disclosures

Once oil tank removal is complete, contact your insurance provider to update your policy. Some insurers offer discounts or require documentation proving safe oil tank removal. Accurate records not only protect you from future liability but also streamline the process if you decide to sell your home.

Full disclosure of oil tank removal and environmental testing in property documents is required in many states. This transparency can prevent legal disputes and reassure potential buyers about the property’s safety and compliance.

Upgrading Heating Systems: Greener Alternatives

With the old tank gone, consider upgrading to a modern, efficient heating system. Many homeowners choose natural gas or heat pumps as eco-friendly alternatives after oil tank removal. In 2024, 40 percent of oil tank removals led to greener system upgrades, reflecting a growing trend toward sustainability.

Switching to cleaner energy not only lowers utility bills but also increases property value. Programs such as those described in the New York Senate Bill S1901 encourage homeowners to remove outdated tanks and install safer, more efficient heating solutions, often with financial incentives.

Preventing Future Environmental Issues

Prevent future issues by maintaining thorough documentation of all oil tank removal activities. Schedule regular inspections of your new heating system and surrounding property. Early detection of leaks or malfunctions can save thousands in remediation costs.

Keep all permits, environmental reports, and contractor warranties organized and accessible. These records will be critical if you refinance, sell, or face future inspections.

Grants, Rebates, and State Incentives

Many states and local governments offer grants, rebates, or low-interest loans to support oil tank removal and heating system upgrades. Research available programs in your area, as requirements and deadlines can change annually.

Some energy providers also offer rebates for switching to cleaner heating technologies. Taking advantage of these resources can significantly reduce the financial burden of oil tank removal and system modernization.

Maintaining Property Value and Compliance

To preserve property value, stay current with all local and state regulations regarding oil tank removal. Regularly update your insurance and maintain clear, accurate records. These steps will help ensure your property remains attractive to buyers and protected from environmental risks.

As you consider the essential steps for safe and compliant oil tank removal in 2025, remember that having a reliable partner can make all the difference. With rising regulations and the risks of property and environmental damage, it’s important to work with a team that values transparency and efficiency. At Simple Tank Services, you’ll benefit from fixed price solutions and the expertise of a dedicated, employee owned team committed to protecting your property and peace of mind. If you’re ready to take the next step or have questions about your specific situation, reach out through our Contact Us page.

Essential Guide to Oil Tanks: Installation & Maintenance 2025

Oil tanks play a vital role in keeping homes and businesses warm as we move into 2025. However, poor oil tanks management can lead to serious risks—leaks, environmental hazards, and costly repairs.

With stricter regulations and rising fuel prices, the demand for safe, efficient, and compliant oil tanks installation and maintenance is higher than ever. Choosing the right system and following best practices is essential for safety and cost savings.

This guide offers expert advice on selecting, installing, and maintaining oil tanks. You will learn about tank types, installation steps, regulations, maintenance, troubleshooting, and future trends.

Ready to protect your property and peace of mind? Follow the latest guidance to ensure your oil tanks are reliable and future-proof.

Understanding Oil Tanks: Types, Materials, and Uses

Selecting the right oil tanks is a crucial decision for property owners in 2025. The range of available options, materials, and applications continues to expand. Understanding these differences ensures safe, efficient, and compliant fuel storage for both homes and businesses.

Understanding Oil Tanks: Types, Materials, and Uses

Overview of Oil Tank Types

Oil tanks are available in two main types: aboveground and underground. Aboveground oil tanks are typically installed outdoors or in basements for easy access and inspection. Underground oil tanks are buried beneath the surface, saving space but requiring careful monitoring for leaks and corrosion.

For residential settings, aboveground oil tanks remain popular due to their accessibility and straightforward maintenance. Commercial properties may opt for larger underground oil tanks to maximize usable space and meet higher capacity needs. Construction also varies. Single-wall tanks offer basic containment, while double-wall tanks provide an added safeguard against leaks and environmental hazards. To learn more about compliance and safety for underground options, see these Underground oil tank regulations.

Common Materials Used in Oil Tanks

Oil tanks are constructed from a variety of materials, each offering unique benefits and trade-offs. The table below summarizes the most common options:

Material

Durability

Corrosion Resistance

Typical Lifespan

Common Environments

Steel

High

Moderate

15-25 years

Indoor, aboveground

Fiberglass

High

Excellent

30+ years

Underground, moist soils

Polyethylene

Moderate

High

15-20 years

Outdoor, variable climates

Composite

High

Superior

30+ years

Both aboveground/underground

Steel oil tanks are valued for their strength but require protection against rust. Fiberglass is a top choice for underground oil tanks, resisting corrosion even in damp soil. Polyethylene and composite materials offer lightweight, durable alternatives for a variety of settings.

Typical Uses and Applications

Oil tanks serve many vital roles in modern infrastructure. Common applications include:

  • Home heating oil storage for furnaces and boilers

  • Industrial and commercial fuel management systems

  • Waste oil collection and recycling operations

The choice of oil tanks depends on the intended use, with residential tanks focused on heating and commercial tanks often designed for large-scale fuel distribution or storage.

Key Considerations When Choosing a Tank

Choosing the right oil tanks requires careful assessment of several factors. Capacity must match property size and anticipated fuel usage. Environmental conditions, such as soil type, water table, and climate, influence both tank material and installation method. Warranty coverage also matters, with leading brands offering extended protection, such as Granby’s 20-year warranty or Roth’s insurance-backed options.

Latest Innovations for 2025

The oil tanks industry continues to evolve with new technology and safety features. Recent innovations include advanced corrosion-resistant coatings, reducing maintenance needs and extending tank lifespans. Smart tank monitoring systems now provide real-time data on fuel levels and leak detection. Trends in double-wall and secondary containment solutions offer enhanced environmental protection and help meet stricter regulatory standards.

Modern oil tanks combine durability, technology, and compliance to deliver safer, more efficient storage solutions for every property type.

Federal, State, and Local Regulations

Oil tanks are regulated by a combination of federal, state, and local agencies. The Environmental Protection Agency (EPA) sets national guidelines, but many states, such as Colorado and Rhode Island, require compliance with their own more detailed standards. For 2025, regulations around installation, maintenance, and decommissioning have become stricter, especially for new oil tanks. It is essential to consult both EPA mandates and your local building department to ensure your oil tanks meet every requirement.

Environmental Protection and Secondary Containment

Environmental protection is a top priority for oil tanks, particularly with the risk of leaks and contamination. Double-wall tanks and secondary containment systems are now standard for many installations, providing extra layers of defense. Leak detection and monitoring are not just best practices but often required by law. To better understand the potential risks and necessary solutions, review the risks of underground oil tank leaks. Integrating these safeguards into your oil tanks setup helps protect property, groundwater, and your financial liability.

Inspection, Permitting, and Reporting

Regular inspections are mandatory for oil tanks, and schedules can vary by jurisdiction. Permitting processes often include site assessments and documentation of tank specifications. Owners must maintain accurate records of all inspections, maintenance, and repairs to stay compliant. When issues are detected, prompt reporting to authorities is required. Keeping detailed records ensures that oil tanks are operating within legal limits and can help with warranty or insurance claims.

Insurance and Liability Considerations

Insurance is a critical component of owning oil tanks. Many states require specific coverage to address potential leaks or environmental damage. Owners should review manufacturer warranties and consider third-party insurance policies, like Roth’s $1 million contamination coverage, for added peace of mind. Comparing available options in a table can help clarify choices:

Insurance Type

Coverage Scope

Typical Requirement

Homeowner’s Insurance

Limited, may exclude tanks

Optional

Tank-Specific Policy

Leaks, contamination

Often required

Manufacturer Warranty

Defects, certain failures

Included with tank

Having the right insurance for oil tanks not only protects assets but is often a legal necessity.

Consequences of Non-Compliance

Non-compliance with regulations for oil tanks can result in serious financial and legal consequences. Fines and penalties may be imposed for improper installation, lack of inspection, or failure to report leaks. Environmental remediation costs can be significant if a spill occurs. Additionally, non-compliant oil tanks can decrease property value and complicate real estate transactions. Following all safety standards and legal requirements is essential to avoid these risks and ensure smooth property ownership.

Oil Tank Maintenance: Best Practices for Longevity

Proper maintenance is the key to ensuring your oil tanks remain safe, efficient, and reliable throughout their service life. Neglecting regular care can lead to leaks, costly repairs, and even environmental hazards. By following proven best practices, you can extend the lifespan of your oil tanks and protect your investment.

Oil Tank Maintenance: Best Practices for Longevity

Routine Inspection and Monitoring

Routine inspection is the cornerstone of oil tanks longevity. Visual checks should be performed monthly for signs of corrosion, leaks, or shifting. Look for stains beneath the tank, rust on surfaces, and any unusual odors. Smart monitoring devices are now available, providing real-time alerts for changes in fuel level or pressure.

Annual professional inspections are recommended. Certified technicians use advanced tools to detect hidden issues, ensuring early intervention. For a detailed checklist of what to look for and how to respond, consult the Oil tank maintenance FAQ.

Key points during routine checks:

  • Examine tank legs and supports for settlement.

  • Inspect all fittings, valves, and gauges for tightness.

  • Verify vent and fill pipes are unobstructed.

Regular attention helps prevent small issues from becoming major problems with oil tanks.

Cleaning and Servicing Procedures

Thorough cleaning is vital for preventing buildup that can compromise oil tanks efficiency. Over time, water, sludge, and contaminants accumulate at the bottom, increasing corrosion risk and reducing fuel quality.

Recommended cleaning intervals vary by usage, but a general rule is every 3–5 years. Technicians pump out residual fuel, remove debris, and flush internal surfaces. Filters, valves, and gauges should also be serviced during this process. Replacing worn components prevents blockages and ensures accurate readings.

Servicing steps include:

  • Draining and safely disposing of old fuel.

  • Rinsing tank interiors with approved solutions.

  • Replacing or cleaning filters and inspecting all seals.

Routine cleaning extends the life of oil tanks and supports optimal system performance.

Preventing and Addressing Corrosion

Corrosion is a primary threat to oil tanks integrity. Protective coatings, such as epoxy or polyurethane, are applied during manufacturing or as a maintenance measure. These coatings shield against moisture and chemical reactions that degrade metal over time.

For underground installations, sacrificial anodes may be used to attract corrosive elements away from the tank shell. Environmental controls, like proper drainage and tank coverings, further limit exposure to damaging conditions.

Consider a case study: Granby’s high-performance coatings have demonstrated impressive results, reducing corrosion rates and increasing tank lifespan by several years. Regularly inspecting the coating’s condition is essential for continued protection of oil tanks.

Winterization and Seasonal Maintenance

Cold weather poses unique challenges for oil tanks. Freezing temperatures can cause condensation inside the tank, introducing water that leads to sludge and corrosion. To prepare for winter, insulate exposed tanks and pipes, and consider installing tank heaters where temperatures drop below freezing.

Seasonal maintenance checklist:

  • Inspect for cracks or leaks caused by temperature fluctuations.

  • Ensure all insulation is intact and secure.

  • Remove any snow or ice buildup from outdoor tanks.

Using tank tubs or covers not only protects the tank from weather but also enhances aesthetics and extends the lifespan of oil tanks in harsh climates.

Record-Keeping and Documentation

Accurate documentation supports compliance, warranty claims, and resale value. Maintain a detailed log of all oil tanks maintenance activities, including inspections, cleanings, repairs, and component replacements. Record dates, findings, and technician details.

A sample maintenance log:

Date

Service Performed

Technician

Notes

2025-03-10

Annual Inspection

J. Smith

No issues detected

2025-06-15

Filter Replacement

A. Lee

Minor sediment found

2025-11-05

Winterization Check

J. Smith

Insulation improved

Tracking warranty and insurance coverage is equally important. Organized records ensure your oil tanks remain compliant and eligible for protection.

When to Replace or Upgrade Your Oil Tank

Even the best-maintained oil tanks eventually reach the end of their service life. Warning signs include persistent leaks, advanced corrosion, or repeated system failures. Modern tank technology offers improved safety, efficiency, and monitoring features that may justify an upgrade before failure occurs.

Manufacturer guidelines typically recommend replacement every 15–25 years, depending on material and environment. Newer models provide double-wall construction, enhanced coatings, and smart monitoring as standard features. Many manufacturers and local governments offer incentives for upgrading oil tanks, making the investment more affordable and beneficial.

When evaluating your current system, consider both safety and the potential for improved performance. Staying proactive with oil tanks replacement ensures peace of mind and long-term reliability.

Troubleshooting Common Oil Tank Issues

Proper troubleshooting is essential for maintaining safe and efficient oil tanks. Even the most robust systems can develop issues over time, so knowing how to identify and address these problems quickly protects both property and the environment.

Identifying and Addressing Leaks

Early detection of leaks in oil tanks is critical. Common warning signs include a persistent fuel odor, visible stains beneath or around the tank, and unexplained drops in system pressure. If you notice these symptoms, act immediately.

Use absorbent pads to contain small spills and prevent further spread. For larger leaks, isolate the area and contact a certified professional. Always follow local environmental reporting requirements for leaks. If a leak is severe or the tank is at the end of its lifespan, consider reviewing the Oil tank removal process to understand your next steps.

Dealing with Corrosion and Structural Damage

Corrosion can compromise the integrity of oil tanks, leading to leaks or structural failure. Assess the extent by inspecting the tank’s surface for rust, flaking paint, or bulging areas. Surface corrosion may be manageable with cleaning and protective coatings.

Temporary fixes, such as patching small holes, may buy time, but permanent solutions often involve replacing the affected section or the entire tank. If damage is extensive, always consult a qualified technician to ensure the oil tanks are safe and compliant.

Resolving Fuel Delivery and System Problems

Fuel delivery issues in oil tanks can disrupt heating or operations. Common causes include clogged filters, airlocks in the fuel line, or faulty pumps. Listen for unusual noises or check for inconsistent fuel flow.

To resolve these issues, start by cleaning or replacing filters. Bleed the system to eliminate airlocks and verify that all valves are open. Proper venting and pressure regulation are essential for optimal performance. If problems persist, schedule a professional inspection.

Managing Water and Sludge Accumulation

Water and sludge can accumulate inside oil tanks, reducing fuel quality and efficiency. Condensation, loose fittings, or damaged fill caps are frequent causes of water ingress. Over time, this leads to sludge that clogs lines and burners.

Regular cleaning and water removal are vital. Use water-detecting paste to check for contamination, and have the tank cleaned professionally if needed. Preventive measures include ensuring tight seals and using additives that break down sludge in oil tanks.

Professional Support and Emergency Services

Not all oil tanks issues can be solved with DIY methods. If you encounter persistent leaks, severe corrosion, or system malfunctions, engage a certified technician. Emergency response teams are available for major spills or hazardous situations.

Many local providers offer 24/7 service plans, ensuring rapid assistance when you need it most. Keeping contact information for trusted professionals on hand provides peace of mind and safeguards your investment.

Future Trends and Innovations in Oil Tank Technology

Emerging technologies are transforming oil tanks, making them safer, smarter, and more sustainable for both homes and businesses. Staying informed about these innovations is crucial for anyone considering new oil tanks or planning upgrades in 2025.

Smart Tank Monitoring and Automation

Oil tanks are becoming more intelligent, thanks to advancements in digital sensors and remote monitoring. Smart systems now provide real-time data on tank levels, temperature, and possible leaks. Many solutions integrate with home automation platforms, letting users track oil tanks from their smartphones or central dashboards.

Automated alerts inform owners of irregularities, minimizing risks and preventing costly spills. As a result, oil tanks are safer, and maintenance is more proactive. These innovations reduce downtime and help ensure uninterrupted heating or fuel supply.

Advanced Materials and Eco-Friendly Designs

Manufacturers are introducing new materials for oil tanks that resist corrosion and extend lifespan. Composite and high-grade polyethylene tanks are gaining popularity due to their durability and compatibility with biofuels. These materials help reduce environmental impact and improve safety.

Eco-friendly designs also include secondary containment and recyclable components. Some oil tanks now feature advanced insulation, minimizing heat loss and optimizing energy efficiency. Such trends reflect a growing demand for green solutions in fuel storage.

Regulatory Shifts and Industry Standards for 2025+

Regulations for oil tanks are evolving to address safety and environmental concerns. In 2025, many states are updating standards for design, installation, and leak detection. For example, Colorado’s new AST system design standards outline strict requirements for aboveground storage tank systems, ensuring compliance and safety.

These regulatory shifts encourage the adoption of double-wall oil tanks, advanced monitoring, and secondary containment. Keeping up with these changes helps owners avoid penalties and protect property value.

Market Insights and Consumer Preferences

The oil tanks market is shifting toward products with longer warranties and comprehensive insurance. Consumers prefer oil tanks that offer robust contamination coverage and easy integration with smart home systems. Data shows an uptick in proactive tank replacements, driven by tighter regulations and a desire for dependable performance.

Warranty-backed oil tanks are especially attractive to property owners looking for peace of mind and long-term security. As technology advances, user-friendly features and low-maintenance designs are also becoming top priorities.

Preparing for the Future: Upgrade Strategies

Evaluating existing oil tanks is essential for future readiness. Owners should assess tank age, material, and compliance with upcoming standards. Upgrading to modern oil tanks with smart monitoring and eco-friendly features can unlock insurance discounts and eligibility for local incentives.

Many regions offer rebates or tax benefits for installing advanced oil tanks. By planning upgrades now, owners ensure their fuel storage meets both today’s needs and tomorrow’s regulations, keeping properties safe and efficient.

Frequently Asked Questions About Oil Tanks

Curious about oil tanks and how to manage them effectively? Below, we answer the most common questions homeowners and business owners have about oil tanks, from lifespan to safety concerns.

What is the average lifespan of an oil tank?

Most oil tanks last between 15 and 30 years, depending on material, environment, and maintenance. Steel tanks may have a shorter life if exposed to moisture, while fiberglass models often last longer. Regular upkeep helps maximize oil tanks’ longevity.

How often should an oil tank be inspected and serviced?

Experts recommend inspecting oil tanks annually. This includes checking for leaks, corrosion, and ensuring all components function properly. A yearly professional inspection can prevent costly issues and maintain compliance with local regulations.

What are the warning signs of a failing oil tank?

Look for rust, damp spots, oil odors, or unexplained drops in fuel level. These symptoms can indicate leaks or structural problems. Early detection is key to preventing major oil tanks failures and environmental hazards.

Can old oil tanks be repaired, or should they always be replaced?

Minor issues like valve replacements or small leaks can sometimes be repaired. However, significant corrosion or structural damage usually means the tank should be replaced. For guidance on safe removal, consult New York heating oil tank removal guidelines.

What are the costs associated with installation and maintenance?

Installation costs for oil tanks vary widely based on tank size, type, and whether it’s aboveground or underground. Maintenance is generally affordable, especially when compared to the risks of neglect. Budget for annual inspections and cleaning.

Are there government programs or rebates for oil tank upgrades?

Many regions offer rebates or financial assistance for upgrading oil tanks, especially when replacing older models with safer, more efficient options. Check with your state energy office or local utility provider for current programs.

How do I choose between aboveground and underground tanks?

Aboveground oil tanks are easier to monitor and maintain, while underground tanks save space but may require more stringent compliance. Consider property layout, local regulations, and environmental factors when making your decision.

What should I do if I suspect a leak or contamination?

If you suspect an oil tanks leak, act quickly. Contact a certified technician and notify local authorities if needed. Prompt action minimizes environmental impact and may be legally required depending on your state.

After exploring the essential steps for selecting, installing, and maintaining your oil tank, you can see how crucial it is to work with a company that values transparency and reliability. At Simple Tank Services, we understand the challenges of oil tank management, from navigating regulations to ensuring your property’s safety and compliance. If you’re ready to take the next step or need expert guidance tailored to your specific needs, you can learn more about how we can help you protect your investment and the environment by visiting Our Services.

Tank TV Episode 29 – Soil Remediation Stockton NJ


In this episode, Simple Tank performs a Soil Remediation on a property in Stockton NJ.

Join us as we tackle a soil remediation project in Stockton, where we addressed contamination issues caused by a leaking 550-gallon tank. About a month ago, our team removed the old tank and installed a 275-gallon raw tank in the basement. During the removal, we discovered holes in the tank and contaminated soil that needed to be addressed promptly.

In this video, you’ll see the process of cleaning up the contaminated soil, bringing the property into compliance, and ensuring a safer environment for the homeowner. Watch as we manage logistics, including coordinating trucks for clean fill and contamination removal, and work methodically to clean up areas near the house and driveway.

This video provides insight into the challenges and steps involved in soil remediation and highlights our commitment to delivering efficient and professional results.


Tank TV Episode 28 – Soil Remediation Stockton NJ


Discover how we tackle soil remediation projects efficiently and professionally! In this video, we’re on-site in Stockton, NJ where we recently removed an old oil tank with visible contamination. Our team used advanced tools, including a PID meter, to identify contamination levels exceeding safety limits.

Watch as we collaborate with a geologist to extract samples, ensuring the property is safe for future use. With our expertise, we aim to deliver results that allow our clients to move forward confidently, repair their property, and prepare it for listing.


Tank TV Episode 27 – 275 Basement Tank Removal & 550 Gallon Sand Filled /w DEP Sampling


In this video, we showcase our professional oil tank removal and inspection process, emphasizing safety, precision, and compliance with township regulations. The process begins with the removal of the tank, patching any holes, and ensuring all copper lines are properly disconnected. Once prepared, the township inspector is called to verify the removal, check for visible holes or contamination, and confirm compliance with required standards. After the inspection, the tank is transported, and the scrapper’s receipt is provided to the township to officially close the permit.

The video also takes you to a 550-gallon oil tank removal project in Mountain Side, where our team navigates challenges like nearby gas and water lines through careful hand-digging and lawn protection measures. We address common issues, such as decommissioned tanks still containing oil, with the necessary preparation and care. Finally, we highlight the steps taken to ensure no contamination, including extracting soil samples for laboratory testing, filling voids with certified clean fill to prevent lawn depressions, and working with a geologist to expedite the submission of clean test results.

This detailed process ensures homeowners can quickly obtain their “No Further Action” letter, a critical step for timely property closings. This video demonstrates our expertise in handling oil tank removal projects efficiently, safely, and in compliance with all regulations.


Tank Talk Episode 015 – Open Ended Soil Remediation Questions

Tank Talk


Listen By

In this episode, Teddy talks with a client about the open ended soil remediation process.

Questions Asked…..

  1. Any extras that will make the invoice higher then the quote? 35 sec
  2. What happens if job takes longer then one day? 2:15
  3. What would be the additional fees if you have to come another day to finish? 4:30
  4. Is there a way to cap the costs of remediation? 6:00
  5. If we stop the remediation, can we finish it one year later? 7:40
  6. Is the $400 NJDEP review fee in addition to the quoted price? 9:00
  7. If we do not finish the job, are we still responsible for the remedial action report? 9:30
Transcript….

Intro:

Welcome to Tank Talk With Teddy, a podcast talking all things related to residential oil tanks. You have questions, Teddy has answers.

Customer:

Hey, Teddy. How are you?

Teddy:

I’m good. I’m good. I got your email. So yeah, I wanted to just kind of go through that with you. Do you have a second?

Customer:

All right. I’m sorry. Yes, go ahead.

Teddy:

Okay, let me just pull that email up, and see the questions that you had. Let me see, where is that email?

Customer:

Yeah, so I can just walk you through it. So the first question that I have, yesterday we talked about what would happen if it goes over 20 tons and you mentioned that the variable costs will be the exportation of the contaminated soil, and the clean fill material. But I just wondered if there was anything else that will increase the cost of the quote by unit, any other variables that will make it higher, than-

Teddy:

Yeah. So there were three line items that we have to be concerned about if we go over 30 tons of soil. So the first one would be the waste classification sample. So that’s going to increase an additional $600. That’s what the facility charges to bring in additional soil, over 30 tons. It’s a one-time charge. So, I mean, you could go up to 500 tons and there’s no additional fees, but if it’s over 30, they will charge us that additional fee. So that’s one variable. And then the two other variables is the soil disposal at $75 a ton, and then the clean fill at $25 per ton.

Teddy:

So whatever that tonnage is, if it’s 40 tons, we’re going to bill you for that exact tonnage for removal and replacement.

Customer:

Got it. Okay. So I should say, it would be like an additional 600, so it would be like a total of 1095?

Teddy:

Exactly. Exactly. Yep.

Customer:

Okay.

Customer:

And so, and I noticed for example, like all of the costs of the excavator and the trucks and everything, I assume that’s for the day, right?

Customer:

So what happens [crosstalk 00:02:11] if you have to go to, if this takes more than one day? Would that be like an additional cost of all that? Or that’s all for the job?

Teddy:

No. Yeah. The open-ended contract is time and material. I could tell you that about 90% of our jobs, we finish in one day, it’s very rare that we have to return for a second day, or a third day. I mean, it does happen, but it is very unusual and we are capable of removing … and this is a question that is a good question, because there’s some companies that what they do is they mobilize with really small equipment. So they can only take out, let’s say, 30 or 40 tons of soil in a day. And then they want to charge you for a second and third day. We don’t operate like that. We’ve mobilized to your house. We have the capabilities of moving, depending on the access, anywhere between a hundred to 150 tons in one day, if we have to.

Teddy:

Obviously, we’re not taking that out if we don’t have to, but we have the capabilities of doing that amount of soil in one day, which is really a lot of soil.

Customer:

Yeah. Yeah. Okay.

Teddy:

Yeah. We’re not looking to milk a job and have it run into a second or third day, that’s the last thing we’re trying to do. And our guys work from basically 7:00 AM till seven, eight o’clock at night, to sun down. And a lot of companies, again, same thing, two o’clock comes around … “No, we’re eight hours, we’re leaving. We’re going to come back tomorrow.” We don’t play that game. We work until basically the facilities shutdown, which is about 4:30, five o’clock and then we could be on site for another two hours finishing up.

Customer:

Okay. Got it. So basically what you’re saying is that the 8500 quote is really for one day of work, for 20 tons. And then it will increase depending on the tons of soil that you take out, and the [inaudible 00:04:01], but then if it takes up to 150 tons to take out in that one day, all of our costs remain the same.

Teddy:

Exactly. [crosstalk 00:04:11]. The only variable that will be is the soil itself. That would be the only variable cost in that. Yeah, exactly. So, yeah. And then if it does so happen that we wind up pulling a hundred and something tons, and we have to come back to backfill or something, then there’ll be some additional fees for the equipment and the labor.

Customer:

And what would be those fees?

Teddy:

You’re looking at, again, it depends. If we’re just back filling the hole, let’s say we got all the contamination out the first day, and it winds up being a hundred and something tons, and we have to come back to backfill, well, we’re not charging you for subsurface evaluator, because he’s the guy who does all the samples. So that would have been done the first day. You would have a field foreman, an environmental technician, you would have the service truck, you’d have the excavator, those line items.

Customer:

Okay. Got it. So basically everything, the excavators, [inaudible 00:05:06], the field vehicle. Okay. All right.

Teddy:

And again, it’s very rare. I mean, and we’ll know by 11 o’clock the day we come out to do it, but typically by 11, 11:30, we know how extensive it’s going to be. Majority of the time, we get all the contamination out by noon, and then the afternoon we’re filling in the excavation. We’re done.

Customer:

Yeah. No, no, I get it. I’m just trying to prepare for what a worst case scenario, hopefully that doesn’t actually happen, you know?

Teddy:

Absolutely. I get it.

Customer:

So the other thing is that, in the very rare case, hopefully this doesn’t happen, that this is looking to be over a hundred tons of soil, depending on how you guys are looking at that, because we have a budget for this, right?

Customer:

So like, the 8500 is really just about the top of what we can actually afford to spend on this. So like, if it goes for another $2000, or something like that, I mean, that’s doable. But if he goes way above that, it will be hard for us to be able to cover that. Is there any way that we can assess the tonnage that you guys are taking in, be able to like stop at some point, if it goes beyond something that we’re able to actually cover? Or pay for?

Teddy:

Absolutely. Yeah. Yeah. So here’s the thing, so if you say to me, “Okay, Teddy, I got, $10,000 is the absolute max,” and let’s say that’s 40 tons of soil, whatever that calculation comes out to, which is roughly about two truckloads of soil.

Teddy:

So if I know that, once we get to that point on the job, let’s say I’m out there and we get the one truck out and we say, “Oh, you know what? It still looks kind of dirty.” But we make a decision together on site. Do you want to take another truckload out? And you agree because you see the soil, you smell it, the geologist on site says that we should. So we take out that second truck. But now you’re telling me, “Okay, I’m maxed out. I don’t have any more funds.” So we can sample the excavation at that point and backfill the hole, finish all the site work.

Teddy:

Now, even though those samples are going to have an odor to it, because obviously, I mean, unless they’re clean, and obviously we know it’s finished. But if it’s not, we could still stop the job and say, “All right, let’s take the samples anyways, and then just backfill the hole.” Let’s see what those lab results are, because even if it’s contaminated, as long as it’s under the level of acceptable limits, we can close it out. And we could absolutely stop the drop at that point.

Teddy:

Now, I can’t guarantee that those samples are going to be clean and you’re going to pass.

Customer:

Yeah.

Teddy:

But we can stop the job at that point. Absolutely.

Customer:

Yeah, exactly. So what I was wondering, because I want to get this done, but obviously I don’t want this to be like a $20,000 job, because I don’t think we can afford that. But what I would say is that I would want to be able to say, okay, if we at some point realized that it’s going to go above where I want to pay, stop it at that point, and maybe we can finish it up in a year or two years from now. Is that something that is possible?

Teddy:

A hundred percent. 100%. Yeah, absolutely. I mean, hopefully, again, I mean, I’ve had this happen in the past where customer tells me, “I have a limit,” and we stop and we take our samples, even though they’re dirty and they come back and they’re a pass, and they’re under the limit. And then the client’s finished, a hundred percent. So that’s capable. Now, let’s say worst case they don’t pass. Yeah, you’re not under any kind of timeframe where you have to then finish it in a certain timeframe.

Teddy:

You could tell me, “Hey, Teddy, I got to save up some money when I have another couple thousand dollars to complete it, I’ll let you know. And the thing is, at that point, let’s say those five or six samples comes back and only one of them is over the limits. Well, I’ll be able to come back to you and tell you, “Hey, we only have one area that we have to dig out, it’s this one sidewall. So here’s the estimate to do that, to come back.” And at least you’ll have an idea of what that additional cost is going to be, and then you can determine on when you’re going to have us come out.

Customer:

Yeah. That makes sense. That makes sense. Okay, great. I think … oh yeah, and the other question that I had is the 400 check to the treasurer, so that’s on top of the $500 prep fee, right?

Teddy:

Yes. That’s a separate check that at the end of the project, you’re going to cut a check directly to the Treasurer, state of New Jersey. You’re not going to send it to them, you’re going to give it to us. We’re going to attach it to your report, and we’re going to send that to the state once the project is a hundred percent complete. So until that report is finished and we’re a hundred percent ready to submit it, to ask them for an NFA, that check is not due. So don’t send them any money. Don’t do anything until the final report is done, and then we’ll tell you what the process is from there.

Customer:

Okay. So that’s actually, that’s another question. If for whatever reason, we don’t happen to finish the job this time around because it goes above with what we’re able to pay. So all have these fees around the action reports and everything, doesn’t take place, right? Because that only happens when it’s done?

Teddy:

Exactly. Yep. Yeah. So you can hold back that money. So, initially how it works is the 50% deposit, so we take that 50% deposit, we schedule you, we come out, we do the work. If there’s a situation where one of those samples is not clean, and you tell me, “Hey, I can’t finish this,” then yeah, you can pay the balance minus the report and reporting fees. Yeah, absolutely. 100%.

Customer:

Okay. That makes sense.

Teddy:

All right?

Customer:

All right, Teddy. Thank you so much for the information. I really appreciate you taking the time to walk me through this. I’m going to- [crosstalk 00:10:36].

Teddy:

Yeah, man. Any other questions, you let me know. I mean, we’re scheduling about a week and a half out right now. So as soon as you give us the green light, I’ll get you scheduled in right away.

Customer:

Okay. Sounds good. Thank you so much.

Teddy:

Thank you, sir.

Customer:

Have a good day.

Teddy:

You too.

Tank Talk Episode 014 – Realtor Representing Buyer Who Wants To Buy A House With A Leaking Underground Oil Tank!

Tank Talk


Listen By

In this episode, Teddy talks with a client who is representing a buyer who wants to buy a house with a leaking underground oil tank. The buyer is looking for a fixed price for the project.

Questions Asked…..

  1. Do you guys offer a flat rate or fixed price for remediation? 1:25
  2. How can I get a fixed price? 2:15
  3. How long is the price good for? 3:15
  4. Does the initial cost of $600 get credited back to my account? 3:30
  5. What are the payment terms? 3:50
Speaker 1:

Hey, sorry about that, Teddy.

Teddy:

Yeah, no worries. What’s going on, man? How can I help you out?

Speaker 1:

Well, I was referred to you by Saeed Hammond Group.

Teddy:

Oh, yes. Yeah. I do a lot of work with Saeed.

Speaker 1:

Yep. So we have a house. I have the buyer, and they have the short sale listing. And they did disclose that there was an oil tank, but they said it was empty. We went to the property, and we think that the property is basically contaminated.

Teddy:

What’s making you think that? Do you have any kind of lab results that were done or?

Speaker 1:

Yeah. Yes, we do. We do. My guy Raul, who does my oil tank sweeps and he also do the testing, it was 1,100 gallon tank. And the problem was that it was filled with water. That’s what the tank was filled with. But the soil testing came back contaminated.

Speaker 1:

So what we were trying to do was see who’s going to pay for the removal and for the remediation. And they had proposed that you guys do a flat rate?

Teddy:

Yep. Yeah. We can help you with that. So essentially, you’re trying to get the bank to pay for it, and you want to get a proposal for a fixed price? Is that kind of what you’re looking for?

Speaker 1:

That’s kind of what we looking for. Now, the thing about it is, the short-sale bank, they’re not going to pay for it. That’s what I’m being told.

Teddy:

Yeah. Usually, [crosstalk 00:01:50] as is. That’s exactly why we have this program, to be honest with you. It’s for investors. I mean, we’re very investor friendly. We came out with these programs for people that are in your exact position, because as you probably know in the industry, it’s very common to get what’s called an open-ended contract, and they could quote you at eight grand and then you buy the property and it costs you 30 or 40. So that doesn’t happen with us.

Teddy:

The way that it works is we charge a fee, it’s $600 to come out. We do a soil investigation that consists of us determining how deep that contamination is, how far out it traveled. We determine if groundwater is impacted. We determine if it’s under any structures, if it’s offsite, all those data points we need to gather. And then we could come back to you with a fixed price contract. That price does not fluctuate. It’s an all-inclusive contract, guaranteed, no further action letter, unlimited amount of soil that gets disposed. It’s all included in that price. So there’s no gimmicks, there’s no catches. I know there’s another company right now that’s giving a flat rate, but it only includes 20 tons. Anything over that you’re responsible. So it’s not a true fixed price. So our contract is a true fixed price. It will not fluctuate. So if the deal makes sense, and I come back to you with a quote. Hypothetically, it’s $12,000. That makes sense for your deal, you close on it. We come and do the work afterwards, and that price is not going to change.

Speaker 1:

Oh, okay. Okay. All right. And that price won’t change.

Teddy:

No, yeah, it doesn’t change. It’s a fixed number. Once I give it to you, that’s good for six months. I mean, as long as you close and get it done within six months, that number is not going to change.

Speaker 1:

Okay. All right. All right. So I just wanted to get a little bit of information from you. So to come out, it’s $600.

Teddy:

Correct. And that 600, we will apply as a credit towards your file if you decide to move forward. So 600, well, if it’s a $10,000 quote, you would only owe us 9,400 bucks. So it will get applied as a credit.

Speaker 1:

Okay. And do you need all monies upfront or what is the?

Teddy:

Well, tell me what you’re doing. So is this a flip for you? Are you going to renovate it and flip it?

Speaker 1:

No, this is an actual buyer, a client who’s looking to be an owner occupant.

Teddy:

Okay. So yeah, in that situation, yeah, the way that it works is we would get a 50% deposit before the job starts. And then after the site work is complete, we ask for the balance. Typically if you were representing a seller and you had a buyer involved and there was a closing coming up, we could arrange to get paid at closing. But in this situation, I mean, unless there’s some way you could get money put in escrow from the closing, from the seller, I mean, I don’t know how you would do it, but yeah, typically we get paid 50% up front and then the balance after the site work.

Speaker 1:

Okay. All right. Now, I got to figure this out because I’m trying to bring both sides together. Well, at least tell my buyer, hey, they are willing to go lower on the price. So you get in on the back end.

Teddy:

Well, exactly. And what we can do is [crosstalk 00:05:06] the bank. So I’ll work for you, man. We’re real investor friendly. We’re trying to make it work for everybody. And we do accept all major credit cards as payment and obviously checks and cash as well.

Speaker 1:

Okay. All right. Thank you. I appreciate you. I have some information to take back to her.

Teddy:

All right. If you have any questions or if they want to call and have any questions about the process, feel free to have them give me a call.

Speaker 1:

Will do. Thank you.

Teddy:

All right. Thanks. Bye.

Tank Talk Episode 013 – My Oil Tank Leaked! Now What? Part 2

Tank Talk


Listen By

In this episode, Teddy talks with a client in regards to their soil sample that was extracted the day of the tank removal. The lab results came back over the NJDEP clean up standards.

Questions Asked…..

  1. What do my soil sample results mean? (25 Seconds)
  2. What type of pricing options do you offer? (1 min)
  3. Can you just sample the excavation instead of remediating? (2 min)
  4. Is the subsurface evaluator included in the price? (2:52)
  5. If we go with open ended contract, you will just come out and start digging? (3 min)
  6. How often does groundwater get contaminated? (3:30)
  7. How much does it cost to investigate the soils for a fixed price? (5:30)

Tank Talk Episode 012 – How Can I Protect My Downside When Buying A Home With An Oil Tank?

Tank Talk


Listen By

In this episode, Teddy talks with a future client about buying a home with a previously filled underground oil tank. The seller is pushing back saying that they have all the proper documents. Teddy explains why it is so important to not trust those docs!

Questions answered in this episode…

Questions Asked…..

  1. The seller refuses to remove the tank, is there anything I can do to minimize my risk? 1:00
  2. Does the cleanup mean we need a No Further Action letter 2:30
  3. How can you see if the soil is contaminated 4:30
  4. Is the tank filled properly, what is the chance you will find a oil leak? 5:30
  5. If the tree is on top of the tree, will your company take it down? 6:30
  6. How big will the holes be when you test the soil? 7:30
  7. How much does average oil tank removal cost? 8:30

Transcription…

Narrator:

Welcome to Tank Talk with Teddy, a podcast talking all things related to residential oil tanks. You have questions? Teddy has answers.

Teddy:

Hello?

Andrew:

Hi. My name is Andrew. I got a question related to oil tin removal.

Teddy:

Sure, I can help you with that.

Andrew:

I hope you can help me that. So, the situation is that I’m going to buy a house with an underground oil tin. It’s a 550 gallon tin, which is under the front yard of the house. It was properly abandoned in 1996. My situation is down the seller of the house, where it fails to do anything. So, I have to take the risk to buy the house with the tin. But before I do that, I want to find out, is it any key cautions, any soil testing that I can do in the inspection period? So, I can at least have a better idea whether there’s an oil leak or whether there’s soil contamination around the tin. Is this something that’s possible or there’s no way to tell?

Teddy:

Absolutely. Yeah, I could definitely help you with this. So, I’ll explain typically how the industry works. For soil testing around a tank like this, basically they will send somebody out to do it by hand, and they bore down alongside the tank. But a lot of times they don’t get to the proper depth and they don’t ever back up the results with some kind of warranty or guarantee. So, for you as a buyer, if you were to pay somebody five or $600 and they gave you results with no guarantee, you are going to be liable for a potential cleanup in the future. So, that’s not going to work, right?

Teddy:

So we have a program where we can come in. We have a special machine called a geoprobe that probes around the side of the tank. I just pull a lever, so I know my guy is going to get to the proper depth. If we can prove that the soil around the tank is clean, we’re going to offer you an optional guarantee for that. It covers you for up to six months. So as long as you hire our company to pull that tank within six months, and if we find any contamination, it could be $50,000 worth of cleanup, you’re covered. We would cover it and clean it up for no additional cost to you, if you take the optional guarantee.

Andrew:

Okay, so the cleanup doesn’t mean that it’s over township and get the no follow up actions certificate?

Teddy:

Yes, that’s what I mean. So let’s say hypothetically, we test the tank next week. I tell you that the soil is clean. You say, great, I’m going to buy the house. Two months from now, you close on the house, you hire us to pull it. I come out and pull that tank out of the ground, and I find that it’s riddled with holes and there’s contamination directly under that tank that we missed. We would then have to get a case number from the DEP, we’d have to then clean up the soil and write a report to get you that no further action letter. That is going to be all included in your guaranteed price.

Andrew:

Okay. I see. So, that means it’s kind of an insurance. So maybe you charge a little bit more than the other company, but you guarantee that you take care of the pull up? [crosstalk 00:03:22]

Teddy:

Exactly. The first step is we charge $600 for the investigation. So, you’re going to have two outcomes. If you can picture that, you’ll have two outcomes on that initial test next week. One outcome, we’re going to find clean soil. I’ll come back to you. I’m going to send those samples to the lab, get lab results and give you those results and tell you that you’re all clear, you’re good to go. Okay, that’s one outcome.

Teddy:

The second outcome is that we find contamination. And when we’re out there that day, if we find contamination, we’re going to do what’s called a delineation. What that means, in layman’s terms, is we’re going to figure out how deep the contamination is, how far it traveled in each direction, and we’re going to give you a fixed price that you can then go to the seller to negotiate. We even have a program where… I’m going to throw numbers at you. Let’s just say it’s a $15,000 remediation. We could come in now, do the remediation at no cost to you or the seller, and the seller could pay us at closing, once we give him the clean bill of health.

Andrew:

Okay. I think that makes sense to me. I think that’s just more save approach. But do you mind just to expand a little bit, like soil contamination? I don’t think it’s like a zero and one thing. So, how do you consider the soil is contaminated? Is it really a black and white case or [inaudible 00:04:42] area?

Teddy:

It’s very black and white. It’s very obvious. So you, as a homeowner, a potential homeowner that has never seen an oil tank come out of the ground, you don’t need me or a township inspector to tell you it’s leaking. It’s very obvious. You can see the soil. It’s discolored. It’s got an odor to it. The tank is riddled of holes. It’s a very obvious thing. So, it’s a visual inspection, initially, that’s done, and then a sample is typically taken from the bottom of the excavation to determine what level the contamination’s at, okay? Because you are allowed to keep contamination in the ground, up to a certain level. And we would have to go through that process once the tank is out. But yeah, if you have the guarantee, you are completely covered, you have no additional worries, you have nothing else to worry about once you close on that property. You have no extra liability. You have nothing that’s going to pop out at you down the road that’s going to cost you a fortune.

Andrew:

Okay, got it. Do you mind if I ask two more questions?

Teddy:

Absolutely.

Andrew:

The first one is, based on your experience, if the tin is sealed properly, in 1996, what’s the chance to have an oil leak come from that tin?

Teddy:

Very high. And let me, [crosstalk 00:05:56]. Yeah, let me explain why it’s very high. Because in 1996, they decided to take that tank out of service. Most of the time, the people didn’t just decide on a whim that they didn’t like oil heat anymore, most of the time. Most of the time that that tank was taking on water, and the heating system wasn’t properly working, which means they had no heat. So what they did is they followed all the proper rules and regulations back then, they opened it up, and they threw sand in it. The problem is it wasn’t required to test the soil around the tank, so there’s no way to tell back in 96 that tank was actually leaking. So a lot of these previously filled tanks were actually leaking before they were filled in place. So, once we pull it, we’re going to find that out, or once we do our soil investigation, we’re going to know that.

Andrew:

Okay, I see. And another thing is that it looks like there’s a tree on top of the oil tin. Do you also take care of the tree removal or I need to find a different company to handle that?

Teddy:

It depends on the size of the tree, but when we come out to do our soil investigation, we’ll be able to let you know if we can handle it and how much it would cost or if it was too big and you had to hire someone else to remove it. When we do our soil investigation, we’re going to know the exact location of that tank, and we’ll let you know which landscaping will be impacted during the dig, and we’ll be able to give you a fixed number on what the cost would be to remove it and all that stuff at that time, and we’ll be able to tell you if we can handle the tree or not.

Andrew:

Okay. And I think you mentioned you have the tools to dig down into the ground to test the oil. What little bit, the impact… Is it just a small hole or there will be a big hole that you need to dig from the ground?

Teddy:

It’s a two inch piece of pipe that gets drilled in through the ground. So, it’s a two inch hole, and we fill the hole in when we’re done. So, when we leave initially during that investigation, you won’t even know we were there.

Andrew:

[inaudible 00:07:56]. Okay. I think that’s really helpful. Let me just talk to my real estate agent. I think most likely I will just call you back and arrange a visit to your house.

Teddy:

Okay, perfect. Yeah, call back and I can take your info, email you out a proposal. Everything we do is electronic. You would sign it electronically. We’ll call you for a 50% deposit, and then we’ll set you up on the schedule. And then when we come out, you pay the balance.

Andrew:

Okay. Sorry, just one more thing forget to ask. So $600 for the inspection, and we want to remove the oil tin, assume there’s no soil contamination. What’s the FH cost for that?

Teddy:

So, it’s about $1,500 typically, plus permits. And if the sand inside of it is contaminated, there’s typically a charge to dispose of that. If it was done in 96 with a permit, most likely that sand is going to be clean. I’m going to reuse that sand as fill material, so there’s no charge for that. But if it’s contaminated, there’ll be an additional fee. So, all that will be spelled out in the contract, if you decide to go forward with us on the guarantee, and that’ll be in the contract itself.

Andrew:

Okay. Sounds good. What’s the name?

Teddy:

My name is Teddy, T-E-D-D-Y, Slack, S-L-A-C-K, from Simple Tech.

Andrew:

Okay, understood. So if I call back, do I need to ask for you or I can just speak to somebody else?

Teddy:

If you want, what I could do is I could take your info right now, I’ll email you proposals in the next few minutes. And then if you decide that you want to move forward, all you have to do is literally open up the email and click approve and type in your name, and then we’ll get everything rolling from that point. Would you like to do that?

Andrew:

Yeah, sounds good. Let’s do it.

Teddy:

Okay, perfect. Look into your email inbox in the next few minutes. You’ll have it there. If you have any questions, my name is Teddy.

Andrew:

Okay. Thank you very much.

Teddy:

Thank you, sir. Bye-bye.

Andrew:

Okay, thank you. Bye-bye.

Tank Talk Episode 011 – Homeowner Not Happy With Lowest Price Contractor!

Tank Talk


Listen By

In this episode, Teddy talks with a homeowner that we sent a quote to remove her underground tank and install a new above ground tank. She decided to hire another contractor because he was cheaper. Once the tank was out of the ground, the contractor found a few pin holes and tried to pressure her to sign on for a soil remediation right away! He did not take any samples of the soil to determine the contamination levels to properly advise her. Please do your homework and don’t hire the cheapest contractor to remove your oil tank. The process that the contractor follows once the tank is out is more important and if not followed properly can cost you thousands of dollars in the end.

Transcript

Speaker 1:

Welcome to Tank Talk with Teddy. A podcast talking all things related to residential oil tanks. You have questions. Teddy has answered.

Teddy:

Hey guys. So I don’t typically hop on before the podcast starts, but I really felt the need to just get on real quick and explain this situation. So this client, had us quote them to remove their underground tank and install a new tank. They’re out in Phillipsburg area. So we gave them a very competitive price, we thought, and they did some price shopping. And they got somebody who was cheaper, that was more local to their house. And they were able to save a couple of hundred bucks on the project. So we didn’t hear from them after the project. Well we get a call and that contractor pulled the tank, and now there is a problem. They have holes in the tank, and there’s some contamination there. And the contractor did not follow the proper procedure. Did not take a sample of the soil.

Teddy:

That’s number one. Okay. And then he’s trying to force a remediation on them right away. That’s a tactic that they like to do. They like to pressure you to do that remediation right away, because they want to get that money out of your pocket and get that job done, and collect the balance. Okay? The proper procedure is to sample the excavation, determine the level of the contamination, and then give the client some options. That is not the process that was followed. So she called us, we are going to now give her a quote to go down to her property and perform what’s called a fixed price investigation. So we will probe around her tank. I mean, around the area where the tank was located, this way, we can get an idea of what the level of contamination is.

Teddy:

And then we’re going to provide her with a couple options to close out her case number. That is the proper procedure. We could’ve skipped this step, which is a $600 step, if the contractor pulled the sample the day he removed the tank. We would have had an idea of the levels of contamination. And then we would have been able to just explain to her over the phone, what her options are. But because he didn’t follow that procedure, she’s looking now at additional $600 to investigate it. And then we’re going to go back to her with some options on how to close out her case number. So listen up, and hope you get some value out of this call.

Speaker 3:

Hi, good afternoon. This is [inaudible 00:02:39]. I have used your services in past, and I wanted to inquire about a property that we took out a thousand gallon tank today. The guy said since there was a hole in the tank, right? They put it as a contamination.

Teddy:

Okay. Where is the house located? What county is the house located in?

Speaker 3:

How would I know? What are my next steps? Because I was not very happy and excited with the company who took out the tank. I felt like they’re over selling me.

Teddy:

Yes. Yeah unfortunately, a lot of that happens in this industry. It’s really unfortunate. If I had to take a guess, I’d say you’re out by Philipsburg, right?

Speaker 3:

Yes. [inaudible 00:03:22] literally by Philipsburg. In fact, you can call it as Philipsburg.

Teddy:

Yes. Yes. So did you use the local guy over there, ADS?

Speaker 3:

Yes.

Teddy:

Yeah. Did they take any samples when they removed the tank yesterday or today?

Speaker 3:

No. They removed it today and no, they did not. I mean, the weird thing was they just called up immediately saying that are two holes in the tank. Tiny, teeny, tiny holes. Okay? And then the inspector didn’t even look at the holes or anything. They just said, this is the DEP ID.

Teddy:

Wow, yep. Yep. This is exactly what a lot of these guys do. It’s really a shame. They really should have taken a sample. So did they explain to you that you’re allowed to keep contamination in the ground up to a certain level?

Speaker 3:

No, no, no. That’s the problem. See again I am a person who goes by rule book, right? You can’t bullshit me. But he says, oh this looks ugly. This looks bad. Come on, dude. There has to be some kind of a process in place. This is US. This is not like third world country where you don’t know what you’re talking about.

Teddy:

Yes, yes, exactly.

Speaker 3:

And I’m very upset, okay? I’m sorry. I’m like, I need to call up… I wish I had gone with you guys, but see the budget was a thousand dollars difference between your estimate and the guy’s estimate. And I don’t have any complaints on taking the tank out. It’s more of like, after the tank. And they said, “We can start tomorrow.” I’m like, Nope. Literally you should of looked at his face. The way I said, “Nope, you cannot start tomorrow.”

Teddy:

No, that’s the thing. They try to pressure you. It’s a pressure move. You know what I mean? They try to get you to do it right away, right away. You got to be careful. And then let me ask you this. Are you selling the property or anything? And what was the reason for removing the tank?

Speaker 3:

[inaudible 00:05:21] I got the property, I’m redoing it because my sister wants to move in. Okay? Unfortunately my next door neighbor is a police cop, and we had [inaudible 00:05:32] three bushes down to get it out, my oil tank. Somehow the oil tank is on a very tight spot between the two houses. So he wants to make sure. And I obviously, I don’t want an oil tank on my property, underground oil tank, no way.

Teddy:

Wow. Yeah, no, absolutely. You did the right thing. Absolutely. Yeah. I see that in our file. I guess we did send you a proposal. So for a removal and an install, and then also one for removal. So were we that much more expensive than those guys?

Speaker 3:

Yeah. You were a thousand dollars more expensive.

Teddy:

A thousand. Wow. So then they did a what? A removal and an install for $2,500 bucks?

Speaker 3:

Yes, yes.

Teddy:

Wow. See, this is the problem in this industry, they-

Speaker 3:

I had to pay-

Teddy:

Go ahead.

Speaker 3:

I had to pay a little more extra because it turned out to be 1,000 gallons, right? Instead of 500 gallons.

Teddy:

Okay. So I mean, see, this is the thing. They try to give a very low price and they want to be able to just get that tank out. And then the first thing they do is report you to the state. When a lot of times it’s not even required to report you to the state, because you can have a hundred holes in your tank. I don’t care if there’s no contamination, I’m not reporting you to the state, but that’s not how everybody works.

Speaker 3:

Yeah, no. He said smell the soil, it smells bad. So you definitely had a leak.

Teddy:

Did you smell it, that it had an odor?

Speaker 3:

Very slight odor. It wasn’t like, oh my God, I have to close my nostril. I mean, honestly see it was raining and it was pine tree freshly cut. I don’t even know whether it was petrochemicals, but it was weird. So, and I don’t know it’s the place for it, right? You’re talking to wrong person.

Teddy:

Yeah. Yeah. And he didn’t tell you that he’s taking a sample or any of that stuff, right?

Speaker 3:

No, no, no.

Teddy:

So the process he should have followed and here’s how it works. This is the way it’s supposed to be done. He should have taken one sample from the bottom of the excavation where the tank was. He runs that to the lab. He gets results within three to four business days. Then he should come back to you and tell you, okay, here’s the level of contamination. Because depending on what the level of the contamination is, then you have options. He’s not giving you any options. He’s trying to pressure you to do it right away. That’s not good businessmen.

Speaker 3:

Yeah. That’s, see he lost my business, because obviously I went to him right? You guys, and now I’m calling you back. That should tell you. My problem is, first of all, honestly, listen, I don’t know whether I have a problem or not. So it’s kind of like, no I definitely have a problem because he reported it to DEP, and the case is there, but there is a problem. Now I don’t know how to address that because I have zero clue. Google is not helping me out. And I’m like at dead ends. And I don’t want to go back to that guy no matter what.

Teddy:

Yeah. I mean, we could definitely help you out, and I’ll give you some different options. But what I would recommend since he didn’t take any samples, what I would recommend is… Now, did he backfill the hole? Is it all the way back filled up to grade and everything?

Speaker 3:

Yeah. I’m sorry to say this, I was so upset, so upset with him. I said to him, “Why don’t you leave it like that?” He said, “No, no. By law, I have to do it.” And do you know what he did? He took out and he mixed all the… I mean, that’s not the way it has to be. The way you need it, it’s like, if you dug through three layers and you made three different stages, right? You don’t mix all the three stages together and put it back, right? If there is a contamination, right, you leave the contamination on the bottom most, then you put the fresh soil. He mixed all the soil, so now if there’s contamination I have [inaudible 00:09:22].

Teddy:

Yeah, the right process is to line the hole with plastic. And then you put the clean stuff on top of the plastic. That’s the proper way to do it.

Speaker 3:

Yeah. No, he did not do anything like that. He just put it back. Dumb, dumb, dumb.

Teddy:

Well, so all right. So here’s what I would recommend. We can definitely help you out, but the first step, okay? We need to know how extensive this contamination is. And what I would recommend is have us come down. We would drill around in that area. It’s a two inch pipe that we would drill down holes, and then we would pull the soil up. And we would see what the level is of the contamination. If it’s under a certain level, then we could just write a report for the state and you’re done with it. Okay? If it’s over the-

Speaker 3:

And what is the certain level?

Teddy:

Well the initial investigation is $600. That’s what we charge for that service. And that’ll tell us-

Speaker 3:

No, no, no.

Teddy:

Go ahead.

Speaker 3:

What are the certain levels, of the soil?

Teddy:

The levels, levels. So all right, so it’s a two step levels, basically. So ideally you really want everything to be under a thousand parts per million. That’s best case. If it’s under a thousand, we don’t have to do any additional analysis at the lab, and we can close out with a report to the DEP, and they’ll give you a no further action letter. That’s best case. Okay? If it’s over a thousand parts per million, but below 5,100 parts per million technically it can stay in the ground, but it will have to pass additional analysis at the lab. So a lot of times, if it is in between those two numbers, it will pass. So really, you really want it under a thousand. Next best thing is under 5,100. Anything over 5,100 has to get remediated.

Speaker 3:

Okay. Now, can you help me out? If it’s under 51… Now I’m understanding. I don’t even know. I don’t even freaking know, as sitting here right now that it’s under thousand or it’s under 51,000 or under 6,000, okay? So sitting here, I’m asking you, how would I know, if it’s just giving you vague example, if it’s 4,000, what would be the next step?

Teddy:

So, okay. So if we come down there and drill around, and this is what I would do. I’d go down there, drill around and I would send one sample out to the lab. Let’s see what that sample is, okay? And if it comes back at 4,000, like you just said, and whenever it comes back over a thousand during this initial investigation phase, I would recommend taking a little bit of soil out, okay? Because we can go back and take our six, because you need six samples taken with the oversight from a geologist. And we don’t want to spend all that money initially, if it’s going to be over the limits. That’s why the first phase is just investigation. It really is only for your use and my use. It’s not for the DEP, it’s for you and I to figure out how extensive this cleanup is. And then we can come back to you with some pricing. But if it’s a 4,000 parts per million, that first sample I would recommend to take out a little bit of soil in that situation.

Speaker 3:

Okay. Okay. Okay. Okay. So, and this has to be done by a certified licensed professional like you, or can I just do it and give it to the lab and figure it out?

Teddy:

No, it has to be done by a certified contractor. In order for us to come down there and really drill down and figure this out. Because for us, when we do that investigation, once we’re done, I’m going to be able to tell you to the dollar and it’s going to be a fixed number, exactly what it’s going to cost for you to close this out. All these other guys give you open-ended contracts. So they’re going to tell you, oh it starts at 6,000 and then it goes up from here. And then they don’t tell you what the final invoice is going to be. A lot of times they come out that $6,000 quote, the invoice is $20,000 at the end of the day. So you’ve got to be very careful. Our program, when we do our investigation for $600 bucks, I’m going to give you a fixed number. That number does not change. You make the decision before the project starts, if you want to pay. And that number will not fluctuate.

Speaker 3:

Okay. Okay. Okay. So that’s a nice thing to know.

Teddy:

Now, if he had a sample, that’s why I asked. So a lot of times we get these phone calls where another contractor pulled the tank. They took the one sample, so they followed the correct process. And then the-

Speaker 3:

No, he did not.

Teddy:

Yeah. See, and then the homeowner would call us at that time. And then I ask, “Do you have a sample?” They say, yes. “Okay. What are the results?” And then we don’t have to do this next step. So, because he didn’t do the sample, we have to now go out down there and prob around to find out.

Speaker 3:

No [crosstalk 00:14:06]. Yeah, he said you can see it from a naked eye, right? That there is an oil contamination and I’m like, okay. See you go by what they say, right?

Teddy:

Well, of course, he’s trying to tell you that because he wants you to do the most expensive job, which is a remediation, but you may not even need that. You might be able to just sample it and write a report. And a lot of times it’s a quarter of the price of a remediation. A typical remediation, just so you understand, if we find that we have to take soil out, just so you understand cost. Typically on average they are about 8 to 15,000. So it’s very expensive. If I can prove that that soil is under the limits, I could close out something for $4,500 bucks. I could close the whole job, it can be finished.

Speaker 3:

Oh okay. I mean $4,500. I’m not able to understand. Okay, you need to repeat again, what did you just say?

Teddy:

Okay. So if we find, okay, so step one is for us to come down there and probe around to determine the level of contamination. That’s step one. Once we have the level, then I’m going to come back to you with options. I’m going to say, here are your options. Option one is going to be for us to basically, to come back and take the six samples that are required. And that’s something like that with the report is about $4,500 bucks.

Speaker 3:

Oh, okay. Okay. Okay. Depending on the readings, right?

Teddy:

Exactly. Exactly. We need that initial reading.

Speaker 3:

Depending on the first sample.

Teddy:

Exactly.

Speaker 3:

Okay. Let me do one thing. Sorry, I came back to my house and my little one is literally all over me, because he didn’t see me since morning. You there?

Teddy:

Yes, I’m here. Yep.

Speaker 3:

Hello?

Teddy:

Yeah, yeah I’m here. Can you hear me?

Speaker 3:

Okay. Yeah, I can hear you. Give me some time, okay? Let me, I’m not available tomorrow and day after tomorrow, I want to meet the person who will be doing the sampling. Let me circle back to you Friday, first thing around 11:00 ish, okay? And then schedule a time for Monday or Tuesday.

Teddy:

Okay. So yeah, I’m going to email you right now, I have all your info. I’ll email you the proposal for the $600 bucks. Once you sign it, it takes about four business days for us to get out there on our calendar. So just keep that in mind. I’m going to email it to you, so you have it in your inbox. If you want to call Friday, that’s fine, but it’ll be about four business days out in our schedule.

Speaker 3:

Okay. Perfect. Perfect. Thank you. Thank you.

Teddy:

All right, thank you for calling. Take it easy. Bye. Bye.

Speaker 3:

Bye. Bye.

Tank Talk Episode 010 – My Oil Tank Is Under My Driveway! What Are The Steps To Remove It?

Tank Talk


Listen By

In this episode, Teddy talks with a prospective client about the oil tank buried under their driveway! The client had some really nice things to say about Simple Tanks online reputation and not so nice things about some of the other contractors out there. Teddy will explain the step by step process to remove an underground oil tank that is located under the driveway!

Questions answered in this episode…

  1. What damage will there be to my front lawn since the tank is located in the driveway
  2. What is the process to get the tank removed from the ground?
  3. Once permits are approved how long does the job take to get done?
  4. What is the process once the tank is out?
  5. Will I be able to communicate with the employees that are sent to our house.
  6. Will you come to my house to look before the work is started?

Tank Talk Episode 009 – I Am Buying A House With A Previously Filled Oil Tank, How Can I Protect Myself?

Tank Talk


Listen By

In this episode, Teddy talk with a prospective client who is an investor buying a property with a previously filled oil tank that was properly permitted. Teddy explains that the soil around this tank still MUST be investigated since it was not required before it was filled in place.

Questions answered in this episode…

  1. The house I am buying has a previously filled oil tank that has all the proper permits, does that mean the soil is clean around the tank.
    45 seconds
  2. How can you tell with 100% certainty that the oil tank has contamination? 2:20
  3. How much does it cost for the soil investigation around an existing underground oil tank? 3:20
  4. How long does it take to get on the schedule for a soil investigation? 4:45
  5. How long does it take to get the results from the soil investigation? 6:15
  6. When is the guarantee offered with the soil test? 8:00
  7. How much does it typically cost to remove a 550 gallon UST? 8:45
  8. How much is the soil sample guarantee? 9:05
  9. How can you figure out an exact price for the cleanup by sending one sample to the lab? 9:55
  10. Can you explain the entire soil investigation process again? 10:40
  11. We you stand behind your fixed price remediation contract? 13:30

Speaker 1:
Welcome to Tank Talk with Teddy, a podcast talking all things related to residential oil tanks. You have questions? Teddy has answers.

Teddy:
[inaudible 00:00:18] this is Teddy.

Jennifer:
Hi Teddy. My name is Jennifer [inaudible 00:00:20].

Teddy:
Oh yes, how are you doing?

Jennifer:
Good, thank you. So my husband and I have an accepted offer on a HUD home that has a properly permitted, decommissioned oil tank. And I naively thought that if it was permitted and it was decommissioned, that would mean that everything was fine. And that’s not what I understand to be the case. And I was wondering if there was any way to mitigate the risk through testing or something. We’re interested in the place, probably everything’s fine, but I understand that doesn’t mean certainly everything is fine.

Teddy:
Correct. No, you’re 100% correct. And you are absolutely taking the right precautions, because most people believe what you believe, that if it had proper permits, that everything is good. It’s the absolute, complete opposite of that. We actually find that a lot of these tanks that have permit, and were filled properly, inspected, a lot of those tanks, majority of them were actually leaking before they were filled in place. And it wasn’t detected because it wasn’t required to test the soil, so is a visual inspection which you can’t tell if the tank was leaking at the time and they just fill them in place. So we have a product or service that is set up exactly for this, where we come in and we probe around the tank. And we can tell you with 100% certainty if there is a problem. And if there is a problem, we’ll tell you to the exact penny on how much it would cost to cleanup. If it’s clean-

Jennifer:
Wow, you’re exactly the person I was looking for.

Teddy:
Yes. These are services are set up for… 90% of our clients are real estate related transactions, so we have very unique services that are set up for exactly what you’re trying to do. And we actually have a product where I could test it and if I tell you it’s clean, we back it up with 100% guarantee. As long as you pull that tank within six months by us, if there’s any contamination that we missed, we’re going to clean it up and no additional costs.

Jennifer:
Oh my gosh, I can’t believe this.

Teddy:
How does that sound?

Jennifer:
I called so many people and everyone’s like, “Oh, there’s no way to know.” So how do you know? Help me understand. I don’t…

Teddy:
So here’s the trick.

Jennifer:
And tell me what it cost because that’s very important.

Teddy:
Yes, absolutely.

Jennifer:
So go ahead.

Teddy:
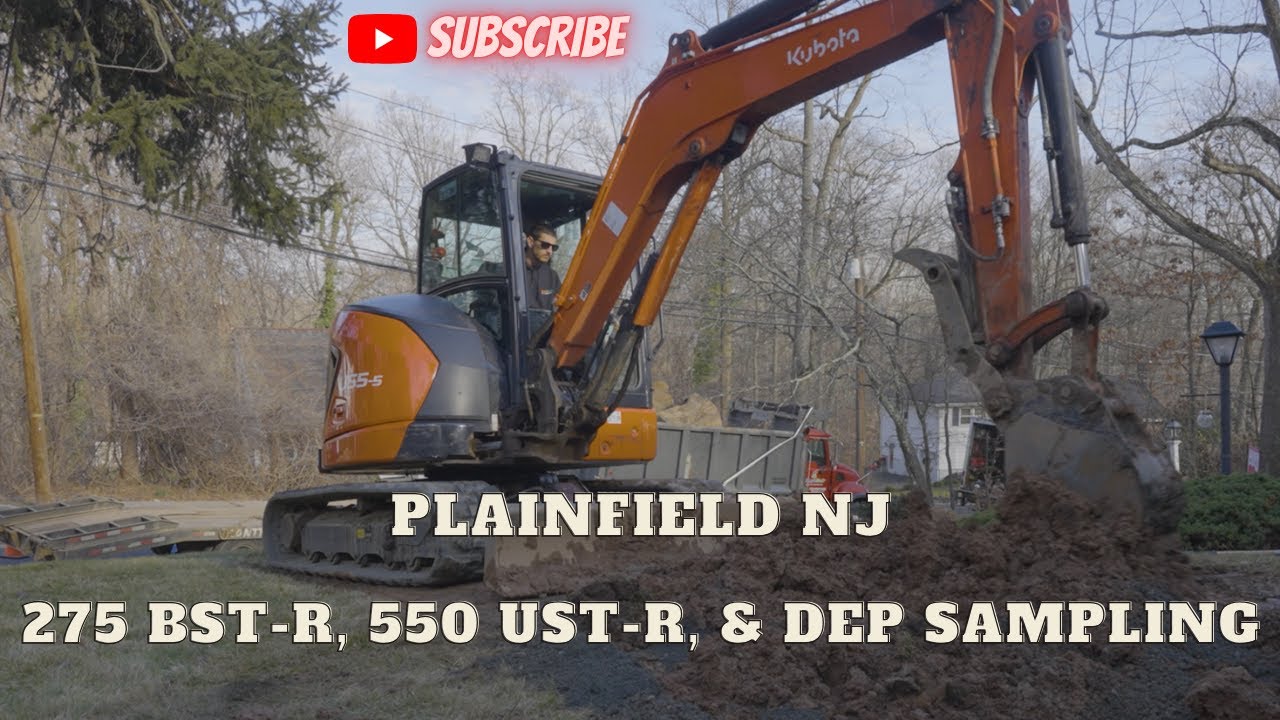
So I’ll go through it. So yes, if you call 10 companies, nine of them are going to tell you it’s impossible, we’re the only company in the state New Jersey. We actually come out and we bore around your tank with what’s called a Geoprobe. It’s a tract rig machine, about $115,000 piece of equipment. The other guys that do your testing, they come out with hand boring equipment, and they send the guy out there that’s 10, $12 an hour. He’s not going to get to the proper depth, he’s going to get you a false reading, all these things. That’s why they don’t back it up with a guarantee. When we do our testing, we’re using a very high powered piece of equipment. And our tech is going to be able to get to the proper depth because that equipment is capable of going down to 30 feet if needed. I only need to go down to seven or eight, so I know I’m getting to the proper depth. So if there’s a major, major problem out there, I’m going to find it.

Teddy:
The only thing I could miss is I could miss a leak under the tank, but it’s going to be very minor because I know I sampled at the proper depth. And that’s why we offer a guarantee. It is an optional guarantee, there is a fee for it. So the way that it works is the initial investigation is $600. So for 600, I’m going to come out there-

Jennifer:
That’s a bargain, my God that’s such a bargain.

Teddy:
Yes. It is a good price. It’s very comparable to a regular soil test as a run 500, 600 bucks, and these guys are doing it by hand, and they’re not giving you all the information I’m going to give you. So we start at 600 initially. So worst case scenario, if I come out there next week for 600 bucks and I find a mess, and I come back to you and say, “You know what? You have a complete mess out here, it’s going to be 15,000, 20,000 to cleanup.” You could walk away, you’re only out of pocket the $600. If I find that it’s clean, you then go and buy the house, you close on it in 60 days, whatever. After the closing, then you would pay me a deposit for the tank removal, which is typically about $1,500. And then we charge, if you want that guarantee, it’s an additional 1400 bucks on top of the removal clause. And then you’re 100% covered for any liability.

Jennifer:
Okay.

Teddy:
So all in it’s about 3,500 bucks, if it’s clean.

Jennifer:
When are you available to bore around the tank?

Teddy:
If you sign on today, I could email you a proposal right now, it’s all electronic. I could have a guy out there, we have to call for utility mark-outs. What town is it in?

Jennifer:
Blairstown.

Teddy:
In Blairstown. So we’d probably be looking at Tuesday, the 26th.

Jennifer:
Today?

Teddy:
Today is Tuesday the 19th. So that’d be next week.

Jennifer:
Oh, so like a week.

Teddy:
Yeah, one week from today.

Jennifer:
So you come out with a high powered piece of equipment for $600 and you bore around everywhere, so you’re taking basically lots of soil.

Teddy:
Why our equipment is the proper way to do it is because it’s really the… It’s not amount of soil, it’s the depth of where you’re taking your sample. So for example, if a guy goes out there with hand boring equipment and he gets stuck around four or five feet because he hits a rock, and he can’t hand bore through it because he doesn’t have the power, he’s going to take a sample at four or five feet, give you the test results. Those test results 99% of the time are going to be clean because the proper depths where the oil is going to be leaking is around seven or eight feet, that’s where the bottom of the tank is.

Teddy:
So I know with my equipment, my guys just have to pull a lever. And like I said, it could go to 30 feet if it wants to, so I know I’m getting to the proper depth. And that’s why we are able to give you guarantee on it because I know I’m going to get to the proper depth. Worst case if I miss something, it’s going to be very minor and we’re willing to clean that up at no additional cost if you take the guarantee.

Jennifer:
And the name of your company, I wrote it down so sloppily when Sue gave me the thing, is what?

Teddy:
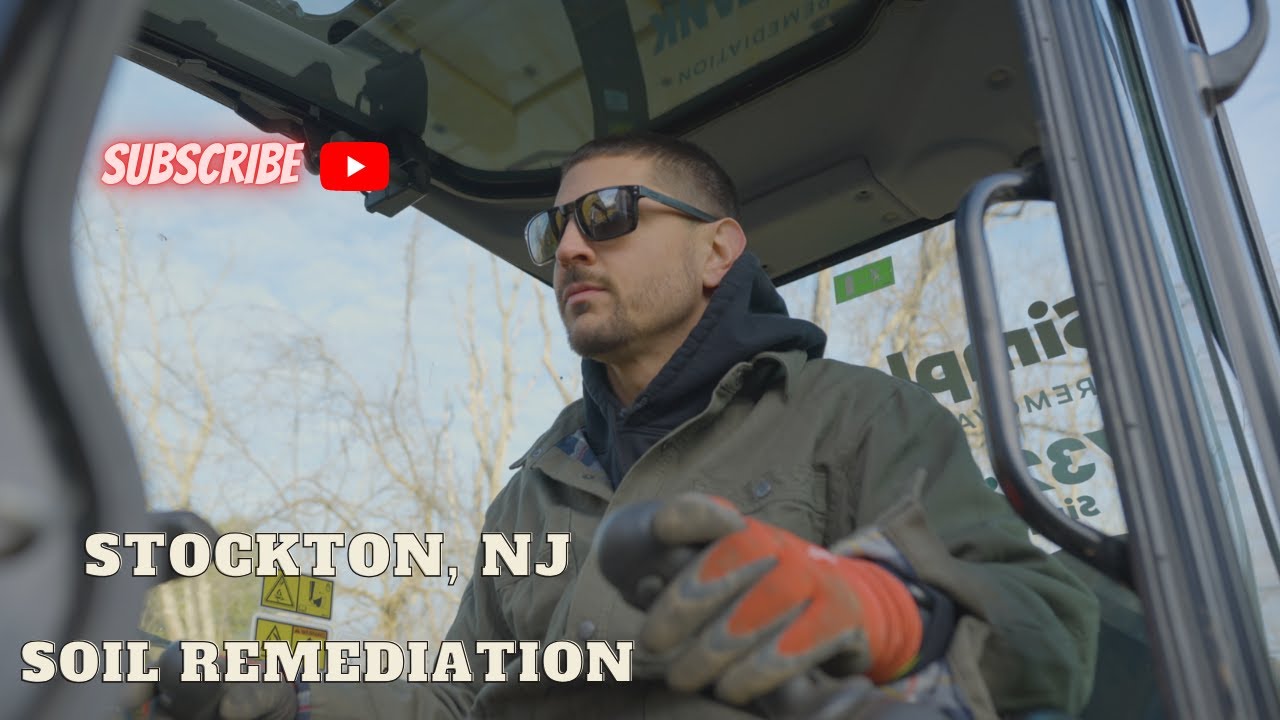
It’s Simple Tank Services. If you go on our website, which is simpletankservices.com, there’s a ton of video content on there. And you’ll be able to see what that machine looks like, and how the process works, as far as the borings go and everything, and you’ll be able to watch a short YouTube video on it. But we can do it typically within four business days and I’ll have verbal results for you that day, I’ll be able to tell you what’s going on. And then the lab results take five business days.

Jennifer:
All right, I’m sorry. What’s the four business days?

Teddy:
Four businesses is like if you sign today, I have to call for mark-outs, takes three days. So typically on the fourth day when you sign-on is when I could get you scheduled in.

Jennifer:
Okay. But if I sign on right now, can you get me scheduled for next Tuesday?

Teddy:
Yes. If you sign today, I’m going to email you right now. I’ll take some your info, I’ll email you out the contract, you just click approve on it. I’ll send you a link for deposit, I’ll set up your file, and put you on the schedule for Tuesday.

Jennifer:
Okay. Forgive me, I’m a little distracted. So it’s $600, you’re boring around, you’re taking lots of samples. And then how does it go from there? You’ll tell me that day, “This place is a disaster, you don’t want to buy it.” Or, “I think it’s pretty good.” That day?

Teddy:
Right.

Jennifer:
Now, is it you, or is it your guys?

Teddy:
No, I’ll have somebody out there. It would probably be one of my two project managers will be doing the borings.

Jennifer:
Okay. So I pay a deposit, I pay the [inaudible 00:07:53] 26. So you bore around it’s $600, you tell me that day is good or bad, and then what happens from there?

Teddy:
So I take one sample, I send it to the lab. The lab will pick up on that Wednesday and it’ll take about five business days. So the following week I’ll have you those lab results, which they just gives me confirmation. So if the soil is clean, we want to see the lab results come back non-detect which means there’s no detection of oil. And then that’s when we offer you the guarantee, which you decide on when you want… You don’t have to pay for anything until you close on the property as far as the guarantee goes in the tank removal. So you pay the only thing your pocket is $600, 300 today, 300 next week when we do the job, that’s it.

Teddy:
And then once the deal closes, if everything’s clean and you closing the deal, then you call us up, we send you a contract for the tank removal itself and then also the guarantee that would be included in there. And then you’re 100% covered, you have no risk at all. If we messed up and we didn’t find contamination and we completely missed it, we’re cleaning it up at no additional fees on top of the guarantee cost and the removal costs.

Jennifer:
All right. So the removal is how much?

Teddy:
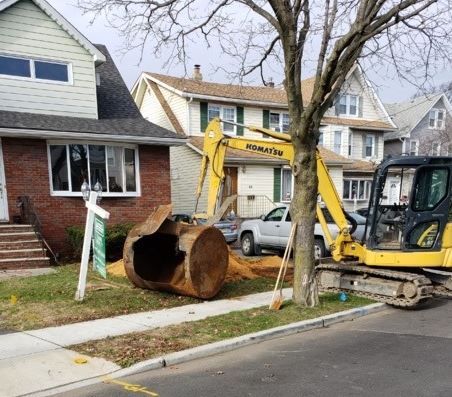
Without looking at the job, typically, it’s about 1500 bucks to remove a tank if it’s easily accessible. And-

Jennifer:
And the guarantee… And you have to decide obviously before you remove it if you’re taking the guarantee or not.

Teddy:
Exactly, yeah. As long as you just tell us, the day before we pull it, and, “Hey, I want that guarantee.” And you pay for it with a credit card, you’re covered.

Jennifer:
And the guarantee is another 1400?

Teddy:
1400, correct.

Jennifer:
All right. So basically, you have a higher tech way to gather the things. But next Tuesday, your guys will be able to tell me like, “Yeah, you should go for this place or not?”

Teddy:
Yes.

Jennifer:
You’ll know if it’s a mess?

Teddy:
Exactly. I’ll be able to tell you with a pretty good confidence level what it looks like. And if it’s a mess I’ll be able to really tell you, “Hey, listen, this thing is a mess.” I’ll be able to tell you 100%. Yeah, next week you’ll have a verbal answer of what’s happening out there. And won’t be able to put an exact dollar figure on it until I get those lab results, typically. But I’ll be able to tell you, “Hey, this is pretty nasty, it’s leaking all over the place. It’s 10 feet deep. It’s five feet in this direction.” We’re going to figure all that out.

Jennifer:
And you’re able to do that only sending one sample to the lab?

Teddy:
That’s a great question. But the lab result really is a minor point of the equation, it doesn’t tell us that much. The main data that we need is how deep the contamination is, how far did it travel in each direction? And how deep did it go? That-

Jennifer:
And you can basically tell that by looking at the soil that you bring up?

Teddy:
Exactly. When I drill a probe down, it’s a two inch piece of pipe and I’m basically hammering that into the ground, let’s say eight feet. I pull it up, I have a eight foot sleeve of soil. I open it up and I can see all right at three feet, that’s where the contamination starts, it stops at seven and a half feet. And it tells me all that stuff.

Jennifer:
So I hire you, you come out at $600… I’m sorry, I just want to fully understand the process because it’s all new to me. Your guys bore around with these big expensive machines, and that day you’ll be able to tell me this place is a mess or not, so I’ll know whether or not to go forward?

Teddy:
Correct, exactly. Yeah.

Jennifer:
Okay. And then from there… So obviously you’re not going to… Oh, because you only offer a guarantee if you feel it’s not a mess. You’ll be able to tell me this place is clean and you’ll be so confident. So next Tuesday when I speak to your guys, you’re either going to say, “Buy this place, it’s clean. And I’m willing to remove the tank for $1,500 plus another $1,400 to guarantee my work.” Or you’re going to say to me, “This place is no good, don’t buy it?”

Teddy:
Well, yes, sort of. And the reason why I say sort of is because if the soil is clean, I’ll be able to tell you, “Hey, everything looks clean, appears clean, but we will need confirmation before I offer the guarantee.” Because the reason is it may be such a small traces of contamination that we may not pick it up visually or with our meters on site, we may have to wait for the lab to come back and tell us, “Hey, here’s your results. It’s a super low reading.” At that point then we don’t offer the guarantee. But I will be able to tell you confident, “Hey, this is a very minor issue here, you’re not going to have any major problems.” You know what I mean? I’ll be able to tell you that for sure. But the confirmation of that lab result really needs to say non-detect for me to offer the guarantee. That’s how it works.

Jennifer:
I see. So if I schedule you, and you’re not available any sooner than a week from now?

Teddy:
The problem is unless I could get one of my guys to come in on Saturday, which is possible, I could talk to them. But I might be able to do it Saturday because I have to call for utility mark-out, that takes three business days to clear. It’s already Tuesday, so Wednesday, Thursday, Friday is no good. So Saturday would be the first day, Monday is a holiday and then Tuesday, so either Saturday or Tuesday.

Jennifer:
Monday is a… Oh my God, it’s Memorial Day already? Wow.

Teddy:
Yeah.

Jennifer:
Okay.

Teddy:
[inaudible 00:13:08].

Jennifer:
So basically you wouldn’t be in a… But that would be before we close. So if it’s $600, I pay $600 and you’re like, “Oh, this place.”

Teddy:
Correct.

Jennifer:
Then I lose my 1,000 and 600. Well, I could probably get the 1,000 back if the place is a mess. And then when the lab results, the only way you offer it… So when the lab results come back, you will be able to price the cleanup at that point?

Teddy:
Yeah, exactly. Once the lab results come back, I’ll be able to put an… Either tell you, “Hey, you have a guarantee.” Or, “Here is cost for the fixed price remediation.”
Jennifer:
Okay. And you’ll be able to stand behind that cost? It’s not like you’ll say, “Oh, the cost is 5,000, [crosstalk 00:13:55] 25,000.”

Teddy:
No. That’s what’s very unique about our company and our services. Once I give you a number, it’s literally to the penny. It’s going to say, let’s say $9,765.32, it doesn’t change. That’s the quote, and if we completely mess up our investigation and I misquote you, and I come out there and I find a major mess, I’m going to do it, and you’re going to get a no further action letter. And your invoice is still going to be that 9,700 or whatever the quote is, that’s how it works.

Jennifer:
Okay, all right. Well, send me your stuff I can’t wait to hire you. And I’ll give you the deposit so you can plan for me and put me in for next Tuesday.

Jennifer:
(silence)

Teddy:
Okay. I’m going to email this to you, you’ll have it literally in a few minutes here. If you don’t get it in five minutes, just call me back it means I have your email wrong. But I’m going to send this out right now. If you have any questions, otherwise just click approve, type in your name as the signature. And then once that happens, I’m going to send you a link for the deposit and I’ll put you on the schedule.

Jennifer:
Awesome. I’m not home now, so give me a couple of minutes to get home and I’ll take care of it.

Teddy:
No worries, take your time.

Jennifer:
Thank you.

Teddy:
All right, bye-bye.

Jennifer:
Bye-bye.