
Oil tank leaks pose serious environmental and structural risks, especially when the contamination reaches the soil beneath a property. Whether the tank is above-ground or buried, even a small leak can introduce harmful hydrocarbons into the ground, affect groundwater quality, damage landscaping, and trigger compliance issues with local environmental regulations. That’s why understanding the right steps for soil remediation after an oil tank leak is critical for homeowners, property managers, and contractors.
Proper remediation isn’t just about removing polluted soil. It’s about following a systematic, science-backed process to restore site safety, prevent long-term environmental damage, and meet regulatory standards. Below is a complete, professional guide on how contaminated soil should be removed the right way—and why working with qualified specialists is essential.
Initial Assessment and Leak Confirmation
The soil remediation process begins with a thorough assessment to confirm whether the oil tank has leaked and to what extent. Environmental professionals typically:
Inspect the tank for corrosion, cracks, or failed components
Collect soil samples from different depths and surrounding areas
Use laboratory testing (TPH, BTEX, PAH analysis) to measure contamination levels
Evaluate groundwater risk if the leak has penetrated deeper layers
This diagnostic phase determines the scope of remediation, the excavation depth required, and the potential need for regulatory reporting.
Site Planning and Compliance Review
Oil leaks often fall under state and local environmental laws. Before any soil removal begins, it’s essential to:
Check for mandatory reporting requirements
Identify if the site needs permits
Prepare a remediation action plan (RAP)
Coordinate with environmental authorities, if required
A professional oil tank removal company typically handles this compliance workflow to ensure the project meets all technical and legal standards.
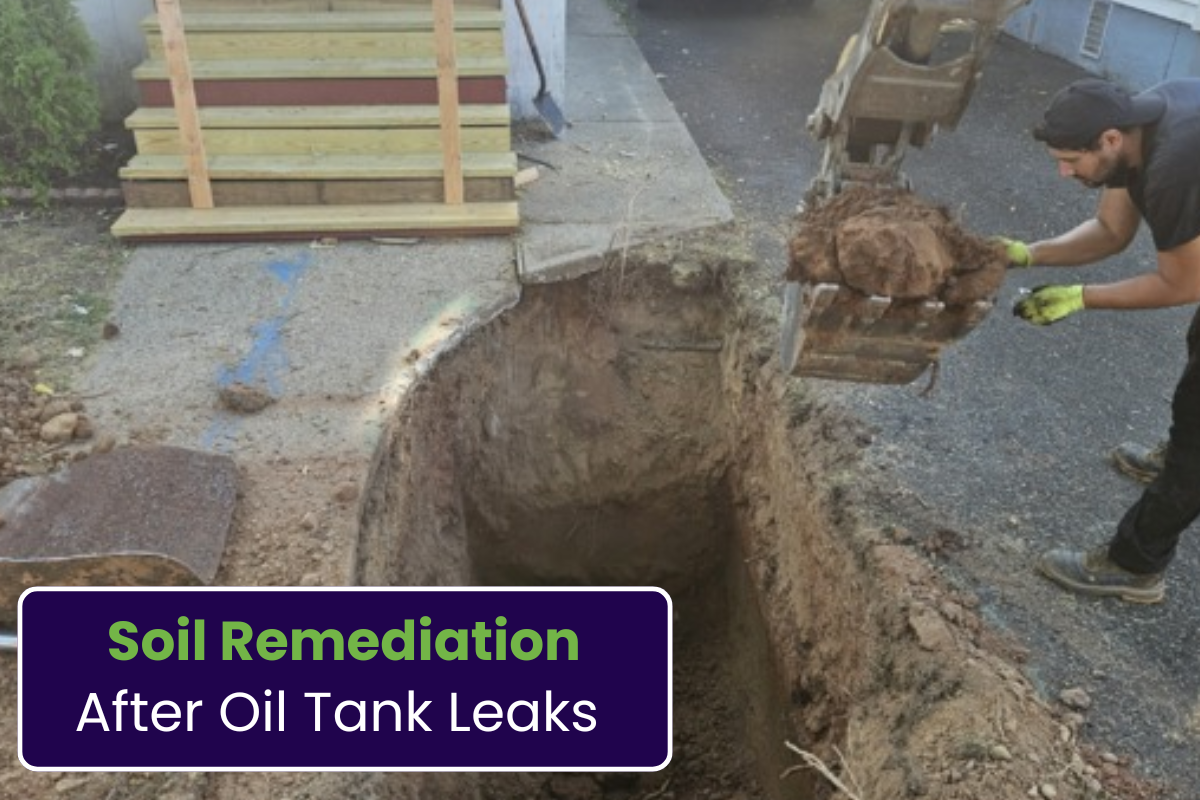
Safe Excavation of Contaminated Soil
Once the plan is approved, the excavation phase begins. This step requires precision and safety:
Key Activities Include:
Marking utility lines before digging
Using the right equipment to remove soil in controlled layers
Separating contaminated and non-contaminated soil
Minimizing dust and preventing the spread of pollutants
Transporting contaminated soil to an approved disposal facility
The depth of excavation depends on lab results. In some cases, soil may need to be removed several feet below the original leak site.
Treatment or Disposal of Contaminated Soil
After excavation, professionals decide whether the soil should be treated on-site or transported offsite for specialized processing.
Common Treatment Options:
Bioremediation: Using microorganisms to break down hydrocarbons
Thermal desorption: Heating soil to vaporize contaminants
Chemical oxidation: Adding oxidizing agents to neutralize pollutants
If the contamination level is high, disposal at a licensed facility becomes the safest and legally compliant approach.
Backfilling and Site Restoration
Once the polluted soil is removed and the remaining ground tests clean, the next step is rebuilding the site.
Professionals will:
Place clean fill soil that meets environmental standards
Compact soil in layers to maintain ground stability
Regrade the area to restore drainage
Rebuild landscaping or structures if needed
Proper restoration ensures the property remains safe, functional, and compliant.
Final Testing and Documentation
After remediation, the site must undergo final testing:
Confirm no residual hydrocarbon contamination exists
Validate groundwater safety if applicable
Produce closure reports for regulatory compliance
Final documentation protects property owners during real estate transactions and insurance claims.
Why Professional Soil Remediation Matters
Handling contaminated soil requires environmental expertise, proper testing, specialized equipment, and regulatory knowledge. Professional soil remediation services ensure:
Accurate contamination assessment
Safe and compliant soil removal
Environmental preservation
Reduced long-term liability
Attempting DIY removal is unsafe, legally risky, and rarely effective.
FAQs
1. How do I know if my oil tank is leaking?
Common signs include oily odors near the tank, dead vegetation, unexplained spikes in heating oil usage, and visible stains. Soil testing provides definitive confirmation.
2. Is soil remediation always required after a tank leak?
Yes. Even small leaks can contaminate soil and groundwater. Local regulations typically require cleanup to prevent long-term hazards.
3. How long does the soil remediation process take?
Depending on contamination severity, soil volume, and state approvals, remediation can take from a few days to several weeks.
4. What does soil remediation usually cost?
Costs vary based on excavation depth, disposal fees, treatment methods, and site access. Professional assessment provides accurate estimates.
5. Can contaminated soil affect property value?
Absolutely. Unresolved contamination can decrease property value, complicate sales, and lead to future liability. Proper remediation protects investment.
Summary
Effective soil remediation after an oil tank leak requires a structured, compliance-focused process—from detailed site assessment and safe excavation to proper disposal and final testing. Following the right steps not only protects the environment but also safeguards your property’s long-term value. Partnering with experienced professionals ensures the cleanup is accurate, efficient, and fully compliant with environmental regulations.